Compare commits
No commits in common. "main" and "0.01.1" have entirely different histories.
|
|
@ -1,4 +0,0 @@
|
||||||
[submodule "software/source/clients/mobile/01-app"]
|
|
||||||
path = software/source/clients/mobile/01-app
|
|
||||||
url = https://github.com/OpenInterpreter/01-app.git
|
|
||||||
branch = main
|
|
||||||
165
README.md
|
|
@ -8,76 +8,161 @@
|
||||||
<br><a href="https://changes.openinterpreter.com">Get Updates</a> | <a href="https://01.openinterpreter.com/">Documentation</a><br>
|
<br><a href="https://changes.openinterpreter.com">Get Updates</a> | <a href="https://01.openinterpreter.com/">Documentation</a><br>
|
||||||
</p>
|
</p>
|
||||||
|
|
||||||
|
<div align="center">
|
||||||
|
|
||||||
|
|
||||||
|
[中文版](docs/README_CN.md) | [日本語](docs/README_JA.md) | [English](README.md)
|
||||||
|
|
||||||
|
|
||||||
|
</div>
|
||||||
|
|
||||||
<br>
|
<br>
|
||||||
|
|
||||||
> [!NOTE]
|

|
||||||
> You can talk to your 01 using OpenAI's [Realtime API](https://platform.openai.com/docs/guides/realtime) (Advanced Voice Mode) via the `--multimodel` flag, e.g:
|
|
||||||
> ```shell
|
|
||||||
> poetry run 01 --server livekit --qr --expose --multimodal
|
|
||||||
> ```
|
|
||||||
|
|
||||||
<br></br>
|
We want to help you build. [Apply for 1-on-1 support.](https://0ggfznkwh4j.typeform.com/to/kkStE8WF)
|
||||||
|
|
||||||

|
|
||||||
|
|
||||||
<br></br>
|
|
||||||
|
|
||||||
The **01** is an open-source platform for intelligent devices, inspired by the *Rabbit R1* and *Star Trek* computer. Powered by [Open Interpreter](https://github.com/OpenInterpreter/open-interpreter), it provides a natural language voice interface for computers.
|
|
||||||
|
|
||||||
<br>
|
<br>
|
||||||
|
|
||||||
> [!IMPORTANT]
|
> [!IMPORTANT]
|
||||||
> This experimental project is under rapid development and lacks basic safeguards. Until a stable `1.0` release, only run this on devices without sensitive information or access to paid services.
|
> This experimental project is under rapid development and lacks basic safeguards. Until a stable `1.0` release, only run this repository on devices without sensitive information or access to paid services.
|
||||||
|
|
||||||
<br>
|
<br>
|
||||||
|
|
||||||
## Capabilities
|
The **01** is an open-source platform for conversational devices, inspired by the *Rabbit R1* and *Star Trek* computer.
|
||||||
|
|
||||||
|
By centering this project on [Open Interpreter](https://github.com/OpenInterpreter/open-interpreter), the **01** is more natural, flexible, and capable than its predecessors. Assistants built from this repository can:
|
||||||
|
|
||||||
- Execute code
|
- Execute code
|
||||||
- Browse the web
|
- Browse the web
|
||||||
- Manage files
|
- Read and create files
|
||||||
- Control third-party software
|
- Control third-party software
|
||||||
|
- ...
|
||||||
|
|
||||||
## Getting Started
|
<br>
|
||||||
|
|
||||||
For detailed setup instructions, visit our [installation guide](https://01.openinterpreter.com/setup/installation).
|
We intend to become the GNU/Linux of this new space by staying open, modular, and free.
|
||||||
|
|
||||||
## Server Options
|
<br>
|
||||||
|
|
||||||
1. **Light Server**: Optimized for low-power devices like ESP32. [Learn more](https://01.openinterpreter.com/server/light)
|
# Software
|
||||||
2. **Livekit Server**: Full-featured for higher processing power devices. [Learn more](https://01.openinterpreter.com/server/livekit)
|
|
||||||
|
|
||||||
## Clients
|
```shell
|
||||||
|
git clone https://github.com/OpenInterpreter/01
|
||||||
|
cd 01/software
|
||||||
|
```
|
||||||
|
|
||||||
- [Android & iOS App](https://01.openinterpreter.com/client/android-ios)
|
> Not working? Read the [setup docs](https://01.openinterpreter.com/software/introduction).
|
||||||
- [ESP32 Implementation](https://01.openinterpreter.com/client/esp32)
|
|
||||||
- [Desktop Client](https://01.openinterpreter.com/client/desktop)
|
|
||||||
|
|
||||||
## Hardware
|
```shell
|
||||||
|
brew install ffmpeg # mac only. windows and linux instructions below
|
||||||
|
poetry install
|
||||||
|
poetry run 01
|
||||||
|
```
|
||||||
|
|
||||||
Build your own [01 Light device](https://01.openinterpreter.com/hardware/01-light/introduction) or explore other [hardware options](https://01.openinterpreter.com/hardware/introduction).
|
<!-- > For a Windows installation, read our [setup guide](https://docs.openinterpreter.com/getting-started/setup#windows). -->
|
||||||
|
|
||||||
## Customization
|
<br>
|
||||||
|
|
||||||
Customize behavior, language model, system message, and more by editing profiles in the `software/source/server/profiles` directory. [Configuration guide](https://01.openinterpreter.com/server/configure)
|
**Note:** The [RealtimeSTT](https://github.com/KoljaB/RealtimeSTT) and [RealtimeTTS](https://github.com/KoljaB/RealtimeTTS) libraries at the heart of the 01 are the work of [Kolja Beigel](https://github.com/KoljaB). Please star those repositories and consider contributing to those projects!
|
||||||
|
|
||||||
## Safety Considerations
|
# Hardware
|
||||||
|
|
||||||
Understand the [risks](https://01.openinterpreter.com/safety/risks) and implement [safety measures](https://01.openinterpreter.com/safety/measures) when using 01.
|
The **01** is also a hub for hardware devices that run or connect to our software.
|
||||||
|
|
||||||
## Contributing
|
- Mac, Windows, and Linux are supported by running `poetry run 01`. This starts the [01 server](https://01.openinterpreter.com/software/run) and a client that uses your `ctrl` key to simulate the 01 light.
|
||||||
|
- We have an Android and iOS application under development [here](software/source/clients/mobile).
|
||||||
|
- The 01 light is an ESP32-based, push-to-talk voice interface. Build documentation is [here.](https://01.openinterpreter.com/hardware/01-light/materials)
|
||||||
|
- It works by connecting to the [01 server](https://01.openinterpreter.com/software/run).
|
||||||
|
|
||||||
We welcome contributions! Check out our [contributing guidelines](CONTRIBUTING.md) and join our [Discord community](https://discord.gg/Hvz9Axh84z).
|
<br>
|
||||||
|
|
||||||
## Documentation
|
**We need your help supporting & building more hardware.** The 01 should be able to run on any device with input (microphone, keyboard, etc.), output (speakers, screens, motors, etc.), and an internet connection (or sufficient compute to run everything locally). [Contribution Guide ↗️](https://github.com/OpenInterpreter/01/blob/main/CONTRIBUTING.md)
|
||||||
|
|
||||||
For comprehensive guides, API references, and troubleshooting, visit our [official documentation](https://01.openinterpreter.com/).
|
<br>
|
||||||
|
|
||||||
<br></br>
|
# What does it do?
|
||||||
|
|
||||||
<p align="center">
|
The 01 exposes a speech-to-speech websocket at `localhost:10101`.
|
||||||
<a href="https://github.com/OpenInterpreter/01/blob/main/CONTEXT.md">Context</a> •
|
|
||||||
<a href="/ROADMAP.md">Roadmap</a>
|
|
||||||
</p>
|
|
||||||
|
|
||||||
<p align="center">○</p>
|
If you stream raw audio bytes to `/` in [Streaming LMC format](https://docs.openinterpreter.com/guides/streaming-response), you will receive its response in the same format.
|
||||||
|
|
||||||
|
Inspired in part by [Andrej Karpathy's LLM OS](https://twitter.com/karpathy/status/1723140519554105733), we run a [code-interpreting language model](https://github.com/OpenInterpreter/open-interpreter), and call it when certain events occur at your computer's [kernel](https://github.com/OpenInterpreter/01/blob/main/software/source/server/utils/kernel.py).
|
||||||
|
|
||||||
|
The 01 wraps this in a voice interface:
|
||||||
|
|
||||||
|
<br>
|
||||||
|
|
||||||
|
<img width="100%" alt="LMC" src="https://github.com/OpenInterpreter/01/assets/63927363/52417006-a2ca-4379-b309-ffee3509f5d4"><br><br>
|
||||||
|
|
||||||
|
# Protocols
|
||||||
|
|
||||||
|
## LMC Messages
|
||||||
|
|
||||||
|
To communicate with different components of this system, we introduce [LMC Messages](https://docs.openinterpreter.com/protocols/lmc-messages) format, which extends OpenAI’s messages format to include a "computer" role:
|
||||||
|
|
||||||
|
https://github.com/OpenInterpreter/01/assets/63927363/8621b075-e052-46ba-8d2e-d64b9f2a5da9
|
||||||
|
|
||||||
|
## Dynamic System Messages
|
||||||
|
|
||||||
|
Dynamic System Messages enable you to execute code inside the LLM's system message, moments before it appears to the AI.
|
||||||
|
|
||||||
|
```python
|
||||||
|
# Edit the following settings in Profiles
|
||||||
|
interpreter.system_message = r" The time is {{time.time()}}. " # Anything in double brackets will be executed as Python
|
||||||
|
interpreter.chat("What time is it?") # It will know, without making a tool/API call
|
||||||
|
```
|
||||||
|
|
||||||
|
# Guides
|
||||||
|
|
||||||
|
## 01 Server
|
||||||
|
|
||||||
|
To run the server on your Desktop and connect it to your 01 Light, run the following commands:
|
||||||
|
|
||||||
|
```shell
|
||||||
|
brew install ngrok/ngrok/ngrok
|
||||||
|
ngrok authtoken ... # Use your ngrok authtoken
|
||||||
|
poetry run 01 --server light --expose
|
||||||
|
```
|
||||||
|
|
||||||
|
The final command will print a server URL. You can enter this into your 01 Light's captive WiFi portal to connect to your 01 Server.
|
||||||
|
|
||||||
|
## Local Mode
|
||||||
|
|
||||||
|
```
|
||||||
|
poetry run 01 --profile local.py
|
||||||
|
```
|
||||||
|
|
||||||
|
## Customizations
|
||||||
|
|
||||||
|
To customize the behavior of the system, edit the [system message, model, skills library path,](https://docs.openinterpreter.com/settings/all-settings) etc. in the `profiles` directory under the `server` directory. This file sets up an interpreter, and is powered by Open Interpreter.
|
||||||
|
|
||||||
|
To specify the text-to-speech service for the 01 `base_device.py`, set `interpreter.tts` to either "openai" for OpenAI, "elevenlabs" for ElevenLabs, or "coqui" for Coqui (local) in a profile. For the 01 Light, set `SPEAKER_SAMPLE_RATE` in `client.ino` under the `esp32` client directory to 24000 for Coqui (local) or 22050 for OpenAI TTS. We currently don't support ElevenLabs TTS on the 01 Light.
|
||||||
|
|
||||||
|
## Ubuntu Dependencies
|
||||||
|
|
||||||
|
```bash
|
||||||
|
sudo apt-get install ffmpeg
|
||||||
|
```
|
||||||
|
|
||||||
|
# Contributors
|
||||||
|
|
||||||
|
[](https://github.com/OpenInterpreter/01/graphs/contributors)
|
||||||
|
|
||||||
|
Please see our [contributing guidelines](CONTRIBUTING.md) for more details on how to get involved.
|
||||||
|
|
||||||
|
<br>
|
||||||
|
|
||||||
|
## Directory
|
||||||
|
|
||||||
|
### [Context ↗](https://github.com/KillianLucas/01/blob/main/CONTEXT.md)
|
||||||
|
|
||||||
|
The story that came before the 01.
|
||||||
|
|
||||||
|
### [Roadmap ↗](/ROADMAP.md)
|
||||||
|
|
||||||
|
The future of the 01.
|
||||||
|
|
||||||
|
<br>
|
||||||
|
|
||||||
|
○
|
||||||
|
|
|
||||||
|
|
@ -0,0 +1,151 @@
|
||||||
|
<h1 align="center">○</h1>
|
||||||
|
|
||||||
|
<p align="center">
|
||||||
|
<a href="https://discord.gg/Hvz9Axh84z"><img alt="Discord" src="https://img.shields.io/discord/1146610656779440188?logo=discord&style=social&logoColor=black"/></a>
|
||||||
|
<br>
|
||||||
|
<br>
|
||||||
|
<strong>The open-source language model computer.(开源大语言模型计算机)</strong><br>
|
||||||
|
<br><a href="https://openinterpreter.com/01">预订 Light</a> | <a href="https://changes.openinterpreter.com">获取更新</a> | <a href="https://01.openinterpreter.com/">文档</a><br>
|
||||||
|
</p>
|
||||||
|
|
||||||
|
<br>
|
||||||
|
|
||||||
|

|
||||||
|
|
||||||
|
我们想帮助您构建。 [申请 1 对 1 的支持。](https://0ggfznkwh4j.typeform.com/to/kkStE8WF)
|
||||||
|
|
||||||
|
<br>
|
||||||
|
|
||||||
|
> [!IMPORTANT]
|
||||||
|
> 这个实验性项目正在快速开发中,并且缺乏基本的安全保障。在稳定的 `1.0` 版本发布之前, 仅在没有敏感信息或访问付费服务的设备上运行此存储库。
|
||||||
|
|
||||||
|
<br>
|
||||||
|
|
||||||
|
**01 项目** 正在构建一个用于 AI 设备的开源生态系统。
|
||||||
|
|
||||||
|
我们的旗舰操作系统可以为对话设备提供动力,比如 Rabbit R1、Humane Pin 或 [Star Trek computer](https://www.youtube.com/watch?v=1ZXugicgn6U)。
|
||||||
|
|
||||||
|
我们打算成为这个领域的 GNU/Linux,保持开放、模块化和免费。
|
||||||
|
|
||||||
|
<br>
|
||||||
|
|
||||||
|
# 软件
|
||||||
|
|
||||||
|
```shell
|
||||||
|
git clone https://github.com/OpenInterpreter/01 # Clone the repository
|
||||||
|
cd 01/software # CD into the source directory
|
||||||
|
```
|
||||||
|
|
||||||
|
<!-- > 不起作用?阅读我们的[安装指南](https://docs.openinterpreter.com/getting-started/setup)。 -->
|
||||||
|
|
||||||
|
```shell
|
||||||
|
brew install portaudio ffmpeg cmake # Install Mac OSX dependencies
|
||||||
|
poetry install # Install Python dependencies
|
||||||
|
export OPENAI_API_KEY=sk... # OR run `poetry run 01 --local` to run everything locally
|
||||||
|
poetry run 01 # Runs the 01 Light simulator (hold your spacebar, speak, release)
|
||||||
|
```
|
||||||
|
|
||||||
|
<!-- > 对于Windows安装,请阅读我们的[专用安装指南](https://docs.openinterpreter.com/getting-started/setup#windows)。 -->
|
||||||
|
|
||||||
|
<br>
|
||||||
|
|
||||||
|
# 硬件
|
||||||
|
|
||||||
|
- **01 Light** 是基于 ESP32 的语音接口。 [构建说明在这里。](https://github.com/OpenInterpreter/01/tree/main/hardware/light) 它与运行在你家庭电脑上的 **01 Server** ([下面有设置指南](https://github.com/OpenInterpreter/01/blob/main/README.md#01-server)) 配合使用。
|
||||||
|
- **Mac OSX** and **Ubuntu** 支持通过运行 `poetry run 01`。 这会使用你的空格键来模拟 01 Light。
|
||||||
|
|
||||||
|
**我们需要您的帮助来支持和构建更多硬件。** 01 应该能够在任何具有输入(麦克风、键盘等)、输出(扬声器、屏幕、电机等)和互联网连接(或足够的计算资源以在本地运行所有内容)的设备上运行。 [ 贡献指南 →](https://github.com/OpenInterpreter/01/blob/main/CONTRIBUTING.md)
|
||||||
|
|
||||||
|
<br>
|
||||||
|
|
||||||
|
# 它是做什么的?
|
||||||
|
|
||||||
|
01 在 `localhost:10001` 上暴露了一个语音到语音的 WebSocket。
|
||||||
|
|
||||||
|
如果你以 [LMC 格式](https://docs.openinterpreter.com/protocols/lmc-messages) 将原始音频字节流传送到 `/`,你将会以相同的格式收到其回复。
|
||||||
|
|
||||||
|
受 [Andrej Karpathy's LLM OS](https://twitter.com/karpathy/status/1723140519554105733) 的启发,我们运行了一个 [code-interpreting language model](https://github.com/OpenInterpreter/open-interpreter),并在你的计算机 [ 内核 ](https://github.com/OpenInterpreter/01/blob/main/software/source/server/utils/kernel.py) 发生某些事件时调用它。
|
||||||
|
|
||||||
|
01 将其包装成一个语音界面:
|
||||||
|
|
||||||
|
<br>
|
||||||
|
|
||||||
|
<img width="100%" alt="LMC" src="https://github.com/OpenInterpreter/01/assets/63927363/52417006-a2ca-4379-b309-ffee3509f5d4"><br><br>
|
||||||
|
|
||||||
|
# 协议
|
||||||
|
|
||||||
|
## LMC 消息
|
||||||
|
|
||||||
|
为了与系统的不同组件进行通信,我们引入了 [LMC 消息](https://docs.openinterpreter.com/protocols/lmc-messages) 格式,它扩展了 OpenAI 的消息格式以包含一个 "computer" 角色:
|
||||||
|
|
||||||
|
https://github.com/OpenInterpreter/01/assets/63927363/8621b075-e052-46ba-8d2e-d64b9f2a5da9
|
||||||
|
|
||||||
|
## 动态系统消息
|
||||||
|
|
||||||
|
动态系统消息使您能够在 LLM 系统消息出现在 AI 前的片刻内执行代码。
|
||||||
|
|
||||||
|
```python
|
||||||
|
# Edit the following settings in Profiles
|
||||||
|
interpreter.system_message = r" The time is {{time.time()}}. " # Anything in double brackets will be executed as Python
|
||||||
|
interpreter.chat("What time is it?") # It will know, without making a tool/API call
|
||||||
|
```
|
||||||
|
|
||||||
|
# 指南
|
||||||
|
|
||||||
|
## 01 服务器
|
||||||
|
|
||||||
|
要在您的桌面上运行服务器并将其连接到您的 01 Light,请运行以下命令:
|
||||||
|
|
||||||
|
```shell
|
||||||
|
brew install ngrok/ngrok/ngrok
|
||||||
|
ngrok authtoken ... # Use your ngrok authtoken
|
||||||
|
poetry run 01 --server --expose
|
||||||
|
```
|
||||||
|
|
||||||
|
最后一个命令将打印一个服务器 URL。您可以将其输入到您的 01 Light 的 captive WiFi 门户中,以连接到您的 01 服务器。
|
||||||
|
|
||||||
|
## 本地模式
|
||||||
|
|
||||||
|
```
|
||||||
|
poetry run 01 --local
|
||||||
|
```
|
||||||
|
|
||||||
|
如果您想要使用 Whisper 运行本地语音转文本,您必须安装 Rust。请按照 [这里](https://www.rust-lang.org/tools/install) 给出的说明进行操作。
|
||||||
|
|
||||||
|
## 自定义
|
||||||
|
|
||||||
|
要自定义系统的行为,请编辑 Profiles 中的 [系统消息、模型、技能库路径](https://docs.openinterpreter.com/settings/all-settings) 等。这个文件设置了一个解释器,并由 Open Interpreter 提供支持。
|
||||||
|
|
||||||
|
## Ubuntu 依赖项
|
||||||
|
|
||||||
|
```bash
|
||||||
|
sudo apt-get install portaudio19-dev ffmpeg cmake
|
||||||
|
```
|
||||||
|
|
||||||
|
# 贡献者
|
||||||
|
|
||||||
|
[](https://github.com/OpenInterpreter/01/graphs/contributors)
|
||||||
|
|
||||||
|
请查看我们的 [贡献指南](CONTRIBUTING.md) 以获取更多的参与详情。
|
||||||
|
|
||||||
|
<br>
|
||||||
|
|
||||||
|
# 路线图
|
||||||
|
|
||||||
|
访问 [我们的路线图](/ROADMAP.md) 以了解 01 的未来。
|
||||||
|
|
||||||
|
<br>
|
||||||
|
|
||||||
|
## 背景
|
||||||
|
|
||||||
|
### [背景说明 ↗](https://github.com/KillianLucas/01/blob/main/CONTEXT.md)
|
||||||
|
|
||||||
|
关于 01 之前设备的故事。
|
||||||
|
|
||||||
|
### [灵感来源 ↗](https://github.com/KillianLucas/01/tree/main/INSPIRATION.md)
|
||||||
|
|
||||||
|
我们想要从中获取优秀想法的事物。
|
||||||
|
|
||||||
|
<br>
|
||||||
|
|
||||||
|
○
|
||||||
|
|
@ -0,0 +1,155 @@
|
||||||
|
<h1 align="center">○</h1>
|
||||||
|
|
||||||
|
<p align="center">
|
||||||
|
<a href="https://discord.gg/Hvz9Axh84z"><img alt="Discord" src="https://img.shields.io/discord/1146610656779440188?logo=discord&style=social&logoColor=black"/></a>
|
||||||
|
<br>
|
||||||
|
<br>
|
||||||
|
<strong>Le modèle de langage d'ordinateur open-source.</strong><br>
|
||||||
|
<br><a href="https://openinterpreter.com/01">Précommandez le Light</a> | <a href="https://changes.openinterpreter.com">Recevoir les mises à jour</a> | <a href="https://01.openinterpreter.com/">Documentation</a><br>
|
||||||
|
</p>
|
||||||
|
|
||||||
|
<br>
|
||||||
|
|
||||||
|

|
||||||
|
|
||||||
|
Nous voulons vous aider à construire. [Postulez pour un support individuel.](https://0ggfznkwh4j.typeform.com/to/kkStE8WF)
|
||||||
|
|
||||||
|
<br>
|
||||||
|
|
||||||
|
---
|
||||||
|
|
||||||
|
⚠️ **ATTENTION** : Ce projet expérimental est en développement rapide et manque de protections de sécurité de base. Jusqu'à l'atteinte d'une version stable 1.0, veuillez faire fonctionner ce dépôt **uniquement** sur des appareils ne contenant aucune information sensible et n'ayant pas accès à des services payants.
|
||||||
|
|
||||||
|
---
|
||||||
|
|
||||||
|
<br>
|
||||||
|
|
||||||
|
**Le Projet 01** construit un écosystème open source pour les appareils d'IA.
|
||||||
|
|
||||||
|
Notre système d'exploitation phare peut alimenter des dispositifs conversationnels tels que le Rabbit R1, le Humane Pin, ou [l'ordinateur de Star Trek](https://www.youtube.com/watch?v=1ZXugicgn6U).
|
||||||
|
|
||||||
|
Nous avons l'intention de devenir le GNU/Linux de cet environnement en restant ouvert, modulaire et gratuit.
|
||||||
|
|
||||||
|
<br>
|
||||||
|
|
||||||
|
# Software
|
||||||
|
|
||||||
|
```shell
|
||||||
|
git clone https://github.com/OpenInterpreter/01 # Clone le dépôt
|
||||||
|
cd 01/software # CD dans le répertoire source
|
||||||
|
```
|
||||||
|
|
||||||
|
<!-- > Cela ne fonctionne pas ? Lisez notre [guide d'installation](https://docs.openinterpreter.com/getting-started/setup). -->
|
||||||
|
|
||||||
|
```shell
|
||||||
|
brew install portaudio ffmpeg cmake # Installe les dépendances Mac OSX
|
||||||
|
poetry install # Installe les dépendances Python
|
||||||
|
export OPENAI_API_KEY=sk... # OU exécute `poetry run 01 --local` pour tout exécuter localement
|
||||||
|
poetry run 01 # Exécute le simulateur 01 Light (maintenez votre barre d'espace, parlez, relâchez)
|
||||||
|
```
|
||||||
|
|
||||||
|
<!-- > Pour une installation sous Windows, lisez [le guide dédié](https://docs.openinterpreter.com/getting-started/setup#windows). -->
|
||||||
|
|
||||||
|
<br>
|
||||||
|
|
||||||
|
# Hardware
|
||||||
|
|
||||||
|
- Le **01 Light** est une interface vocale basée sur ESP32. Les instructions de construction sont [ici]. (https://github.com/OpenInterpreter/01/tree/main/hardware/light). Une liste de ce qu'il faut acheter se trouve [ici](https://github.com/OpenInterpreter/01/blob/main/hardware/light/BOM.md).
|
||||||
|
- Il fonctionne en tandem avec le **Server 01** ([guide d'installation ci-dessous](https://github.com/OpenInterpreter/01/blob/main/README.md#01-server)) fonctionnant sur votre ordinateur.
|
||||||
|
- **Mac OSX** et **Ubuntu** sont pris en charge en exécutant `poetry run 01` (**Windows** est pris en charge de manière expérimentale). Cela utilise votre barre d'espace pour simuler le 01 Light.
|
||||||
|
|
||||||
|
**Nous avons besoin de votre aide pour soutenir et construire plus de hardware.** Le 01 devrait pouvoir fonctionner sur tout dispositif avec entrée (microphone, clavier, etc.), sortie (haut-parleurs, écrans, moteurs, etc.) et connexion internet (ou suffisamment de puissance de calcul pour tout exécuter localement). [Guide de Contribution →](https://github.com/OpenInterpreter/01/blob/main/CONTRIBUTING.md)
|
||||||
|
|
||||||
|
<br>
|
||||||
|
|
||||||
|
# Comment ça marche ?
|
||||||
|
|
||||||
|
Le 01 expose un websocket de _speech-to-speech_ à l'adresse `localhost:10001`.
|
||||||
|
|
||||||
|
Si vous diffusez des octets audio bruts vers `/` au [format de streaming LMC](https://docs.openinterpreter.com/guides/streaming-response), vous recevrez sa réponse dans le même format.
|
||||||
|
|
||||||
|
Inspiré en partie par [l'idée d'un OS LLM d'Andrej Karpathy](https://twitter.com/karpathy/status/1723140519554105733), nous utilisons un [un modèle de langage inteprétant du code](https://github.com/OpenInterpreter/open-interpreter), et le sollicitons lorsque certains événements se produisent dans le [noyau de votre ordinateur](https://github.com/OpenInterpreter/01/blob/main/software/source/server/utils/kernel.py).
|
||||||
|
|
||||||
|
Le 01 l'encapsule dans une interface vocale :
|
||||||
|
|
||||||
|
<br>
|
||||||
|
|
||||||
|
<img width="100%" alt="LMC" src="https://github.com/OpenInterpreter/01/assets/63927363/52417006-a2ca-4379-b309-ffee3509f5d4"><br><br>
|
||||||
|
|
||||||
|
# Protocoles
|
||||||
|
|
||||||
|
## Messages LMC
|
||||||
|
|
||||||
|
Pour communiquer avec les différents composants du système, nous introduisons le [format de messages LMC](https://docs.openinterpreter.com/protocols/lmc-messages), une extension du format de message d'OpenAI qui inclut un nouveau rôle "_computer_":
|
||||||
|
|
||||||
|
https://github.com/OpenInterpreter/01/assets/63927363/8621b075-e052-46ba-8d2e-d64b9f2a5da9
|
||||||
|
|
||||||
|
## Messages Systèmes Dynamiques (Dynamic System Messages)
|
||||||
|
|
||||||
|
Les Messages Systèmes Dynamiques vous permettent d'exécuter du code à l'intérieur du message système du LLM, juste avant qu'il n'apparaisse à l'IA.
|
||||||
|
|
||||||
|
```python
|
||||||
|
# Modifiez les paramètres suivants dans Profiles
|
||||||
|
interpreter.system_message = r" The time is {{time.time()}}. " # Tout ce qui est entre doubles crochets sera exécuté comme du Python
|
||||||
|
interpreter.chat("What time is it?") # L'interpréteur connaitre la réponse, sans faire appel à un outil ou une API
|
||||||
|
```
|
||||||
|
|
||||||
|
# Guides
|
||||||
|
|
||||||
|
## 01 Server
|
||||||
|
|
||||||
|
Pour exécuter le serveur sur votre ordinateur et le connecter à votre 01 Light, exécutez les commandes suivantes :
|
||||||
|
|
||||||
|
```shell
|
||||||
|
brew install ngrok/ngrok/ngrok
|
||||||
|
ngrok authtoken ... # Utilisez votre authtoken ngrok
|
||||||
|
poetry run 01 --server --expose
|
||||||
|
```
|
||||||
|
|
||||||
|
La dernière commande affichera une URL de serveur. Vous pouvez saisir ceci dans le portail WiFi captif de votre 01 Light pour le connecter à votre serveur 01.
|
||||||
|
|
||||||
|
## Mode Local
|
||||||
|
|
||||||
|
```
|
||||||
|
poetry run 01 --local
|
||||||
|
```
|
||||||
|
|
||||||
|
Si vous souhaitez exécuter localement du speech-to-text en utilisant Whisper, vous devez installer Rust. Suivez les instructions données [ici](https://www.rust-lang.org/tools/install).
|
||||||
|
|
||||||
|
## Personnalisation
|
||||||
|
|
||||||
|
Pour personnaliser le comportement du système, modifie [`system message`, `model`, `skills library path`,](https://docs.openinterpreter.com/settings/all-settings) etc. in Profiles. Ce fichier configure un interprète alimenté par Open Interpreter.
|
||||||
|
|
||||||
|
## Dépendances Ubuntu
|
||||||
|
|
||||||
|
```bash
|
||||||
|
sudo apt-get install portaudio19-dev ffmpeg cmake
|
||||||
|
```
|
||||||
|
|
||||||
|
# Contributeurs
|
||||||
|
|
||||||
|
[](https://github.com/OpenInterpreter/01/graphs/contributors)
|
||||||
|
|
||||||
|
Veuillez consulter nos [directives de contribution](CONTRIBUTING.md) pour plus de détails sur comment participer.
|
||||||
|
|
||||||
|
<br>
|
||||||
|
|
||||||
|
# Roadmap
|
||||||
|
|
||||||
|
Visitez [notre roadmap](/ROADMAP.md) pour connaitre le futur du 01.
|
||||||
|
|
||||||
|
<br>
|
||||||
|
|
||||||
|
## Background
|
||||||
|
|
||||||
|
### [Contexte ↗](https://github.com/KillianLucas/01/blob/main/CONTEXT.md)
|
||||||
|
|
||||||
|
L'histoire des appareils qui ont précédé le 01.
|
||||||
|
|
||||||
|
### [Inspiration ↗](https://github.com/KillianLucas/01/tree/main/INSPIRATION.md)
|
||||||
|
|
||||||
|
Des choses dont nous souhaitons nous inspirer.
|
||||||
|
|
||||||
|
<br>
|
||||||
|
|
||||||
|
○
|
||||||
|
|
@ -0,0 +1,154 @@
|
||||||
|
<h1 align="center">○</h1>
|
||||||
|
|
||||||
|
<p align="center">
|
||||||
|
<a href="https://discord.gg/Hvz9Axh84z"><img alt="Discord" src="https://img.shields.io/discord/1146610656779440188?logo=discord&style=social&logoColor=black"/></a>
|
||||||
|
<br>
|
||||||
|
<br>
|
||||||
|
<strong>オープンソースの言語モデルコンピュータ。</strong><br>
|
||||||
|
<br><a href="https://openinterpreter.com/01">Light の予約</a> | <a href="https://changes.openinterpreter.com">最新情報</a> | <a href="https://01.openinterpreter.com/">ドキュメント</a><br>
|
||||||
|
</p>
|
||||||
|
|
||||||
|
<br>
|
||||||
|
|
||||||
|

|
||||||
|
|
||||||
|
あなたのビルドをサポートします。[1 対 1 のサポートを申し込む。](https://0ggfznkwh4j.typeform.com/to/kkStE8WF)
|
||||||
|
|
||||||
|
<br>
|
||||||
|
|
||||||
|
> [!IMPORTANT]
|
||||||
|
> この実験的なプロジェクトは急速に開発が進んでおり、基本的な安全策が欠けています。安定した `1.0` リリースまでは、機密情報や有料サービスへのアクセスがないデバイスでのみこのリポジトリを実行してください。
|
||||||
|
>
|
||||||
|
> **これらの懸念やその他の懸念に対処するための大幅な書き換えが[ここ](https://github.com/KillianLucas/01-rewrite/tree/main)で行われています。**
|
||||||
|
|
||||||
|
<br>
|
||||||
|
|
||||||
|
**01 プロジェクト** は、AI 機器のためのオープンソースのエコシステムを構築しています。
|
||||||
|
|
||||||
|
私たちの主力オペレーティングシステムは、Rabbit R1、Humane Pin、[Star Trek computer](https://www.youtube.com/watch?v=1ZXugicgn6U) のような会話デバイスを動かすことができます。
|
||||||
|
|
||||||
|
私たちは、オープンでモジュラーでフリーであり続けることで、この分野の GNU/Linux になるつもりです。
|
||||||
|
|
||||||
|
<br>
|
||||||
|
|
||||||
|
# ソフトウェア
|
||||||
|
|
||||||
|
```shell
|
||||||
|
git clone https://github.com/OpenInterpreter/01 # リポジトリのクローン
|
||||||
|
cd 01/software # CD でソースディレクトリに移動
|
||||||
|
```
|
||||||
|
|
||||||
|
<!-- > うまくいきませんか?[セットアップガイド](https://docs.openinterpreter.com/getting-started/setup)をお読みください。 -->
|
||||||
|
|
||||||
|
```shell
|
||||||
|
brew install portaudio ffmpeg cmake # Mac OSXの依存関係のインストール
|
||||||
|
poetry install # Pythonの依存関係のインストール
|
||||||
|
export OPENAI_API_KEY=sk... # または、`poetry run 01 --local` を実行し、ローカルですべてを実行
|
||||||
|
poetry run 01 # 01 Light シミュレーターを作動させる(スペースバーを押しながら話し、放す)
|
||||||
|
```
|
||||||
|
|
||||||
|
<!-- > Windows のインストールについては、[セットアップガイド](https://docs.openinterpreter.com/getting-started/setup#windows)をお読みください。 -->
|
||||||
|
|
||||||
|
<br>
|
||||||
|
|
||||||
|
# ハードウェア
|
||||||
|
|
||||||
|
- **01 Light** は ESP32 ベースの音声インターフェースです。ビルド手順は[こちら](https://github.com/OpenInterpreter/01/tree/main/hardware/light)。買うべきもののリストは[こちら](https://github.com/OpenInterpreter/01/blob/main/hardware/light/BOM.md)。
|
||||||
|
- ご自宅のコンピューターで動作している **01 サーバー**([下記のセットアップガイド](https://github.com/OpenInterpreter/01/blob/main/README.md#01-server))と連動して動作します。
|
||||||
|
- **Mac OSX** と **Ubuntu** は `poetry run 01` を実行することでサポートされます(**Windows** は実験的にサポートされている)。これはスペースキーを使って 01 Light をシミュレートします。
|
||||||
|
|
||||||
|
**より多くのハードウェアをサポートし、構築するためには、皆さんの協力が必要です。** 01 は、入力(マイク、キーボードなど)、出力(スピーカー、スクリーン、モーターなど)、インターネット接続(またはローカルですべてを実行するのに十分な計算能力)があれば、どのようなデバイスでも実行できるはずです。[コントリビューションガイド →](https://github.com/OpenInterpreter/01/blob/main/CONTRIBUTING.md)
|
||||||
|
|
||||||
|
<br>
|
||||||
|
|
||||||
|
# 何をするのか?
|
||||||
|
|
||||||
|
01 は、`localhost:10001` で音声合成ウェブソケットを公開しています。
|
||||||
|
|
||||||
|
生のオーディオバイトを[ストリーミング LMC フォーマット](https://docs.openinterpreter.com/guides/streaming-response)で `/` にストリーミングすると、同じフォーマットで応答を受け取ります。
|
||||||
|
|
||||||
|
[Andrej Karpathy の LLM OS](https://twitter.com/karpathy/status/1723140519554105733) に一部インスパイアされ、[コード解釈言語モデル](https://github.com/OpenInterpreter/open-interpreter)を実行し、コンピュータの[カーネル](https://github.com/OpenInterpreter/01/blob/main/software/source/server/utils/kernel.py)で特定のイベントが発生したときにそれを呼び出します。
|
||||||
|
|
||||||
|
01 はこれを音声インターフェースで包んでいます:
|
||||||
|
|
||||||
|
<br>
|
||||||
|
|
||||||
|
<img width="100%" alt="LMC" src="https://github.com/OpenInterpreter/01/assets/63927363/52417006-a2ca-4379-b309-ffee3509f5d4"><br><br>
|
||||||
|
|
||||||
|
# プロトコル
|
||||||
|
|
||||||
|
## LMC メッセージ
|
||||||
|
|
||||||
|
このシステムのさまざまなコンポーネントと通信するために、[LMC メッセージ](https://docs.openinterpreter.com/protocols/lmc-messages)フォーマットを導入します。これは、OpenAI のメッセージフォーマットを拡張し、"computer" の役割を含むようにしたものです:
|
||||||
|
|
||||||
|
https://github.com/OpenInterpreter/01/assets/63927363/8621b075-e052-46ba-8d2e-d64b9f2a5da9
|
||||||
|
|
||||||
|
## ダイナミックシステムメッセージ
|
||||||
|
|
||||||
|
ダイナミックシステムメッセージは、LLM のシステムメッセージが AI に表示される一瞬前に、その中でコードを実行することを可能にします。
|
||||||
|
|
||||||
|
```python
|
||||||
|
# Profiles の以下の設定を編集
|
||||||
|
interpreter.system_message = r" The time is {{time.time()}}. " # 二重括弧の中は Python として実行されます
|
||||||
|
interpreter.chat("What time is it?") # ツール/API を呼び出すことなく、次のことが分かります
|
||||||
|
```
|
||||||
|
|
||||||
|
# ガイド
|
||||||
|
|
||||||
|
## 01 サーバー
|
||||||
|
|
||||||
|
デスクトップ上でサーバーを起動し、01 Light に接続するには、以下のコマンドを実行します:
|
||||||
|
|
||||||
|
```shell
|
||||||
|
brew install ngrok/ngrok/ngrok
|
||||||
|
ngrok authtoken ... # ngrok authtoken を使用
|
||||||
|
poetry run 01 --server --expose
|
||||||
|
```
|
||||||
|
|
||||||
|
最後のコマンドは、サーバーの URL を表示します。これを 01 Light のキャプティブ WiFi ポータルに入力すると、01 Server に接続できます。
|
||||||
|
|
||||||
|
## ローカルモード
|
||||||
|
|
||||||
|
```
|
||||||
|
poetry run 01 --local
|
||||||
|
```
|
||||||
|
|
||||||
|
Whisper を使ってローカル音声合成を実行したい場合、Rust をインストールする必要があります。[こちら](https://www.rust-lang.org/tools/install)の指示に従ってください。
|
||||||
|
|
||||||
|
## カスタマイズ
|
||||||
|
|
||||||
|
システムの動作をカスタマイズするには、Profiles 内の[システムメッセージ、モデル、スキルライブラリのパス](https://docs.openinterpreter.com/settings/all-settings)などを編集します。このファイルはインタープリターをセットアップするもので、Open Interpreter によって動作します。
|
||||||
|
|
||||||
|
## Ubuntu 依存関係
|
||||||
|
|
||||||
|
```bash
|
||||||
|
sudo apt-get install portaudio19-dev ffmpeg cmake
|
||||||
|
```
|
||||||
|
|
||||||
|
# コントリビューター
|
||||||
|
|
||||||
|
[](https://github.com/OpenInterpreter/01/graphs/contributors)
|
||||||
|
|
||||||
|
参加方法の詳細については、[コントリビューションガイド](/CONTRIBUTING.md)をご覧ください。
|
||||||
|
|
||||||
|
<br>
|
||||||
|
|
||||||
|
# ロードマップ
|
||||||
|
|
||||||
|
01 の未来を見るには、[私達のロードマップ](/ROADMAP.md)をご覧ください。
|
||||||
|
|
||||||
|
<br>
|
||||||
|
|
||||||
|
## バックグラウンド
|
||||||
|
|
||||||
|
### [コンテキスト ↗](https://github.com/KillianLucas/01/blob/main/CONTEXT.md)
|
||||||
|
|
||||||
|
01 以前のデバイスの物語。
|
||||||
|
|
||||||
|
### [インスピレーション ↗](https://github.com/KillianLucas/01/tree/main/INSPIRATION.md)
|
||||||
|
|
||||||
|
素晴らしいアイデアは盗みたいと思うもの。
|
||||||
|
|
||||||
|
<br>
|
||||||
|
|
||||||
|
○
|
||||||
|
Before Width: | Height: | Size: 2.9 MiB |
|
Before Width: | Height: | Size: 2.4 MiB |
|
Before Width: | Height: | Size: 1.2 MiB |
|
|
@ -1,61 +0,0 @@
|
||||||
---
|
|
||||||
title: "Android & iOS"
|
|
||||||
description: "A react-native client for the 01"
|
|
||||||
---
|
|
||||||
|
|
||||||
<CardGroup cols={3}>
|
|
||||||
<Card title="Source Code" icon="github" href="https://github.com/OpenInterpreter/01-app">
|
|
||||||
View on GitHub
|
|
||||||
</Card>
|
|
||||||
<Card title="Android" icon="android" href="https://play.google.com/store/apps/details?id=com.interpreter.app">
|
|
||||||
Get it on Google Play
|
|
||||||
</Card>
|
|
||||||
<Card title="iOS" icon="apple" href="https://apps.apple.com/ca/app/01-light/id6601937732">
|
|
||||||
Download on the App Store
|
|
||||||
</Card>
|
|
||||||
</CardGroup>
|
|
||||||
|
|
||||||

|
|
||||||
|
|
||||||
The 01 App connects to the 01 server on your home machine, enabling remote access to your files, apps, and IoT devices.
|
|
||||||
|
|
||||||
# Setup
|
|
||||||
|
|
||||||
<Steps>
|
|
||||||
<Step title="Install 01">
|
|
||||||
Install the 01 software on your computer. For detailed instructions, visit the [installation guide](/setup/installation).
|
|
||||||
</Step>
|
|
||||||
<Step title="Install Livekit">
|
|
||||||
Setup Livekit on your computer. For instructions, visit the [installation guide](/server/livekit).
|
|
||||||
</Step>
|
|
||||||
<Step title="Start the server">
|
|
||||||
Open a terminal and run the following command:
|
|
||||||
|
|
||||||
```bash
|
|
||||||
poetry run 01 --server livekit --expose --qr
|
|
||||||
```
|
|
||||||
|
|
||||||
This will start the 01 server with LiveKit support, expose it to the internet, and generate a QR code. You may need to wait up to 30 seconds before the code is displayed.
|
|
||||||
|
|
||||||
If the server fails, you may need to restart the server a few times before it works again. We're working on resolving this as soon as possible.
|
|
||||||
</Step>
|
|
||||||
<Step title="Connect the app">
|
|
||||||
Open the 01 App on your mobile device and use it to scan the QR code displayed in your terminal. This will establish a connection between your mobile device and the 01 server running on your computer.
|
|
||||||
</Step>
|
|
||||||
</Steps>
|
|
||||||
|
|
||||||
# Settings
|
|
||||||
|
|
||||||
The 01 App offers several customizable settings to enhance your experience. These can be changed by connecting to the server, then hitting the gear icon in the upper right, and adjusting the following settings:
|
|
||||||
|
|
||||||
## <Icon icon="microphone" /> Push-to-talk
|
|
||||||
|
|
||||||
Hold the on-screen button to activate listening, or use voice activity detection for hands-free operation.
|
|
||||||
|
|
||||||
## <Icon icon="watch" /> Wearable Mode
|
|
||||||
|
|
||||||
Optimizes the interface for small screens, displaying a minimal full-screen button without the chat interface.
|
|
||||||
|
|
||||||
## <Icon icon="ear-listen" /> Always Listen for Context
|
|
||||||
|
|
||||||
Continuously gathers environmental context, even when not actively prompted. Only available when Push-to-talk is enabled.
|
|
||||||
|
|
@ -1,29 +0,0 @@
|
||||||
<Info>This client uses the [light](/server/light) server.</Info>
|
|
||||||
|
|
||||||
The desktop client for 01 provides a simple way to interact with the 01 light server using your computer. There are two main ways to use the desktop client:
|
|
||||||
|
|
||||||
## Simulating 01 Light Hardware
|
|
||||||
|
|
||||||
To simulate the 01 light hardware device on your desktop, run:
|
|
||||||
|
|
||||||
```
|
|
||||||
poetry run 01 --client
|
|
||||||
```
|
|
||||||
|
|
||||||
This will start the client in simulation mode. You can hold the CTRL key to talk to the 01 light server, simulating the button press on the physical device.
|
|
||||||
|
|
||||||
## Running Both Server and Client
|
|
||||||
|
|
||||||
To run both the server and client simultaneously, use:
|
|
||||||
|
|
||||||
```
|
|
||||||
poetry run 01
|
|
||||||
```
|
|
||||||
|
|
||||||
This command starts both the 01 light server and the desktop client, allowing you to interact with the system immediately. The client interface will guide you through the interaction process.
|
|
||||||
|
|
||||||
|
|
||||||
|
|
||||||
|
|
||||||
|
|
||||||
|
|
||||||
|
|
@ -1,135 +0,0 @@
|
||||||
---
|
|
||||||
title: "ESP32"
|
|
||||||
description: "How to setup the ESP32"
|
|
||||||
---
|
|
||||||
|
|
||||||
<Info>This client uses the [light](/server/light) server.</Info>
|
|
||||||
|
|
||||||
### Video Guide
|
|
||||||
|
|
||||||
<iframe
|
|
||||||
width="560"
|
|
||||||
height="315"
|
|
||||||
src="https://www.youtube.com/embed/Y76zed8nEE8"
|
|
||||||
frameBorder="0"
|
|
||||||
allow="accelerometer; autoplay; clipboard-write; encrypted-media; gyroscope; picture-in-picture"
|
|
||||||
allowfullscreen
|
|
||||||
></iframe>
|
|
||||||
|
|
||||||
---
|
|
||||||
|
|
||||||
To set up the ESP32 for use with 01, follow this guide to install the firmware:
|
|
||||||
|
|
||||||
<Steps>
|
|
||||||
<Step title="Download Arduino IDE">
|
|
||||||
<Card title="Download Arduino IDE" icon="download" href="https://www.arduino.cc/en/software">
|
|
||||||
Get the Arduino IDE
|
|
||||||
</Card>
|
|
||||||
</Step>
|
|
||||||
|
|
||||||
<Step title="Get the firmware">
|
|
||||||
Get the firmware by copying the contents of [client.ino](https://github.com/OpenInterpreter/01/blob/main/software/source/clients/esp32/src/client/client.ino) from the 01 repository.
|
|
||||||
|
|
||||||
<Card title="View client.ino" icon="code" href="https://github.com/OpenInterpreter/01/blob/main/software/source/clients/esp32/src/client/client.ino">
|
|
||||||
View the ESP32 firmware source code
|
|
||||||
</Card>
|
|
||||||
|
|
||||||
<img src="https://raw.githubusercontent.com/OpenInterpreter/01/main/docs/assets/copy-client.png" alt="Copy client.ino contents" width="80%" />
|
|
||||||
</Step>
|
|
||||||
|
|
||||||
<Step title="Paste firmware into Arduino IDE">
|
|
||||||
Open Arduino IDE and paste the client.ino contents.
|
|
||||||
|
|
||||||
<img src="https://raw.githubusercontent.com/OpenInterpreter/01/main/docs/assets/paste-client.png" alt="Paste client.ino contents" width="80%" />
|
|
||||||
|
|
||||||
<img src="https://raw.githubusercontent.com/OpenInterpreter/01/main/docs/assets/pasted-client.png" alt="Pasted client.ino contents" width="80%" />
|
|
||||||
</Step>
|
|
||||||
|
|
||||||
<Step title="(Optional) Hardcode credentials">
|
|
||||||
Hardcode your WiFi SSID, WiFi password, and server URL into the top of the `client.ino` file.
|
|
||||||
|
|
||||||
<img src="https://raw.githubusercontent.com/OpenInterpreter/01/main/docs/assets/hardcode-wifi-pass-server.png" alt="Hardcode WiFi SSID and password" width="80%" />
|
|
||||||
|
|
||||||
Hardcoding is recommended for a more streamlined setup and development environment. However, if you don't hardcode these values or if the ESP32 can't connect using the provided information, it will automatically default to a captive portal for configuration.
|
|
||||||
</Step>
|
|
||||||
|
|
||||||
<Step title="Install ESP32 boards">
|
|
||||||
Go to Tools -> Board -> Boards Manager, search "esp32", then install the boards by Arduino and Espressif.
|
|
||||||
|
|
||||||
<img src="https://raw.githubusercontent.com/OpenInterpreter/01/main/docs/assets/boards-manager.png" alt="Install ESP32 boards" width="80%" />
|
|
||||||
</Step>
|
|
||||||
|
|
||||||
<Step title="Install required libraries">
|
|
||||||
Go to Tools -> Manage Libraries, then install the following:
|
|
||||||
|
|
||||||
- M5Atom by M5Stack ([Reference](https://www.arduino.cc/reference/en/libraries/m5atom/))
|
|
||||||
|
|
||||||
<img src="https://raw.githubusercontent.com/OpenInterpreter/01/main/docs/assets/M5-atom-library.png" alt="Install M5Atom library" width="80%" />
|
|
||||||
|
|
||||||
<img src="https://raw.githubusercontent.com/OpenInterpreter/01/main/docs/assets/m5-atom-install-all.png" alt="Install all M5Atom dependencies" width="80%" />
|
|
||||||
|
|
||||||
- WebSockets by Markus Sattler ([Reference](https://www.arduino.cc/reference/en/libraries/websockets/))
|
|
||||||
|
|
||||||
<img src="https://raw.githubusercontent.com/OpenInterpreter/01/main/docs/assets/WebSockets by Markus Sattler.png" alt="Install WebSockets library" width="80%" />
|
|
||||||
|
|
||||||
- AsyncTCP by dvarrel ([Reference](https://github.com/dvarrel/AsyncTCP))
|
|
||||||
|
|
||||||
<img src="https://raw.githubusercontent.com/OpenInterpreter/01/main/docs/assets/AsyncTCP by dvarrel.png" alt="Install AsyncTCP library" width="80%" />
|
|
||||||
|
|
||||||
- ESPAsyncWebServer by lacamera ([Reference](https://github.com/lacamera/ESPAsyncWebServer))
|
|
||||||
|
|
||||||
<img src="https://raw.githubusercontent.com/OpenInterpreter/01/main/docs/assets/ESPAsyncWebServer by lacamera.png" alt="Install ESPAsyncWebServer library" width="80%" />
|
|
||||||
|
|
||||||
<img src="https://raw.githubusercontent.com/OpenInterpreter/01/main/docs/assets/ESPAsyncWebServer-install-all.png" alt="Install all ESPAsyncWebServer dependencies" width="80%" />
|
|
||||||
</Step>
|
|
||||||
|
|
||||||
<Step title="Connect the board">
|
|
||||||
To flash the .ino to the board, connect the board to the USB port.
|
|
||||||
|
|
||||||
<img src="https://raw.githubusercontent.com/OpenInterpreter/01/main/docs/assets/connect_usb.jpeg" alt="Connect USB" width="80%" />
|
|
||||||
</Step>
|
|
||||||
|
|
||||||
<Step title="Select board and port">
|
|
||||||
Select the port from the dropdown on the IDE, then select the M5Atom board (or M5Stack-ATOM if you have that).
|
|
||||||
|
|
||||||
<img src="https://raw.githubusercontent.com/OpenInterpreter/01/main/docs/assets/Select Board and Port.png" alt="Select Board and Port" width="80%" />
|
|
||||||
</Step>
|
|
||||||
|
|
||||||
<Step title="Upload firmware">
|
|
||||||
Click on upload to flash the board.
|
|
||||||
|
|
||||||
<img src="https://raw.githubusercontent.com/OpenInterpreter/01/main/docs/assets/Upload.png" alt="Upload firmware" width="80%" />
|
|
||||||
</Step>
|
|
||||||
|
|
||||||
<Step title="Start the 01 server">
|
|
||||||
Start the 01 server on your computer:
|
|
||||||
```
|
|
||||||
poetry run 01 --server light
|
|
||||||
```
|
|
||||||
This command starts the server and generates a URL.
|
|
||||||
|
|
||||||
For remote connections, use:
|
|
||||||
```
|
|
||||||
poetry run 01 --server light --expose
|
|
||||||
```
|
|
||||||
This generates a public URL accessible from anywhere.
|
|
||||||
</Step>
|
|
||||||
|
|
||||||
<Step title="Connect ESP32 to the server">
|
|
||||||
Connect your 01 device to the server using one of these methods:
|
|
||||||
|
|
||||||
a) Hardcode credentials:
|
|
||||||
- Modify the Wi-Fi and server credentials at the top of the `client.ino` file.
|
|
||||||
- Flash the modified file to the ESP32.
|
|
||||||
- This method is quick but less flexible for changing details later.
|
|
||||||
|
|
||||||
b) Use the captive portal:
|
|
||||||
- Power on your 01 device.
|
|
||||||
- Connect to the '01-light' Wi-Fi network from your computer or smartphone.
|
|
||||||
- A captive portal page should open automatically. If not, open a web browser.
|
|
||||||
- Enter your Wi-Fi details and the server URL from step 1.
|
|
||||||
- Click 'Connect' to save settings and connect your device.
|
|
||||||
|
|
||||||
After successful connection, your ESP32 will be ready to communicate with the server.
|
|
||||||
</Step>
|
|
||||||
</Steps>
|
|
||||||
|
|
@ -1,33 +0,0 @@
|
||||||
---
|
|
||||||
title: "Introduction"
|
|
||||||
description: "Talk to the 01 Server using a client"
|
|
||||||
---
|
|
||||||
|
|
||||||
The 01 client is the user interface that captures and transmits audio, plays back responses, and provides a seamless experience across various platforms. It's designed to interact with the 01 server, which processes input, executes commands, and generates responses using Open Interpreter.
|
|
||||||
|
|
||||||
<CardGroup cols={2}>
|
|
||||||
<Card
|
|
||||||
title="Android & iOS App"
|
|
||||||
icon="mobile"
|
|
||||||
description="Our cross-platform mobile app for Android and iOS devices."
|
|
||||||
href="/client/android-ios"
|
|
||||||
/>
|
|
||||||
<Card
|
|
||||||
title="ESP32 Implementation"
|
|
||||||
icon="microchip"
|
|
||||||
description="An implementation for ESP32 microcontrollers, perfect for IoT projects."
|
|
||||||
href="/client/esp32"
|
|
||||||
/>
|
|
||||||
<Card
|
|
||||||
title="Native iOS App"
|
|
||||||
icon="apple"
|
|
||||||
description="A native iOS application built specifically for Apple devices."
|
|
||||||
href="/client/native-ios"
|
|
||||||
/>
|
|
||||||
<Card
|
|
||||||
title="Desktop"
|
|
||||||
icon="desktop"
|
|
||||||
description="A Python-based desktop client for interacting with the 01 light server."
|
|
||||||
href="/client/desktop"
|
|
||||||
/>
|
|
||||||
</CardGroup>
|
|
||||||
|
|
@ -0,0 +1,115 @@
|
||||||
|
---
|
||||||
|
title: "Getting Started"
|
||||||
|
description: "Preparing your machine"
|
||||||
|
---
|
||||||
|
|
||||||
|
## Prerequisites
|
||||||
|
|
||||||
|
To run the 01 on your computer, you will need to install the following essential packages:
|
||||||
|
|
||||||
|
- Git
|
||||||
|
- Python (version 3.11.x recommended)
|
||||||
|
- Poetry
|
||||||
|
- FFmpeg
|
||||||
|
|
||||||
|
## Installation Guide
|
||||||
|
|
||||||
|
### For All Platforms
|
||||||
|
|
||||||
|
1. **Git**: Download and install Git from the [official website](https://git-scm.com/downloads).
|
||||||
|
|
||||||
|
2. **Python**:
|
||||||
|
- Download Python 3.11.x from the [official Python website](https://www.python.org/downloads/).
|
||||||
|
- During installation, make sure to check "Add Python to PATH".
|
||||||
|
|
||||||
|
3. **Poetry**:
|
||||||
|
- Follow the [official Poetry installation guide](https://python-poetry.org/docs/#installing-with-the-official-installer).
|
||||||
|
- If you encounter SSL certificate issues on Windows, see the Windows-specific instructions below.
|
||||||
|
|
||||||
|
4. **FFmpeg**: Installation instructions vary by platform (see below).
|
||||||
|
|
||||||
|
### Platform-Specific Instructions
|
||||||
|
|
||||||
|
#### MacOS
|
||||||
|
|
||||||
|
We recommend using Homebrew to install the required dependencies:
|
||||||
|
|
||||||
|
```bash
|
||||||
|
brew install portaudio ffmpeg cmake
|
||||||
|
```
|
||||||
|
|
||||||
|
#### Ubuntu
|
||||||
|
|
||||||
|
**Note**: Wayland is not supported. These instructions are for Ubuntu 20.04 and below.
|
||||||
|
|
||||||
|
Install the required packages:
|
||||||
|
|
||||||
|
```bash
|
||||||
|
sudo apt-get update
|
||||||
|
sudo apt-get install portaudio19-dev ffmpeg cmake
|
||||||
|
```
|
||||||
|
|
||||||
|
#### Windows
|
||||||
|
|
||||||
|
1. **Git**: Download and install [Git for Windows](https://git-scm.com/download/win).
|
||||||
|
|
||||||
|
2. **Python**:
|
||||||
|
- Download Python 3.11.x from the [official Python website](https://www.python.org/downloads/windows/).
|
||||||
|
- During installation, ensure you check "Add Python to PATH".
|
||||||
|
|
||||||
|
3. **Microsoft C++ Build Tools**:
|
||||||
|
- Download from [Microsoft's website](https://visualstudio.microsoft.com/visual-cpp-build-tools/).
|
||||||
|
- Run the installer and select "Desktop development with C++" from the Workloads tab.
|
||||||
|
- This step is crucial for Poetry to work correctly.
|
||||||
|
|
||||||
|
4. **Poetry**:
|
||||||
|
- If the standard installation method fails due to SSL issues, try this workaround:
|
||||||
|
1. Download the installation script from [https://install.python-poetry.org/](https://install.python-poetry.org/) and save it as `install-poetry.py`.
|
||||||
|
2. Open the file and replace the `get(self, url):` method with:
|
||||||
|
```python
|
||||||
|
def get(self, url):
|
||||||
|
import ssl
|
||||||
|
import certifi
|
||||||
|
request = Request(url, headers={"User-Agent": "Python Poetry"})
|
||||||
|
context = ssl.create_default_context(cafile=certifi.where())
|
||||||
|
context.check_hostname = False
|
||||||
|
context.verify_mode = ssl.CERT_NONE
|
||||||
|
with closing(urlopen(request, context=context)) as r:
|
||||||
|
return r.read()
|
||||||
|
```
|
||||||
|
3. Run the modified script to install Poetry.
|
||||||
|
- Add Poetry to your PATH:
|
||||||
|
1. Press Win + R, type "sysdm.cpl", and press Enter.
|
||||||
|
2. Go to the "Advanced" tab and click "Environment Variables".
|
||||||
|
3. Under "User variables", find "Path" and click "Edit".
|
||||||
|
4. Click "New" and add: `C:\Users\<USERNAME>\AppData\Roaming\Python\Scripts`
|
||||||
|
5. Click "OK" to close all windows.
|
||||||
|
|
||||||
|
5. **FFmpeg**:
|
||||||
|
- Download the latest FFmpeg build from the [BtbN GitHub releases page](https://github.com/BtbN/FFmpeg-Builds/releases).
|
||||||
|
- Choose the `ffmpeg-master-latest-win64-gpl.zip` (non-shared suffix) file.
|
||||||
|
- Extract the compressed zip file.
|
||||||
|
- Add the FFmpeg `bin` folder to your PATH:
|
||||||
|
1. Press Win + R, type "sysdm.cpl", and press Enter.
|
||||||
|
2. Go to the "Advanced" tab and click "Environment Variables".
|
||||||
|
3. Under "System variables", find "Path" and click "Edit".
|
||||||
|
4. Click "New" and add the full path to the FFmpeg `bin` folder (e.g., `C:\path\to\ffmpeg\bin`).
|
||||||
|
5. Click "OK" to close all windows.
|
||||||
|
|
||||||
|
## What is Poetry?
|
||||||
|
|
||||||
|
Poetry is a dependency management and packaging tool for Python. It simplifies the process of managing project dependencies, ensuring consistent environments across different setups. We use Poetry to guarantee that everyone running 01 has the same environment and dependencies.
|
||||||
|
|
||||||
|
## Troubleshooting
|
||||||
|
|
||||||
|
### Windows-Specific Issues
|
||||||
|
|
||||||
|
1. **Poetry Install Error**: If you encounter an error stating "Microsoft Visual C++ 14.0 or greater is required" when running `poetry install`, make sure you have properly installed the Microsoft C++ Build Tools as described in step 3 of the Windows installation guide.
|
||||||
|
|
||||||
|
2. **FFmpeg Not Found**: If you receive an error saying FFmpeg is not found after installation, ensure that you've correctly added the FFmpeg `bin` folder to your system PATH as described in step 5 of the Windows installation guide.
|
||||||
|
|
||||||
|
3. **Server Connection Issues**: If the server connects but you encounter errors when sending messages, double-check that all dependencies are correctly installed and that FFmpeg is properly set up in your PATH.
|
||||||
|
|
||||||
|
## Next Steps
|
||||||
|
|
||||||
|
Once you have successfully installed all the prerequisites, you're ready to clone the repository and set up the project.
|
||||||
|
|
@ -0,0 +1,26 @@
|
||||||
|
---
|
||||||
|
title: Introduction
|
||||||
|
description: "The open-source language model computer"
|
||||||
|
---
|
||||||
|
|
||||||
|
<img
|
||||||
|
src="https://www.openinterpreter.com/OI-O1-BannerDemo-3.jpg"
|
||||||
|
alt="thumbnail"
|
||||||
|
style={{ transform: "translateY(-1.25rem)" }}
|
||||||
|
/>
|
||||||
|
|
||||||
|
The **01** is an open-source platform for conversational devices, inspired by the _Star Trek_ computer.
|
||||||
|
|
||||||
|
With [Open Interpreter](https://github.com/OpenInterpreter/open-interpreter) at its core, the **01** is more natural, flexible, and capable than its predecessors. Assistants built on **01** can:
|
||||||
|
|
||||||
|
- Execute code
|
||||||
|
- Browse the web
|
||||||
|
- Read and create files
|
||||||
|
- Control third-party software
|
||||||
|
- ...
|
||||||
|
|
||||||
|
<br></br>
|
||||||
|
|
||||||
|
We intend to become the GNU/Linux of this space by staying open, modular, and free.
|
||||||
|
|
||||||
|
_Disclaimer:_ The current version of the 01 is a developer preview.
|
||||||
|
|
@ -0,0 +1,7 @@
|
||||||
|
For the 01 Light project, we've chosen the M5Atom, which features an ESP32 Pico chip. This compact and powerful microcontroller is ideal for our needs, offering built-in Wi-Fi and Bluetooth capabilities, a microphone, speaker, and button.
|
||||||
|
|
||||||
|
<div style="display: flex; justify-content: center;">
|
||||||
|
<img src="../esp32/assets/m5atomecho.png" alt="M5Atom ESP32 Pico" width="60%" />
|
||||||
|
</div>
|
||||||
|
|
||||||
|
To set up the M5Atom for use with 01 Light, please follow the detailed instructions in our [ESP32 Setup Guide](../esp32/esp32-setup.md). This guide will walk you through the process of installing the necessary firmware and configuring your device.
|
||||||
|
|
@ -1,11 +0,0 @@
|
||||||
---
|
|
||||||
title: "Chip"
|
|
||||||
---
|
|
||||||
|
|
||||||
For the 01 Light project, we've chosen the M5Atom, which features an ESP32 Pico chip. This compact and powerful microcontroller is ideal for our needs, offering built-in Wi-Fi and Bluetooth capabilities, a microphone, speaker, and button.
|
|
||||||
|
|
||||||
To set up the M5Atom for use with 01 Light, please follow the instructions in our [ESP32 Setup Guide](client/esp32).
|
|
||||||
|
|
||||||
<Card title="ESP32 Setup Guide" icon="microchip" href="/client/esp32">
|
|
||||||
Learn how to set up your M5Atom for the 01 Light project
|
|
||||||
</Card>
|
|
||||||
|
|
@ -1,34 +1,14 @@
|
||||||
---
|
---
|
||||||
title: "Connect"
|
title: "Connect"
|
||||||
description: "Connect your 01 device to your 01 server"
|
description: "Connect your 01 device"
|
||||||
---
|
---
|
||||||
|
|
||||||
### Connecting your 01 device to the server
|
### Captive portal
|
||||||
|
|
||||||
1. Start the 01 server on your computer:
|
To connect your 01, you will use the captive portal.
|
||||||
```
|
|
||||||
poetry run 01 --server light
|
|
||||||
```
|
|
||||||
This command starts the server and generates a URL.
|
|
||||||
|
|
||||||
For remote connections, use:
|
1. Turn on your computer or laptop and connect to the '01 light' Wi-Fi network.
|
||||||
```
|
2. Enter your Wi-Fi/hotspot name and password in the captive portal page.
|
||||||
poetry run 01 --server light --expose
|
3. Enter the server URL generated on their computer and hit 'Connect'.
|
||||||
```
|
|
||||||
This generates a public URL accessible from anywhere.
|
|
||||||
|
|
||||||
2. Connect your 01 device to the server using one of these methods:
|
Now you're connected and ready to go!
|
||||||
|
|
||||||
a) Hardcode credentials:
|
|
||||||
- Modify the Wi-Fi and server credentials at the top of the `client.ino` file.
|
|
||||||
- Flash the modified file to the ESP32.
|
|
||||||
- This method is quick but less flexible for changing details later.
|
|
||||||
|
|
||||||
b) Use the captive portal:
|
|
||||||
- Power on your 01 device.
|
|
||||||
- Connect to the '01-light' Wi-Fi network from your computer or smartphone.
|
|
||||||
- A captive portal page should open automatically. If not, open a web browser.
|
|
||||||
- Enter your Wi-Fi details and the server URL from step 1.
|
|
||||||
- Click 'Connect' to save settings and connect your device.
|
|
||||||
|
|
||||||
After successful connection, your 01 device will be ready to communicate with the server.
|
|
||||||
|
|
|
||||||
|
|
@ -1,42 +1,8 @@
|
||||||
---
|
---
|
||||||
title: "Introduction"
|
title: "Introduction"
|
||||||
description: "Talk to your computer from anywhere in the world"
|
description: "The 01 light"
|
||||||
---
|
---
|
||||||
|
|
||||||

|
The 01 light is an open-source voice interface.
|
||||||
|
|
||||||
The 01 light is a handheld, push-to-talk voice interface. It's powered by an ESP32 chip that sends the user's voice over Wifi to the 01 Server, then plays back the audio it receives.
|
The first body was designed to be push-to-talk and handheld, but the core chip can be built into standalone bodies with hardcoded wifi credentials.
|
||||||
|
|
||||||
# Setup guide
|
|
||||||
|
|
||||||
<Steps>
|
|
||||||
<Step title="Gather Materials">
|
|
||||||
<Card title="Buy Materials" icon="basket-shopping" href="/hardware/01-light/materials">
|
|
||||||
Get the list of components needed to build your 01 Light. Click here to view the required materials and purchase options.
|
|
||||||
</Card>
|
|
||||||
</Step>
|
|
||||||
|
|
||||||
<Step title="3D Print the Case">
|
|
||||||
<Card title="Print Case" icon="cube" href="/hardware/01-light/case">
|
|
||||||
Download the 3D model files and follow instructions to print the custom case for your 01 Light.
|
|
||||||
</Card>
|
|
||||||
</Step>
|
|
||||||
|
|
||||||
<Step title="Assemble the Device">
|
|
||||||
<Card title="Assembly Guide" icon="screwdriver-wrench" href="/hardware/01-light/assembly">
|
|
||||||
Step-by-step instructions on how to put together your 01 Light components inside the 3D printed case.
|
|
||||||
</Card>
|
|
||||||
</Step>
|
|
||||||
|
|
||||||
<Step title="Flash the ESP32">
|
|
||||||
<Card title="Program the Chip" icon="microchip" href="/hardware/01-light/chip">
|
|
||||||
Learn how to flash the ESP32 with the 01 Light firmware to enable its core functionality.
|
|
||||||
</Card>
|
|
||||||
</Step>
|
|
||||||
|
|
||||||
<Step title="Connect to Server">
|
|
||||||
<Card title="Setup Connection" icon="wifi" href="/hardware/01-light/connect">
|
|
||||||
Configure your 01 Light to connect to the 01 Server and start using your new voice interface.
|
|
||||||
</Card>
|
|
||||||
</Step>
|
|
||||||
</Steps>
|
|
||||||
|
|
|
||||||
|
|
@ -1,52 +0,0 @@
|
||||||
---
|
|
||||||
title: "Custom Hardware"
|
|
||||||
description: "Control 01 from your own device"
|
|
||||||
---
|
|
||||||
|
|
||||||
You can create custom hardware that integrates with the O1 server software running on your computer.
|
|
||||||
|
|
||||||
To use 01 with your custom hardware, run the livekit server and connect to the "Livekit is running at..." URL that is displayed:
|
|
||||||
|
|
||||||
```bash
|
|
||||||
poetry run 01 --server livekit
|
|
||||||
```
|
|
||||||
|
|
||||||
Or, run the light server and connect to the URL that is displayed:
|
|
||||||
|
|
||||||
```bash
|
|
||||||
poetry run 01 --server light
|
|
||||||
```
|
|
||||||
|
|
||||||
You may need to set additional parameters via [flags](/software/flags) depending on your setup.
|
|
||||||
|
|
||||||
---
|
|
||||||
|
|
||||||
# Usage
|
|
||||||
|
|
||||||
## Light Server
|
|
||||||
|
|
||||||
When using the light server, to transmit audio commands to 01, send LMC audio chunks to the websocket defined by your server.
|
|
||||||
|
|
||||||
### LMC Messages
|
|
||||||
|
|
||||||
To support the incoming `L`anguage `M`odel `C`omputer architecture, we extend OpenAI's messages format to include additional information, and a new role called `computer`:
|
|
||||||
|
|
||||||
<Card
|
|
||||||
title="LMC"
|
|
||||||
icon="link"
|
|
||||||
href="https://docs.openinterpreter.com/protocols/lmc-messages"
|
|
||||||
>
|
|
||||||
Read about LMC messages protocol here.
|
|
||||||
</Card>
|
|
||||||
|
|
||||||
## Livekit Server
|
|
||||||
|
|
||||||
When using the Livekit server, any of Livekit's SDKs will connect.
|
|
||||||
|
|
||||||
<Card
|
|
||||||
title="Explore Livekit SDKs"
|
|
||||||
icon="code"
|
|
||||||
href="https://docs.livekit.io/client-sdk-js/"
|
|
||||||
>
|
|
||||||
Find documentation and integration guides for all Livekit SDKs.
|
|
||||||
</Card>
|
|
||||||
|
|
@ -0,0 +1,28 @@
|
||||||
|
---
|
||||||
|
title: "Custom Hardware"
|
||||||
|
description: "Control 01 from your own device"
|
||||||
|
---
|
||||||
|
|
||||||
|
You can create custom hardware that integrates with the O1 server software running on your computer.
|
||||||
|
|
||||||
|
To use 01 with your custom hardware, run the server:
|
||||||
|
|
||||||
|
```bash
|
||||||
|
poetry run 01 --server
|
||||||
|
```
|
||||||
|
|
||||||
|
You may need to set additional parameters via [flags](/software/flags) depending on your setup.
|
||||||
|
|
||||||
|
To transmit audio commands to 01, send LMC audio chunks to the websocket defined by your server.
|
||||||
|
|
||||||
|
## LMC Messages
|
||||||
|
|
||||||
|
To support the incoming `L`anguage `M`odel `C`omputer architecture, we extend OpenAI's messages format to include additional information, and a new role called `computer`:
|
||||||
|
|
||||||
|
<Card
|
||||||
|
title="LMC"
|
||||||
|
icon="link"
|
||||||
|
href="https://docs.openinterpreter.com/protocols/lmc-messages"
|
||||||
|
>
|
||||||
|
Read about LMC messages protocol here.
|
||||||
|
</Card>
|
||||||
|
|
@ -1,26 +1,12 @@
|
||||||
---
|
---
|
||||||
title: "Desktop"
|
title: "Desktop"
|
||||||
description: "Control the 01 from your computer"
|
description: "Control 01 from your computer"
|
||||||
---
|
---
|
||||||
|
|
||||||
<Info> Make sure that you have navigated to the `/software` directory. </Info>
|
<Info> Make sure that you have navigated to the `software` directory. </Info>
|
||||||
|
|
||||||
To run 01 with your computer's microphone and speaker, you need to start a server and a client.
|
To run 01 with your computer's microphone and speaker, run:
|
||||||
|
|
||||||
We abstract this away with a simple command:
|
|
||||||
|
|
||||||
```bash
|
```bash
|
||||||
poetry run 01
|
poetry run 01
|
||||||
```
|
```
|
||||||
|
|
||||||
*Tip:* While in the `/software` directory, you can run the following command to install the `01` command system-wide:
|
|
||||||
|
|
||||||
```bash
|
|
||||||
pip install .
|
|
||||||
```
|
|
||||||
|
|
||||||
Then, simply run `01` in your terminal to start the server + client and begin speaking to your assistant.
|
|
||||||
|
|
||||||
```bash
|
|
||||||
01
|
|
||||||
```
|
|
||||||
|
Before Width: | Height: | Size: 46 KiB After Width: | Height: | Size: 46 KiB |
|
Before Width: | Height: | Size: 44 KiB After Width: | Height: | Size: 44 KiB |
|
Before Width: | Height: | Size: 97 KiB After Width: | Height: | Size: 97 KiB |
|
Before Width: | Height: | Size: 36 KiB After Width: | Height: | Size: 36 KiB |
|
Before Width: | Height: | Size: 124 KiB After Width: | Height: | Size: 124 KiB |
|
Before Width: | Height: | Size: 124 KiB After Width: | Height: | Size: 124 KiB |
|
Before Width: | Height: | Size: 39 KiB After Width: | Height: | Size: 39 KiB |
|
Before Width: | Height: | Size: 92 KiB After Width: | Height: | Size: 92 KiB |
|
Before Width: | Height: | Size: 169 KiB After Width: | Height: | Size: 169 KiB |
|
Before Width: | Height: | Size: 248 KiB After Width: | Height: | Size: 248 KiB |
|
Before Width: | Height: | Size: 144 KiB After Width: | Height: | Size: 144 KiB |
|
Before Width: | Height: | Size: 155 KiB After Width: | Height: | Size: 155 KiB |
|
Before Width: | Height: | Size: 454 KiB After Width: | Height: | Size: 454 KiB |
|
Before Width: | Height: | Size: 61 KiB After Width: | Height: | Size: 61 KiB |
|
Before Width: | Height: | Size: 304 KiB After Width: | Height: | Size: 304 KiB |
|
|
@ -0,0 +1,96 @@
|
||||||
|
---
|
||||||
|
title: "ESP32"
|
||||||
|
description: "How to setup the ESP32"
|
||||||
|
---
|
||||||
|
|
||||||
|
To set up the ESP32 for use with 01, follow this guide to install the firmware:
|
||||||
|
|
||||||
|
1. Download [Arduino IDE](https://www.arduino.cc/en/software).
|
||||||
|
|
||||||
|
2. Get the firmware by copying the contents of [client.ino](https://github.com/OpenInterpreter/01/blob/main/software/source/clients/esp32/src/client/client.ino) from the 01 repository.
|
||||||
|
|
||||||
|
<div style="display: flex; justify-content: center;">
|
||||||
|
<img src="assets/copy-client.png" alt="Copy client.ino contents" width="60%" />
|
||||||
|
</div>
|
||||||
|
|
||||||
|
3. Open Arduino IDE and paste the client.ino contents.
|
||||||
|
|
||||||
|
<div style="display: flex; justify-content: center;">
|
||||||
|
<img src="assets/paste-client.png" alt="Paste client.ino contents" width="60%" />
|
||||||
|
|
||||||
|
<img src="assets/pasted-client.png" alt="Pasted client.ino contents" width="60%" />
|
||||||
|
</div>
|
||||||
|
|
||||||
|
4. Hardcode your WiFi SSID, WiFi password, and server URL into the code.
|
||||||
|
|
||||||
|
<div style="display: flex; justify-content: center;">
|
||||||
|
<img src="assets/hardcode-wifi-pass-server.png" alt="Hardcode WiFi SSID and password" width="60%" />
|
||||||
|
</div>
|
||||||
|
|
||||||
|
<div style="display: flex; justify-content: center;">
|
||||||
|
<div style="width: 80%;">
|
||||||
|
Hardcoding is recommended for a more streamlined setup and development environment. However, if you don't hardcode these values or if the ESP32 can't connect using the provided information, it will automatically default to a captive portal for configuration.
|
||||||
|
</div>
|
||||||
|
</div>
|
||||||
|
|
||||||
|
5. Go to Tools -> Board -> Boards Manager, search "esp32", then install the boards by Arduino and Espressif.
|
||||||
|
|
||||||
|
<div style="display: flex; justify-content: center;">
|
||||||
|
<img src="assets/boards-manager.png" alt="Install ESP32 boards" width="60%" />
|
||||||
|
</div>
|
||||||
|
|
||||||
|
5. Go to Tools -> Manage Libraries, then install the following:
|
||||||
|
|
||||||
|
- M5Atom by M5Stack ([Reference](https://www.arduino.cc/reference/en/libraries/m5atom/))
|
||||||
|
|
||||||
|
<div style="display: flex; justify-content: center;">
|
||||||
|
<img src="assets/M5-atom-library.png" alt="Install M5Atom library" width="60%" />
|
||||||
|
|
||||||
|
<img src="assets/m5-atom-install-all.png" alt="Install all M5Atom dependencies" width="60%" />
|
||||||
|
</div>
|
||||||
|
|
||||||
|
- WebSockets by Markus Sattler ([Reference](https://www.arduino.cc/reference/en/libraries/websockets/))
|
||||||
|
|
||||||
|
<div style="display: flex; justify-content: center;">
|
||||||
|
<img src="assets/WebSockets by Markus Sattler.png" alt="Install WebSockets library" width="60%" />
|
||||||
|
</div>
|
||||||
|
|
||||||
|
- AsyncTCP by dvarrel ([Reference](https://github.com/dvarrel/AsyncTCP))
|
||||||
|
|
||||||
|
<div style="display: flex; justify-content: center;">
|
||||||
|
<img src="assets/AsyncTCP by dvarrel.png" alt="Install AsyncTCP library" width="60%" />
|
||||||
|
</div>
|
||||||
|
|
||||||
|
- ESPAsyncWebServer by lacamera ([Reference](https://github.com/lacamera/ESPAsyncWebServer))
|
||||||
|
|
||||||
|
<div style="display: flex; justify-content: center;">
|
||||||
|
<img src="assets/ESPAsyncWebServer by lacamera.png" alt="Install ESPAsyncWebServer library" width="60%" />
|
||||||
|
|
||||||
|
<img src="assets/ESPAsyncWebServer-install-all.png" alt="Install all ESPAsyncWebServer dependencies" width="60%" />
|
||||||
|
</div>
|
||||||
|
|
||||||
|
6. To flash the .ino to the board, connect the board to the USB port.
|
||||||
|
|
||||||
|
<div style="display: flex; justify-content: center;">
|
||||||
|
<img src="assets/connect_usb.jpeg" alt="Connect USB" width="60%" />
|
||||||
|
</div>
|
||||||
|
|
||||||
|
7. Select the port from the dropdown on the IDE, then select the M5Atom board (or M5Stack-ATOM if you have that).
|
||||||
|
|
||||||
|
<div style="display: flex; justify-content: center;">
|
||||||
|
<img src="assets/Select Board and Port.png" alt="Select Board and Port" width="60%" />
|
||||||
|
</div>
|
||||||
|
|
||||||
|
8. Click on upload to flash the board.
|
||||||
|
|
||||||
|
<div style="display: flex; justify-content: center;">
|
||||||
|
<img src="assets/Upload.png" alt="Upload firmware" width="60%" />
|
||||||
|
</div>
|
||||||
|
|
||||||
|
|
||||||
|
|
||||||
|
---
|
||||||
|
|
||||||
|
Watch this video from Thomas for a step-by-step guide on flashing the ESP32 and connecting the 01.
|
||||||
|
|
||||||
|
[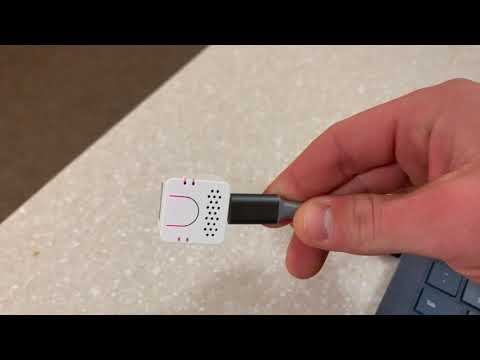](https://www.youtube.com/watch?v=Y76zed8nEE8 "ESP32 Flashing Tutorial")
|
||||||
|
|
@ -0,0 +1,30 @@
|
||||||
|
---
|
||||||
|
title: "ESP32"
|
||||||
|
description: "How to setup the ESP32"
|
||||||
|
---
|
||||||
|
|
||||||
|
To set up the ESP32 for use with 01, follow this guide to install the firmware:
|
||||||
|
|
||||||
|
1. Download [Arduino IDE](https://www.arduino.cc/en/software).
|
||||||
|
2. Get the firmware by copying the contents of [client.ino](https://github.com/OpenInterpreter/01/blob/main/software/source/clients/esp32/src/client/client.ino) from the 01 repository.
|
||||||
|
3. Open Arduino IDE and paste the client.ino contents.
|
||||||
|
4. Go to Tools -> Board -> Boards Manager, search "esp32", then install the boards by Arduino and Espressif.
|
||||||
|
5. Go to Tools -> Manage Libraries, then install the following:
|
||||||
|
|
||||||
|
- M5Atom by M5Stack [Reference](https://www.arduino.cc/reference/en/libraries/m5atom/)
|
||||||
|
- WebSockets by Markus Sattler [Reference](https://www.arduino.cc/reference/en/libraries/websockets/)
|
||||||
|
- AsyncTCP by dvarrel [Reference](https://github.com/dvarrel/AsyncTCP)
|
||||||
|
- ESPAsyncWebServer by lacamera [Reference](https://github.com/lacamera/ESPAsyncWebServer)
|
||||||
|
|
||||||
|
6. To flash the .ino to the board, connect the board to the USB port, select the port from the dropdown on the IDE, then select the M5Atom board (or M5Stack-ATOM if you have that). Click on upload to flash the board.
|
||||||
|
|
||||||
|
Watch this video from Thomas for a step-by-step guide on flashing the ESP32 and connecting the 01.
|
||||||
|
|
||||||
|
<iframe
|
||||||
|
width="560"
|
||||||
|
height="315"
|
||||||
|
src="https://www.youtube.com/embed/Y76zed8nEE8"
|
||||||
|
frameBorder="0"
|
||||||
|
allow="accelerometer; autoplay; clipboard-write; encrypted-media; gyroscope; picture-in-picture"
|
||||||
|
allowfullscreen
|
||||||
|
></iframe>
|
||||||
|
|
@ -1,33 +0,0 @@
|
||||||
---
|
|
||||||
title: "Grimes Build"
|
|
||||||
description: "A simple DIY setup used by Grimes and Bella Poarch at Coachella"
|
|
||||||
---
|
|
||||||
|
|
||||||
# Grimes' Coachella 01 Build
|
|
||||||
|
|
||||||
This guide describes the simple DIY setup used by Grimes and Bella Poarch to interact with the 01 AI assistant at Coachella. The setup consists of two main components taped together:
|
|
||||||
|
|
||||||
<CardGroup cols={2}>
|
|
||||||
<Card title="Macro Keypad" icon="keyboard" href="https://www.amazon.com/dp/B0BDRPQLW1?ref=ppx_yo2ov_dt_b_fed_asin_title&th=1">
|
|
||||||
Purchase on Amazon
|
|
||||||
</Card>
|
|
||||||
<Card title="Microphone" icon="microphone" href="https://www.amazon.com/dp/B08LGWSCJD?ref=ppx_yo2ov_dt_b_fed_asin_title">
|
|
||||||
Purchase on Amazon
|
|
||||||
</Card>
|
|
||||||
</CardGroup>
|
|
||||||
|
|
||||||
## Assembly
|
|
||||||
|
|
||||||
1. Purchase the macro keypad and microphone using the links above.
|
|
||||||
2. Simply tape the microphone to the macro keypad.
|
|
||||||
|
|
||||||
## Setup
|
|
||||||
|
|
||||||
1. Install the [01 Desktop Client](/client/desktop) on your computer.
|
|
||||||
2. Remap the buttons on the macro keypad to trigger the hotkey that activates the 01 AI assistant.
|
|
||||||
|
|
||||||
## Usage
|
|
||||||
|
|
||||||
1. Start the 01 Desktop Client on your computer.
|
|
||||||
2. Press the remapped button on the macro keypad to activate the 01 AI assistant.
|
|
||||||
3. Speak into the attached microphone to interact with the AI.
|
|
||||||
|
|
@ -1,39 +0,0 @@
|
||||||
---
|
|
||||||
title: "Introduction"
|
|
||||||
description: "Explore various hardware configurations for the 01 platform"
|
|
||||||
---
|
|
||||||
|
|
||||||
The 01 platform offers flexibility in hardware configurations, allowing you to create a device that suits your needs and preferences. From desktop setups to portable builds, there are multiple options to bring the 01 experience to life.
|
|
||||||
|
|
||||||
<CardGroup cols={3}>
|
|
||||||
<Card
|
|
||||||
title="01 Light"
|
|
||||||
icon="circle"
|
|
||||||
href="/hardware/01-light/introduction"
|
|
||||||
description="Create a simplified, lightweight version of the 01 device."
|
|
||||||
/>
|
|
||||||
<Card
|
|
||||||
title="Desktop Setup"
|
|
||||||
icon="desktop"
|
|
||||||
href="/hardware/desktop"
|
|
||||||
description="Create a powerful 01 setup using your existing computer hardware."
|
|
||||||
/>
|
|
||||||
<Card
|
|
||||||
title="Grimes Build"
|
|
||||||
icon="microchip"
|
|
||||||
href="/hardware/grimes"
|
|
||||||
description="Build a portable 01 device inspired by Grimes' custom hardware."
|
|
||||||
/>
|
|
||||||
<Card
|
|
||||||
title="Custom Builds"
|
|
||||||
icon="screwdriver-wrench"
|
|
||||||
href="/hardware/custom"
|
|
||||||
description="Explore unique and creative ways to build your own 01 device."
|
|
||||||
/>
|
|
||||||
<Card
|
|
||||||
title="Mini Phone"
|
|
||||||
icon="mobile"
|
|
||||||
href="/hardware/mini-phone"
|
|
||||||
description="Transform a small smartphone into a dedicated 01 device."
|
|
||||||
/>
|
|
||||||
</CardGroup>
|
|
||||||
|
|
@ -1,18 +0,0 @@
|
||||||
---
|
|
||||||
title: "Mini Phone"
|
|
||||||
description: "A compact, dedicated device for 01"
|
|
||||||
---
|
|
||||||
|
|
||||||

|
|
||||||
|
|
||||||
To create your own mini-phone for 01:
|
|
||||||
|
|
||||||
1. Install the 01 App on a small smartphone. For installation instructions, visit the [Android & iOS client page](/client/android-ios).
|
|
||||||
|
|
||||||
2. Purchase a mini smartphone to use as your dedicated 01 device:
|
|
||||||
|
|
||||||
<Card title="Mini Smartphone" icon="mobile" href="https://www.amazon.com/FDMDAF-Smartphone-Cellphone-Lightweight-Unlocked/dp/B0CYGZFC54/ref=sr_1_2">
|
|
||||||
Buy on Amazon
|
|
||||||
</Card>
|
|
||||||
|
|
||||||
Once you have the app installed on your mini smartphone, you'll have a compact, dedicated device for interacting with 01.
|
|
||||||
|
|
@ -1,10 +1,9 @@
|
||||||
---
|
---
|
||||||
title: "Native iOS App"
|
title: "Community Apps"
|
||||||
|
description: "Apps built by the community"
|
||||||
---
|
---
|
||||||
|
|
||||||
<Info>This client uses the [light](/server/light) server.</Info>
|
## Native iOS app by [eladekkal](https://github.com/eladdekel).
|
||||||
|
|
||||||
**Thank you [eladekkal](https://github.com/eladdekel) for your native iOS contribution!**
|
|
||||||
|
|
||||||
To run it on your device, you can either install the app directly through the current TestFlight [here](https://testflight.apple.com/join/v8SyuzMT), or build from the source code files in Xcode on your Mac.
|
To run it on your device, you can either install the app directly through the current TestFlight [here](https://testflight.apple.com/join/v8SyuzMT), or build from the source code files in Xcode on your Mac.
|
||||||
|
|
||||||
|
|
@ -0,0 +1,39 @@
|
||||||
|
---
|
||||||
|
title: "Development"
|
||||||
|
description: "How to get your 01 mobile app"
|
||||||
|
---
|
||||||
|
|
||||||
|
## [React Native app](https://github.com/OpenInterpreter/01/tree/main/software/source/clients/mobile)
|
||||||
|
|
||||||
|
Work in progress, we will continue to improve this application.
|
||||||
|
|
||||||
|
If you want to run it on your device, you will need to install [Expo Go](https://expo.dev/go) on your mobile device.
|
||||||
|
|
||||||
|
### Setup Instructions
|
||||||
|
|
||||||
|
- [Install 01 software](/software/installation) on your machine
|
||||||
|
|
||||||
|
- Run the Expo server:
|
||||||
|
|
||||||
|
```shell
|
||||||
|
cd software/source/clients/mobile/react-native
|
||||||
|
npm install # install dependencies
|
||||||
|
npx expo start # start local expo development server
|
||||||
|
```
|
||||||
|
|
||||||
|
This will produce a QR code that you can scan with Expo Go on your mobile device.
|
||||||
|
|
||||||
|
Open **Expo Go** on your mobile device and select _Scan QR code_ to scan the QR code produced by the `npx expo start` command.
|
||||||
|
|
||||||
|
- Run 01:
|
||||||
|
|
||||||
|
```shell
|
||||||
|
cd software # cd into `software`
|
||||||
|
poetry run 01 --mobile # exposes QR code for 01 Light server
|
||||||
|
```
|
||||||
|
|
||||||
|
### Using the App
|
||||||
|
|
||||||
|
In the 01 mobile app, select _Scan Code_ to scan the QR code produced by the `poetry run 01 --mobile` command.
|
||||||
|
|
||||||
|
Press and hold the button to speak, release to make the request. To rescan the QR code, swipe left on the screen to go back.
|
||||||
|
|
@ -0,0 +1,15 @@
|
||||||
|
---
|
||||||
|
title: "Download"
|
||||||
|
description: "How to get your 01 mobile app"
|
||||||
|
---
|
||||||
|
|
||||||
|
Using your phone is a great way to control 01. There are multiple options available.
|
||||||
|
|
||||||
|
<CardGroup cols={2}>
|
||||||
|
<Card title="iOS" icon="apple">
|
||||||
|
Coming soon
|
||||||
|
</Card>
|
||||||
|
<Card title="Android" icon="android">
|
||||||
|
Coming soon
|
||||||
|
</Card>
|
||||||
|
</CardGroup>
|
||||||
|
|
@ -1,28 +1,7 @@
|
||||||
---
|
---
|
||||||
title: "Privacy Policy"
|
title: "Privacy Policy"
|
||||||
description: "Understand how we collect, use, and protect your data."
|
|
||||||
---
|
---
|
||||||
|
|
||||||
<CardGroup cols={2}>
|
|
||||||
<Card
|
|
||||||
title="Privacy Policy"
|
|
||||||
icon="shield-check"
|
|
||||||
href="/legal/privacy-policy"
|
|
||||||
>
|
|
||||||
Understand how we collect, use, and protect your data.
|
|
||||||
</Card>
|
|
||||||
|
|
||||||
<Card
|
|
||||||
title="Terms of Service"
|
|
||||||
icon="file-contract"
|
|
||||||
href="/legal/terms-of-service"
|
|
||||||
>
|
|
||||||
Understand your rights and responsibilities when using the 01 App.
|
|
||||||
</Card>
|
|
||||||
</CardGroup>
|
|
||||||
|
|
||||||
# Privacy Policy
|
|
||||||
|
|
||||||
Last updated: August 8th, 2024
|
Last updated: August 8th, 2024
|
||||||
|
|
||||||
## 1. Introduction
|
## 1. Introduction
|
||||||
|
|
@ -104,4 +83,3 @@ Our app does not use cookies or web tracking technologies.
|
||||||
## 14. Consent
|
## 14. Consent
|
||||||
|
|
||||||
By using the 01 App, you consent to this Privacy Policy.
|
By using the 01 App, you consent to this Privacy Policy.
|
||||||
|
|
||||||
|
|
@ -0,0 +1,67 @@
|
||||||
|
# Open Interpreter Fulfillment Policy for the 01 Light
|
||||||
|
|
||||||
|
This Policy outlines how **OPEN INTERPRETER, INC. DBA Open Interpreter** ("Company," "we," or "us") fulfills orders, handles shipping, and processes returns for the **01 Light** product.
|
||||||
|
|
||||||
|
## 1. Product Description
|
||||||
|
|
||||||
|
The **01 Light** is a physical product sold by Open Interpreter, Inc.
|
||||||
|
|
||||||
|
## 2. Delivery Policy
|
||||||
|
|
||||||
|
### 2.1. Shipping Methods
|
||||||
|
|
||||||
|
We ship the **01 Light** via standard shipping through our preferred carriers.
|
||||||
|
|
||||||
|
### 2.2. Shipping Timeframes
|
||||||
|
|
||||||
|
We strive to process and ship orders promptly. Estimated delivery timeframes will be provided in the near future based on your shipping address and chosen shipping method.
|
||||||
|
|
||||||
|
### 2.3. Shipping Fees
|
||||||
|
|
||||||
|
Shipping fees, if applicable, will be calculated and displayed during checkout based on your shipping address and chosen shipping method.
|
||||||
|
|
||||||
|
## 3. Refund Policy
|
||||||
|
|
||||||
|
### 3.1. Defective Product
|
||||||
|
|
||||||
|
If you receive a defective **01 Light**, please contact our customer support team within 14 days of delivery. We will arrange for a replacement or issue a full refund, including shipping costs.
|
||||||
|
|
||||||
|
### 3.2. Incorrect Shipment
|
||||||
|
|
||||||
|
If you receive an incorrect product, please contact our customer support team within 14 days of delivery. We will arrange for the correct product to be shipped to you and provide a prepaid shipping label for the return of the incorrect item.
|
||||||
|
|
||||||
|
## 4. Return Policy
|
||||||
|
|
||||||
|
### 4.1. Eligibility
|
||||||
|
|
||||||
|
The **01 Light** may be returned within 30 days of delivery for a refund, provided that the product is unused, in its original packaging, and in resalable condition.
|
||||||
|
|
||||||
|
### 4.2. Return Shipping
|
||||||
|
|
||||||
|
The customer is responsible for return shipping costs, unless the return is due to our error (e.g., defective product or incorrect shipment).
|
||||||
|
|
||||||
|
### 4.3. Refund Processing
|
||||||
|
|
||||||
|
Upon receipt and inspection of the returned product, we will issue a refund for the purchase price, less any applicable restocking fees, to the original payment method.
|
||||||
|
|
||||||
|
**Return Address:**
|
||||||
|
Open Interpreter Inc.
|
||||||
|
505 Broadway E
|
||||||
|
PMB 323
|
||||||
|
Seattle, WA 98102
|
||||||
|
|
||||||
|
## 5. Cancellation Policy
|
||||||
|
|
||||||
|
### 5.1. Order Cancellation
|
||||||
|
|
||||||
|
You may cancel your order for the **01 Light** at no cost any time before the order has been processed and shipped. Please contact our customer support team to request a cancellation.
|
||||||
|
|
||||||
|
### 5.2. Processed Orders
|
||||||
|
|
||||||
|
Once an order has been processed and shipped, it can no longer be cancelled. You may request a return in accordance with our Return Policy.
|
||||||
|
|
||||||
|
## 6. Customer Support
|
||||||
|
|
||||||
|
For inquiries, requests, or concerns regarding your order, refund, return, or any other aspect of this Policy, please contact our customer support team via call or text to **(206) 701-9374** or via email at **help@openinterpreter.com**. We will make every effort to address your concerns promptly and provide a satisfactory resolution in accordance with this Policy and applicable laws.
|
||||||
|
|
||||||
|
This Policy is governed by and construed in accordance with the laws of the State of Washington, without giving effect to any principles of conflicts of law.
|
||||||
|
|
@ -0,0 +1,85 @@
|
||||||
|
---
|
||||||
|
title: "Privacy Policy"
|
||||||
|
---
|
||||||
|
|
||||||
|
Last updated: August 8th, 2024
|
||||||
|
|
||||||
|
## 1. Introduction
|
||||||
|
|
||||||
|
Welcome to the 01 App. We are committed to protecting your privacy and providing a safe, AI-powered chat experience. This Privacy Policy explains how we collect, use, and protect your information when you use our app.
|
||||||
|
|
||||||
|
## 2. Information We Collect
|
||||||
|
|
||||||
|
### 2.1 When Using Our Cloud Service
|
||||||
|
|
||||||
|
If you choose to use our cloud service, we collect and store:
|
||||||
|
|
||||||
|
- Your email address
|
||||||
|
- Transcriptions of your interactions with our AI assistant
|
||||||
|
- Any images you send to or receive from the AI assistant
|
||||||
|
|
||||||
|
### 2.2 When Using Self-Hosted Server
|
||||||
|
|
||||||
|
If you connect to your own self-hosted server, we do not collect or store any of your data, including your email address.
|
||||||
|
|
||||||
|
## 3. How We Use Your Information
|
||||||
|
|
||||||
|
We use the collected information solely for the purpose of providing and improving our AI chat service. This includes:
|
||||||
|
|
||||||
|
- Facilitating communication between you and our AI assistant
|
||||||
|
- Improving the accuracy and relevance of AI responses
|
||||||
|
- Analyzing usage patterns to enhance user experience
|
||||||
|
|
||||||
|
## 4. Data Storage and Security
|
||||||
|
|
||||||
|
We take appropriate measures to protect your data from unauthorized access, alteration, or destruction. All data is stored securely and accessed only by authorized personnel.
|
||||||
|
|
||||||
|
## 5. Data Sharing and Third-Party Services
|
||||||
|
|
||||||
|
We do not sell, trade, or otherwise transfer your personally identifiable information to outside parties. This does not include trusted third parties who assist us in operating our app, conducting our business, or servicing you, as long as those parties agree to keep this information confidential.
|
||||||
|
|
||||||
|
We may use third-party services for analytics and app functionality. These services may collect anonymous usage data to help us improve the app.
|
||||||
|
|
||||||
|
## 6. Data Retention and Deletion
|
||||||
|
|
||||||
|
We retain your data for as long as your account is active or as needed to provide you services. If you wish to cancel your account or request that we no longer use your information, please contact us using the information in Section 11.
|
||||||
|
|
||||||
|
## 7. Your Rights
|
||||||
|
|
||||||
|
You have the right to:
|
||||||
|
|
||||||
|
- Access the personal information we hold about you
|
||||||
|
- Request correction of any inaccurate information
|
||||||
|
- Request deletion of your data from our systems
|
||||||
|
|
||||||
|
To exercise these rights, please contact us using the information provided in Section 11.
|
||||||
|
|
||||||
|
## 8. Children's Privacy
|
||||||
|
|
||||||
|
Our app is not intended for children under the age of 13. We do not knowingly collect personal information from children under 13. If you are a parent or guardian and you are aware that your child has provided us with personal information, please contact us.
|
||||||
|
|
||||||
|
## 9. International Data Transfer
|
||||||
|
|
||||||
|
Your information, including personal data, may be transferred to — and maintained on — computers located outside of your state, province, country or other governmental jurisdiction where the data protection laws may differ from those in your jurisdiction.
|
||||||
|
|
||||||
|
## 10. Changes to This Privacy Policy
|
||||||
|
|
||||||
|
We may update our Privacy Policy from time to time. We will notify you of any changes by posting the new Privacy Policy on this page and updating the "Last updated" date.
|
||||||
|
|
||||||
|
## 11. Contact Us
|
||||||
|
|
||||||
|
If you have any questions about this Privacy Policy, please contact us at:
|
||||||
|
|
||||||
|
Email: help@openinterpreter.com
|
||||||
|
|
||||||
|
## 12. California Privacy Rights
|
||||||
|
|
||||||
|
If you are a California resident, you have the right to request information regarding the disclosure of your personal information to third parties for direct marketing purposes, and to opt-out of such disclosures. As stated in this Privacy Policy, we do not share your personal information with third parties for direct marketing purposes.
|
||||||
|
|
||||||
|
## 13. Cookies and Tracking
|
||||||
|
|
||||||
|
Our app does not use cookies or web tracking technologies.
|
||||||
|
|
||||||
|
## 14. Consent
|
||||||
|
|
||||||
|
By using the 01 App, you consent to this Privacy Policy.
|
||||||
|
|
@ -1,73 +0,0 @@
|
||||||
---
|
|
||||||
title: "Terms of Service"
|
|
||||||
description: "Understand your rights and responsibilities when using the 01 App."
|
|
||||||
---
|
|
||||||
|
|
||||||
<CardGroup cols={2}>
|
|
||||||
<Card
|
|
||||||
title="Privacy Policy"
|
|
||||||
icon="shield-check"
|
|
||||||
href="/legal/privacy-policy"
|
|
||||||
>
|
|
||||||
Understand how we collect, use, and protect your data.
|
|
||||||
</Card>
|
|
||||||
|
|
||||||
<Card
|
|
||||||
title="Terms of Service"
|
|
||||||
icon="file-contract"
|
|
||||||
href="/legal/terms-of-service"
|
|
||||||
>
|
|
||||||
Understand your rights and responsibilities when using the 01 App.
|
|
||||||
</Card>
|
|
||||||
</CardGroup>
|
|
||||||
|
|
||||||
|
|
||||||
# Terms of Service
|
|
||||||
|
|
||||||
Last Updated: September 11, 2024
|
|
||||||
|
|
||||||
## 1. Acceptance of Terms
|
|
||||||
|
|
||||||
By using the 01 App ("the App"), you agree to be bound by these Terms of Service. If you do not agree to these terms, do not use the App.
|
|
||||||
|
|
||||||
## 2. Description of Service
|
|
||||||
|
|
||||||
The 01 App is an experimental artificial intelligence chat application that has the capability to execute code on your computer. By using this App, you acknowledge and accept that:
|
|
||||||
|
|
||||||
- The App can control your computer
|
|
||||||
- The App is capable of damaging your system
|
|
||||||
- The App may perform actions that could be considered malicious
|
|
||||||
|
|
||||||
## 3. User Responsibilities
|
|
||||||
|
|
||||||
Before using the App, you must:
|
|
||||||
|
|
||||||
- Back up all your files
|
|
||||||
- Understand the safety implications of running AI-generated code on your computer
|
|
||||||
- Read and agree to these terms and conditions
|
|
||||||
|
|
||||||
## 4. Risks and Disclaimer
|
|
||||||
|
|
||||||
You understand and agree that:
|
|
||||||
|
|
||||||
- The App is experimental and may cause damage to your system
|
|
||||||
- You use the App at your own risk
|
|
||||||
- We are not responsible for any damage, data loss, or other negative consequences resulting from your use of the App
|
|
||||||
|
|
||||||
## 5. Indemnification
|
|
||||||
|
|
||||||
You agree to indemnify and hold harmless the App developers, owners, and affiliates from any claims, damages, or expenses arising from your use of the App.
|
|
||||||
|
|
||||||
## 6. Modifications to Service
|
|
||||||
|
|
||||||
We reserve the right to modify or discontinue the App at any time without notice.
|
|
||||||
|
|
||||||
## 7. Governing Law
|
|
||||||
|
|
||||||
These terms shall be governed by and construed in accordance with the laws of Washington, USA.
|
|
||||||
|
|
||||||
## 8. Contact Information
|
|
||||||
|
|
||||||
For questions about these Terms, please contact us at: help@openinterpreter.com
|
|
||||||
|
|
||||||
By using the 01 App, you acknowledge that you have read, understood, and agree to be bound by these Terms of Service.
|
|
||||||
|
|
@ -33,10 +33,10 @@
|
||||||
},
|
},
|
||||||
"navigation": [
|
"navigation": [
|
||||||
{
|
{
|
||||||
"group": "Setup",
|
"group": "Getting Started",
|
||||||
"pages": [
|
"pages": [
|
||||||
"setup/introduction",
|
"getting-started/introduction",
|
||||||
"setup/installation"
|
"getting-started/getting-started"
|
||||||
]
|
]
|
||||||
},
|
},
|
||||||
{
|
{
|
||||||
|
|
@ -48,29 +48,25 @@
|
||||||
]
|
]
|
||||||
},
|
},
|
||||||
{
|
{
|
||||||
"group": "Server",
|
"group": "Software Setup",
|
||||||
"pages": [
|
"pages": [
|
||||||
"server/introduction",
|
"software/introduction",
|
||||||
"server/livekit",
|
"software/installation",
|
||||||
"server/light",
|
{
|
||||||
"server/configure",
|
"group": "Server",
|
||||||
"server/flags"
|
"pages": [
|
||||||
|
"software/server/introduction",
|
||||||
|
"software/server/livekit-server",
|
||||||
|
"software/server/light-server"
|
||||||
|
]
|
||||||
|
},
|
||||||
|
"software/configure",
|
||||||
|
"software/flags"
|
||||||
]
|
]
|
||||||
},
|
},
|
||||||
{
|
{
|
||||||
"group": "Client",
|
"group": "Hardware Setup",
|
||||||
"pages": [
|
"pages": [
|
||||||
"client/introduction",
|
|
||||||
"client/android-ios",
|
|
||||||
"client/desktop",
|
|
||||||
"client/esp32",
|
|
||||||
"client/native-ios"
|
|
||||||
]
|
|
||||||
},
|
|
||||||
{
|
|
||||||
"group": "Hardware",
|
|
||||||
"pages": [
|
|
||||||
"hardware/introduction",
|
|
||||||
{
|
{
|
||||||
"group": "01 Light",
|
"group": "01 Light",
|
||||||
"pages": [
|
"pages": [
|
||||||
|
|
@ -82,10 +78,22 @@
|
||||||
"hardware/01-light/connect"
|
"hardware/01-light/connect"
|
||||||
]
|
]
|
||||||
},
|
},
|
||||||
|
{
|
||||||
|
"group": "ESP32",
|
||||||
|
"pages": [
|
||||||
|
"hardware/esp32/esp32-setup"
|
||||||
|
]
|
||||||
|
},
|
||||||
|
"hardware/custom_hardware",
|
||||||
"hardware/desktop",
|
"hardware/desktop",
|
||||||
"hardware/mini-phone",
|
{
|
||||||
"hardware/grimes",
|
"group": "Mobile",
|
||||||
"hardware/custom"
|
"pages": [
|
||||||
|
"hardware/mobile/download",
|
||||||
|
"hardware/mobile/development",
|
||||||
|
"hardware/mobile/community-apps"
|
||||||
|
]
|
||||||
|
}
|
||||||
]
|
]
|
||||||
},
|
},
|
||||||
{
|
{
|
||||||
|
|
@ -97,8 +105,8 @@
|
||||||
{
|
{
|
||||||
"group": "Legal",
|
"group": "Legal",
|
||||||
"pages": [
|
"pages": [
|
||||||
"legal/privacy-policy",
|
"legal/fulfillment-policy",
|
||||||
"legal/terms-of-service"
|
"legal/privacy"
|
||||||
]
|
]
|
||||||
}
|
}
|
||||||
],
|
],
|
||||||
|
|
|
||||||
|
|
@ -1,25 +0,0 @@
|
||||||
---
|
|
||||||
title: "Introduction"
|
|
||||||
---
|
|
||||||
|
|
||||||
|
|
||||||
|
|
||||||
The 01 project supports two different server types to accommodate various hardware capabilities and use cases.
|
|
||||||
|
|
||||||
## Server Options
|
|
||||||
|
|
||||||
<CardGroup cols={2}>
|
|
||||||
<Card title="Light Server" icon="microchip" href="/server/light">
|
|
||||||
Optimized for low-power, constrained environments like ESP32 devices.
|
|
||||||
</Card>
|
|
||||||
<Card title="Livekit Server" icon="server" href="/server/livekit">
|
|
||||||
Full-featured server for devices with higher processing power, such as phones, web browsers, and desktop computers.
|
|
||||||
</Card>
|
|
||||||
</CardGroup>
|
|
||||||
|
|
||||||
### Choosing the Right Server
|
|
||||||
|
|
||||||
- **Light Server**: Ideal for embedded systems and IoT devices with limited resources.
|
|
||||||
- **Livekit Server**: Offers robust performance and a full range of features for more capable hardware.
|
|
||||||
|
|
||||||
Select the server that best fits your device and project requirements.
|
|
||||||
|
|
@ -1,77 +0,0 @@
|
||||||
# LiveKit Installation Guide for Windows
|
|
||||||
|
|
||||||
## Required Software
|
|
||||||
|
|
||||||
- Git
|
|
||||||
- Python (version 3.11.9 recommended)
|
|
||||||
- Poetry (Python package manager)
|
|
||||||
- LiveKit server for Windows
|
|
||||||
- FFmpeg
|
|
||||||
|
|
||||||
## Installation Steps
|
|
||||||
|
|
||||||
### 1. Python Installation
|
|
||||||
|
|
||||||
Install Python 3.11.9 (latest version < 3.12) using the binary installer.
|
|
||||||
|
|
||||||
### 2. Poetry Installation
|
|
||||||
|
|
||||||
Poetry installation on Windows can be challenging. If you encounter SSL certificate verification issues, try this workaround:
|
|
||||||
|
|
||||||
1. Download the installation script from [https://install.python-poetry.org/](https://install.python-poetry.org/) and save it as `install-poetry.py`.
|
|
||||||
2. Modify the `get(self, url):` method in the script to disable certificate verification:
|
|
||||||
|
|
||||||
```python
|
|
||||||
def get(self, url):
|
|
||||||
import ssl
|
|
||||||
import certifi
|
|
||||||
request = Request(url)
|
|
||||||
context = ssl.create_default_context(cafile=certifi.where())
|
|
||||||
context.check_hostname = False
|
|
||||||
context.verify_mode = ssl.CERT_NONE
|
|
||||||
with closing(urlopen(request, context=context)) as r:
|
|
||||||
return r.read()
|
|
||||||
```
|
|
||||||
|
|
||||||
3. Run the modified script to install Poetry.
|
|
||||||
4. Add Poetry's bin directory to your PATH:
|
|
||||||
- Path: `C:\Users\[USERNAME]\AppData\Roaming\Python\Scripts`
|
|
||||||
- Follow the guide at: [https://www.java.com/en/download/help/path.html](https://www.java.com/en/download/help/path.html)
|
|
||||||
|
|
||||||
### 3. LiveKit Server Installation
|
|
||||||
|
|
||||||
1. Download the latest release of LiveKit server for Windows (e.g., `livekit_1.7.2_windows_amd64.zip`).
|
|
||||||
2. Extract the `livekit-server.exe` file to your `/software` directory.
|
|
||||||
|
|
||||||
### 4. FFmpeg Installation
|
|
||||||
|
|
||||||
1. Download the FFmpeg Windows build from: [https://github.com/BtbN/FFmpeg-Builds/releases](https://github.com/BtbN/FFmpeg-Builds/releases)
|
|
||||||
- Choose the `ffmpeg-master-latest-win64-gpl.zip` (non-shared suffix) version.
|
|
||||||
2. Extract the compressed zip and add the FFmpeg bin directory to your PATH.
|
|
||||||
|
|
||||||
### 5. Final Setup
|
|
||||||
|
|
||||||
1. Run `poetry install`. If you encounter an error about Microsoft Visual C++, install "Microsoft C++ Build Tools":
|
|
||||||
- Download from: [https://visualstudio.microsoft.com/visual-cpp-build-tools/](https://visualstudio.microsoft.com/visual-cpp-build-tools/)
|
|
||||||
- In the installation popup, select "Desktop Development with C++" with preselected components.
|
|
||||||
|
|
||||||
2. Set up your Anthropic API key:
|
|
||||||
```
|
|
||||||
setx ANTHROPIC_API_KEY [your_api_key]
|
|
||||||
```
|
|
||||||
|
|
||||||
3. Modify `main.py` to correctly locate and run the LiveKit server:
|
|
||||||
- Set the LiveKit path:
|
|
||||||
```python
|
|
||||||
livekit_path = "path/to/your/01/software/livekit-server"
|
|
||||||
```
|
|
||||||
- Modify the server command for Windows:
|
|
||||||
```python
|
|
||||||
f"{livekit_path} --dev --bind {server_host} --port {server_port}"
|
|
||||||
```
|
|
||||||
> Note: Remove the `> /dev/null 2>&1` section from the command as it's not compatible with Windows.
|
|
||||||
|
|
||||||
## Troubleshooting
|
|
||||||
|
|
||||||
- If you encounter "ffmpeg not found" errors or issues when sending messages, ensure FFmpeg is correctly installed and added to your PATH.
|
|
||||||
- For any SSL certificate issues during installation, refer to the Poetry installation workaround provided above.
|
|
||||||
|
|
@ -1,146 +0,0 @@
|
||||||
---
|
|
||||||
title: "Installation"
|
|
||||||
---
|
|
||||||
|
|
||||||
## Prerequisites
|
|
||||||
|
|
||||||
To run the 01 on your computer, you will need to install the following essential packages:
|
|
||||||
|
|
||||||
- Git
|
|
||||||
- Python (version 3.11.x recommended)
|
|
||||||
- Poetry
|
|
||||||
- FFmpeg
|
|
||||||
|
|
||||||
<Tabs>
|
|
||||||
<Tab title="MacOS">
|
|
||||||
### MacOS Installation
|
|
||||||
|
|
||||||
1. **Git**: If you don't already have it, download and install Git from its [official website](https://git-scm.com/downloads).
|
|
||||||
|
|
||||||
2. **Python**:
|
|
||||||
- Download **Python 3.11.x** from the [official Python website](https://www.python.org/downloads/).
|
|
||||||
- During installation, make sure to check "Add Python to PATH".
|
|
||||||
|
|
||||||
3. **Poetry**:
|
|
||||||
- Follow the [official Poetry installation guide](https://python-poetry.org/docs/#installing-with-the-official-installer).
|
|
||||||
|
|
||||||
4. **FFmpeg and other dependencies**:
|
|
||||||
We recommend using Homebrew to install the required dependencies:
|
|
||||||
|
|
||||||
```bash
|
|
||||||
brew install portaudio ffmpeg cmake
|
|
||||||
```
|
|
||||||
|
|
||||||
</Tab>
|
|
||||||
<Tab title="Windows">
|
|
||||||
### Windows Installation
|
|
||||||
|
|
||||||
1. **Git**: Download and install [Git for Windows](https://git-scm.com/download/win).
|
|
||||||
|
|
||||||
2. **Python**:
|
|
||||||
- Download Python 3.11.x from the [official Python website](https://www.python.org/downloads/windows/).
|
|
||||||
- During installation, ensure you check "Add Python to PATH".
|
|
||||||
|
|
||||||
3. **Microsoft C++ Build Tools**:
|
|
||||||
- Download from [Microsoft's website](https://visualstudio.microsoft.com/visual-cpp-build-tools/).
|
|
||||||
- Run the installer and select "Desktop development with C++" from the Workloads tab.
|
|
||||||
- This step is crucial for Poetry to work correctly.
|
|
||||||
|
|
||||||
4. **Poetry**:
|
|
||||||
- If the standard installation method fails due to SSL issues, try this workaround:
|
|
||||||
1. Download the installation script from [https://install.python-poetry.org/](https://install.python-poetry.org/) and save it as `install-poetry.py`.
|
|
||||||
2. Open the file and replace the `get(self, url):` method with:
|
|
||||||
```python
|
|
||||||
def get(self, url):
|
|
||||||
import ssl
|
|
||||||
import certifi
|
|
||||||
request = Request(url, headers={"User-Agent": "Python Poetry"})
|
|
||||||
context = ssl.create_default_context(cafile=certifi.where())
|
|
||||||
context.check_hostname = False
|
|
||||||
context.verify_mode = ssl.CERT_NONE
|
|
||||||
with closing(urlopen(request, context=context)) as r:
|
|
||||||
return r.read()
|
|
||||||
```
|
|
||||||
3. Run the modified script to install Poetry.
|
|
||||||
- Add Poetry to your PATH:
|
|
||||||
1. Press Win + R, type "sysdm.cpl", and press Enter.
|
|
||||||
2. Go to the "Advanced" tab and click "Environment Variables".
|
|
||||||
3. Under "User variables", find "Path" and click "Edit".
|
|
||||||
4. Click "New" and add: `C:\Users\<USERNAME>\AppData\Roaming\Python\Scripts`
|
|
||||||
5. Click "OK" to close all windows.
|
|
||||||
|
|
||||||
5. **FFmpeg**:
|
|
||||||
- Download the latest FFmpeg build from the [BtbN GitHub releases page](https://github.com/BtbN/FFmpeg-Builds/releases).
|
|
||||||
- Choose the `ffmpeg-master-latest-win64-gpl.zip` (non-shared suffix) file.
|
|
||||||
- Extract the compressed zip file.
|
|
||||||
- Add the FFmpeg `bin` folder to your PATH:
|
|
||||||
1. Press Win + R, type "sysdm.cpl", and press Enter.
|
|
||||||
2. Go to the "Advanced" tab and click "Environment Variables".
|
|
||||||
3. Under "System variables", find "Path" and click "Edit".
|
|
||||||
4. Click "New" and add the full path to the FFmpeg `bin` folder (e.g., `C:\path\to\ffmpeg\bin`).
|
|
||||||
5. Click "OK" to close all windows.
|
|
||||||
|
|
||||||
## Troubleshooting
|
|
||||||
|
|
||||||
1. **Poetry Install Error**: If you encounter an error stating "Microsoft Visual C++ 14.0 or greater is required" when running `poetry install`, make sure you have properly installed the Microsoft C++ Build Tools as described in step 3 of the Windows installation guide.
|
|
||||||
|
|
||||||
2. **FFmpeg Not Found**: If you receive an error saying FFmpeg is not found after installation, ensure that you've correctly added the FFmpeg `bin` folder to your system PATH as described in step 5 of the Windows installation guide.
|
|
||||||
|
|
||||||
3. **Server Connection Issues**: If the server connects but you encounter errors when sending messages, double-check that all dependencies are correctly installed and that FFmpeg is properly set up in your PATH.
|
|
||||||
|
|
||||||
</Tab>
|
|
||||||
<Tab title="Linux">
|
|
||||||
### Linux Installation (Ubuntu)
|
|
||||||
|
|
||||||
1. **Git**: If you don't already have it, install Git using:
|
|
||||||
```bash
|
|
||||||
sudo apt-get update
|
|
||||||
sudo apt-get install git
|
|
||||||
```
|
|
||||||
|
|
||||||
2. **Python**:
|
|
||||||
- Install Python 3.11.x using:
|
|
||||||
```bash
|
|
||||||
sudo apt-get install python3.11
|
|
||||||
```
|
|
||||||
|
|
||||||
3. **Poetry**:
|
|
||||||
- Follow the [official Poetry installation guide](https://python-poetry.org/docs/#installing-with-the-official-installer).
|
|
||||||
|
|
||||||
4. **FFmpeg and other dependencies**:
|
|
||||||
Install the required packages:
|
|
||||||
|
|
||||||
```bash
|
|
||||||
sudo apt-get update
|
|
||||||
sudo apt-get install portaudio19-dev ffmpeg cmake
|
|
||||||
```
|
|
||||||
|
|
||||||
</Tab>
|
|
||||||
</Tabs>
|
|
||||||
|
|
||||||
## Install 01
|
|
||||||
|
|
||||||
Now, clone the repo and navigate into the 01 directory:
|
|
||||||
|
|
||||||
```bash
|
|
||||||
git clone https://github.com/OpenInterpreter/01.git
|
|
||||||
cd 01
|
|
||||||
```
|
|
||||||
|
|
||||||
Then, navigate to the project's software directory:
|
|
||||||
|
|
||||||
```bash
|
|
||||||
cd software
|
|
||||||
```
|
|
||||||
|
|
||||||
**Your current working directory should now be `01/software`.**
|
|
||||||
|
|
||||||
Finally, install the project's dependencies in a virtual environment managed by Poetry.
|
|
||||||
|
|
||||||
```bash
|
|
||||||
poetry install
|
|
||||||
```
|
|
||||||
|
|
||||||
Now you should be ready to [run the 01](/server/).
|
|
||||||
|
|
||||||
First, we recommend you familiarize yourself with our [safety report](/safety/).
|
|
||||||
|
|
@ -1,43 +0,0 @@
|
||||||
---
|
|
||||||
title: Introduction
|
|
||||||
description: "The #1 open-source voice interface"
|
|
||||||
---
|
|
||||||
|
|
||||||
<img
|
|
||||||
src="https://raw.githubusercontent.com/OpenInterpreter/01/main/docs/assets/banner.png"
|
|
||||||
noZoom
|
|
||||||
/>
|
|
||||||
|
|
||||||
The **01** is an open-source platform for intelligent devices, inspired by the *Rabbit R1* and *Star Trek* computer.
|
|
||||||
|
|
||||||
Assistants powered by the 01 can execute code, browse the web, read and create files, control third-party software, and beyond.
|
|
||||||
|
|
||||||
<br></br>
|
|
||||||
|
|
||||||
<Card
|
|
||||||
title="Install the 01"
|
|
||||||
icon="arrow-right"
|
|
||||||
href="/setup/installation"
|
|
||||||
horizontal
|
|
||||||
></Card>
|
|
||||||
|
|
||||||
---
|
|
||||||
|
|
||||||
# Table of Contents
|
|
||||||
|
|
||||||
### Software
|
|
||||||
|
|
||||||
<CardGroup cols={2}>
|
|
||||||
<Card title="Server" icon="server" href="/server/introduction">
|
|
||||||
The brain of the 01 system that runs on your computer. It processes input, executes commands, generates responses, and manages core logic using Open Interpreter.
|
|
||||||
</Card>
|
|
||||||
<Card title="Client" icon="microphone" href="/client/introduction">
|
|
||||||
The voice interface that captures and transmits audio input, plays back audio responses, and allows users to interact with the server.
|
|
||||||
</Card>
|
|
||||||
</CardGroup>
|
|
||||||
|
|
||||||
### Hardware
|
|
||||||
|
|
||||||
<Card title="Build Options" icon="microchip" href="/hardware/introduction">
|
|
||||||
Explore various hardware configurations, from desktop setups to ESP32-based portable builds and custom integrations. Find guides for assembling your own 01 device.
|
|
||||||
</Card>
|
|
||||||
|
|
@ -9,7 +9,7 @@ description: "Customize the behaviour of your 01 from the CLI"
|
||||||
|
|
||||||
Specify the server to run.
|
Specify the server to run.
|
||||||
|
|
||||||
Valid arguments are either [livekit](/server/livekit) or [light](/server/light)
|
Valid arguments are either [livekit](/software/livekit-server) or [light](/software/light-server)
|
||||||
|
|
||||||
```
|
```
|
||||||
poetry run 01 --server light
|
poetry run 01 --server light
|
||||||
|
|
@ -10,11 +10,12 @@ To install the 01 software:
|
||||||
```bash
|
```bash
|
||||||
# Clone the repo and navigate into the 01 directory
|
# Clone the repo and navigate into the 01 directory
|
||||||
git clone https://github.com/OpenInterpreter/01.git
|
git clone https://github.com/OpenInterpreter/01.git
|
||||||
cd 01
|
|
||||||
```
|
```
|
||||||
|
|
||||||
## Run the 01
|
## Run the 01
|
||||||
|
|
||||||
|
In order to run 01 on your computer, use [Poetry](https://python-poetry.org/docs/#installing-with-the-official-installer).
|
||||||
|
|
||||||
Navigate to the project's software directory:
|
Navigate to the project's software directory:
|
||||||
|
|
||||||
```bash
|
```bash
|
||||||
|
|
@ -0,0 +1,45 @@
|
||||||
|
---
|
||||||
|
title: "Overview"
|
||||||
|
description: "The software that powers 01"
|
||||||
|
---
|
||||||
|
|
||||||
|
## Components
|
||||||
|
|
||||||
|
The 01 software consists of two main components:
|
||||||
|
|
||||||
|
### Server
|
||||||
|
|
||||||
|
The server runs on your computer and acts as the brain of the 01 system. It:
|
||||||
|
|
||||||
|
- Passes input to the interpreter
|
||||||
|
- Executes commands on your computer
|
||||||
|
- Returns responses
|
||||||
|
|
||||||
|
### Client
|
||||||
|
|
||||||
|
The client is responsible for capturing audio for controlling computers running the 01 server. It:
|
||||||
|
|
||||||
|
- Transmits audio to the server
|
||||||
|
- Plays back responses
|
||||||
|
|
||||||
|
## Customization
|
||||||
|
|
||||||
|
One of the key features of the 01 ecosystem is its modularity. You can:
|
||||||
|
|
||||||
|
- Use different language models
|
||||||
|
- Customize the system's behavior through profiles
|
||||||
|
- Create and integrate custom hardware
|
||||||
|
|
||||||
|
## Getting Started
|
||||||
|
|
||||||
|
To begin using 01:
|
||||||
|
|
||||||
|
1. [Install](/software/installation) the software
|
||||||
|
2. [Run](/software/server/introduction) the Server
|
||||||
|
3. [Connect](/hardware/01-light/connect) the Client
|
||||||
|
|
||||||
|
For more advanced usage, check out our guides on [configuration](/software/configure).
|
||||||
|
|
||||||
|
## Contributing
|
||||||
|
|
||||||
|
As an open-source project, we welcome contributions from the community. Whether you're interested in improving the core software, developing new features, or creating custom hardware integrations, there are many ways to get involved.
|
||||||
|
|
@ -0,0 +1,19 @@
|
||||||
|
---
|
||||||
|
title: "Choosing a server"
|
||||||
|
description: "The servers that powers 01"
|
||||||
|
---
|
||||||
|
|
||||||
|
<CardGroup cols={2}>
|
||||||
|
<Card title="Light" href="/software/server/light-server">
|
||||||
|
Light Server
|
||||||
|
</Card>
|
||||||
|
<Card title="Livekit" href="/software/server/livekit-server">
|
||||||
|
Livekit Server
|
||||||
|
</Card>
|
||||||
|
</CardGroup>
|
||||||
|
|
||||||
|
## Livekit vs. Light Server
|
||||||
|
|
||||||
|
- **Livekit Server**: Designed for devices with higher processing power, such as phones, web browsers, and more capable hardware. It offers a full range of features and robust performance.
|
||||||
|
|
||||||
|
- **Light Server**: We have another lightweight server called the Light server, specifically designed for ESP32 devices. It's optimized for low-power, constrained environments.
|
||||||
|
|
@ -1,6 +1,6 @@
|
||||||
---
|
---
|
||||||
title: "Light Server"
|
title: "Light Server"
|
||||||
description: "A lightweight voice server for your 01"
|
description: "A lightweight voice server for your 0"
|
||||||
---
|
---
|
||||||
|
|
||||||
## Overview
|
## Overview
|
||||||
|
|
@ -36,7 +36,7 @@ Before setting up the environment, you need to install Livekit. Follow the instr
|
||||||
```
|
```
|
||||||
|
|
||||||
- **Windows**:
|
- **Windows**:
|
||||||
[View the Windows install instructions here.](/server/windows-livekit)
|
[View the Windows install instructions here.](/software/server/windows-livekit)
|
||||||
|
|
||||||
### Environment Setup
|
### Environment Setup
|
||||||
|
|
||||||
|
|
@ -0,0 +1,70 @@
|
||||||
|
LiveKit Installation and Usage Guide for Windows
|
||||||
|
|
||||||
|
Prerequisites
|
||||||
|
|
||||||
|
Required Software:
|
||||||
|
- IDE (e.g., VSCode, Cursor)
|
||||||
|
- Git
|
||||||
|
- Python (version 3.11.9 recommended)
|
||||||
|
- Poetry (Python package manager)
|
||||||
|
- LiveKit server for Windows
|
||||||
|
- FFmpeg
|
||||||
|
|
||||||
|
Python Installation:
|
||||||
|
1. Install Python 3.11.9 (latest version [less than] 3.12) using the binary installer.
|
||||||
|
|
||||||
|
Poetry Installation:
|
||||||
|
Poetry installation on Windows can be challenging. If you encounter SSL certificate verification issues, try the following workaround:
|
||||||
|
|
||||||
|
1. Download the installation script from https://install.python-poetry.org/ and save it as install-poetry.py.
|
||||||
|
2. Modify the get(self, url): method in the script to disable certificate verification:
|
||||||
|
|
||||||
|
def get(self, url):
|
||||||
|
import ssl
|
||||||
|
import certifi
|
||||||
|
request = Request(url)
|
||||||
|
context = ssl.create_default_context(cafile=certifi.where())
|
||||||
|
context.check_hostname = False
|
||||||
|
context.verify_mode = ssl.CERT_NONE
|
||||||
|
with closing(urlopen(request, context=context)) as r:
|
||||||
|
return r.read()
|
||||||
|
|
||||||
|
3. Run the modified script to install Poetry.
|
||||||
|
4. Add Poetry's bin directory to your PATH:
|
||||||
|
- Path: C:\Users\[USERNAME]\AppData\Roaming\Python\Scripts
|
||||||
|
- Follow the guide at: https://www.java.com/en/download/help/path.html
|
||||||
|
|
||||||
|
LiveKit Server Installation:
|
||||||
|
1. Download the latest release of LiveKit server for Windows (e.g., livekit_1.7.2_windows_amd64.zip).
|
||||||
|
2. Extract the livekit-server.exe file to your /software directory.
|
||||||
|
|
||||||
|
FFmpeg Installation:
|
||||||
|
1. Download the FFmpeg Windows build from: https://github.com/BtbN/FFmpeg-Builds/releases
|
||||||
|
- Choose the ffmpeg-master-latest-win64-gpl.zip (non-shared suffix) version.
|
||||||
|
2. Extract the compressed zip and add the FFmpeg bin directory to your PATH.
|
||||||
|
|
||||||
|
Installation Steps:
|
||||||
|
|
||||||
|
1. Run 'poetry install'. If you encounter an error about Microsoft Visual C++, install "Microsoft C++ Build Tools":
|
||||||
|
- Download from: https://visualstudio.microsoft.com/visual-cpp-build-tools/
|
||||||
|
- In the installation popup, select "Desktop Development with C++" with preselected components.
|
||||||
|
|
||||||
|
2. Set up your Anthropic API key:
|
||||||
|
setx ANTHROPIC_API_KEY [your_api_key]
|
||||||
|
|
||||||
|
3. Modify main.py to correctly locate and run the LiveKit server:
|
||||||
|
- Set the LiveKit path:
|
||||||
|
livekit_path = "path/to/your/01/software/livekit-server"
|
||||||
|
- Modify the server command for Windows:
|
||||||
|
f"{livekit_path} --dev --bind {server_host} --port {server_port}"
|
||||||
|
Note: Remove the '> /dev/null 2>&1' section from the command as it's not compatible with Windows.
|
||||||
|
|
||||||
|
Troubleshooting:
|
||||||
|
|
||||||
|
- If you encounter "ffmpeg not found" errors or issues when sending messages, ensure FFmpeg is correctly installed and added to your PATH.
|
||||||
|
- For any SSL certificate issues during installation, refer to the Poetry installation workaround provided above.
|
||||||
|
|
||||||
|
Additional Notes:
|
||||||
|
|
||||||
|
- This guide assumes you're using Windows. Some commands or paths may need to be adjusted for your specific setup.
|
||||||
|
- Always ensure you're using the latest versions of software and check official documentation for any recent changes.
|
||||||
|
|
@ -1,6 +1,6 @@
|
||||||
/* .rounded-lg {
|
.rounded-lg {
|
||||||
border-radius: 0;
|
border-radius: 0;
|
||||||
} */
|
}
|
||||||
|
|
||||||
/*
|
/*
|
||||||
|
|
||||||
|
|
|
||||||
|
|
@ -111,3 +111,8 @@ description: "Frequently Asked Questions"
|
||||||
transit (TLS 1.2+)". This will be different for Anthropic, Ollama, etc. but
|
transit (TLS 1.2+)". This will be different for Anthropic, Ollama, etc. but
|
||||||
I'd expect all large providers to have the same encryption standards.
|
I'd expect all large providers to have the same encryption standards.
|
||||||
</Accordion>
|
</Accordion>
|
||||||
|
|
||||||
|
- How do you build on top of the 01?
|
||||||
|
- What are minimum hardware requirements?
|
||||||
|
- What firmware do I use to connect? - What ideally do I need in my code to access
|
||||||
|
the server correctly?
|
||||||
|
|
|
||||||
|
|
@ -19,7 +19,6 @@ import time
|
||||||
from dotenv import load_dotenv
|
from dotenv import load_dotenv
|
||||||
import signal
|
import signal
|
||||||
from source.server.livekit.worker import main as worker_main
|
from source.server.livekit.worker import main as worker_main
|
||||||
from source.server.livekit.multimodal import main as multimodal_main
|
|
||||||
import warnings
|
import warnings
|
||||||
import requests
|
import requests
|
||||||
|
|
||||||
|
|
@ -72,11 +71,6 @@ def run(
|
||||||
"--debug",
|
"--debug",
|
||||||
help="Print latency measurements and save microphone recordings locally for manual playback",
|
help="Print latency measurements and save microphone recordings locally for manual playback",
|
||||||
),
|
),
|
||||||
multimodal: bool = typer.Option(
|
|
||||||
False,
|
|
||||||
"--multimodal",
|
|
||||||
help="Run the multimodal agent",
|
|
||||||
),
|
|
||||||
):
|
):
|
||||||
|
|
||||||
threads = []
|
threads = []
|
||||||
|
|
@ -110,13 +104,6 @@ def run(
|
||||||
print(f"Invalid profile path: {profile}")
|
print(f"Invalid profile path: {profile}")
|
||||||
exit(1)
|
exit(1)
|
||||||
|
|
||||||
# Load the profile module from the provided path
|
|
||||||
spec = importlib.util.spec_from_file_location("profile", profile)
|
|
||||||
profile_module = importlib.util.module_from_spec(spec)
|
|
||||||
spec.loader.exec_module(profile_module)
|
|
||||||
|
|
||||||
# Get the interpreter from the profile
|
|
||||||
interpreter = profile_module.interpreter
|
|
||||||
|
|
||||||
### SERVER
|
### SERVER
|
||||||
|
|
||||||
|
|
@ -148,7 +135,7 @@ def run(
|
||||||
args=(
|
args=(
|
||||||
light_server_host,
|
light_server_host,
|
||||||
light_server_port,
|
light_server_port,
|
||||||
interpreter,
|
profile,
|
||||||
voice,
|
voice,
|
||||||
debug
|
debug
|
||||||
),
|
),
|
||||||
|
|
@ -258,12 +245,10 @@ def run(
|
||||||
|
|
||||||
### START LIVEKIT WORKER
|
### START LIVEKIT WORKER
|
||||||
if server == "livekit":
|
if server == "livekit":
|
||||||
time.sleep(1)
|
time.sleep(7)
|
||||||
# These are needed to communicate with the worker's entrypoint
|
# These are needed to communicate with the worker's entrypoint
|
||||||
os.environ['INTERPRETER_SERVER_HOST'] = light_server_host
|
os.environ['INTERPRETER_SERVER_HOST'] = light_server_host
|
||||||
os.environ['INTERPRETER_SERVER_PORT'] = str(light_server_port)
|
os.environ['INTERPRETER_SERVER_PORT'] = str(light_server_port)
|
||||||
os.environ['01_TTS'] = interpreter.tts
|
|
||||||
os.environ['01_STT'] = interpreter.stt
|
|
||||||
|
|
||||||
token = str(api.AccessToken('devkey', 'secret') \
|
token = str(api.AccessToken('devkey', 'secret') \
|
||||||
.with_identity("identity") \
|
.with_identity("identity") \
|
||||||
|
|
@ -273,18 +258,12 @@ def run(
|
||||||
room="my-room",
|
room="my-room",
|
||||||
)).to_jwt())
|
)).to_jwt())
|
||||||
|
|
||||||
# meet_url = f'http://localhost:3000/custom?liveKitUrl={url.replace("http", "ws")}&token={token}\n\n'
|
|
||||||
meet_url = f'https://meet.livekit.io/custom?liveKitUrl={url.replace("http", "ws")}&token={token}\n\n'
|
meet_url = f'https://meet.livekit.io/custom?liveKitUrl={url.replace("http", "ws")}&token={token}\n\n'
|
||||||
print("\n")
|
|
||||||
print("For debugging, you can join a video call with your assistant. Click the link below, then send a chat message that says {CONTEXT_MODE_OFF}, then begin speaking:")
|
|
||||||
print(meet_url)
|
print(meet_url)
|
||||||
|
|
||||||
for attempt in range(30):
|
for attempt in range(30):
|
||||||
try:
|
try:
|
||||||
if multimodal:
|
worker_main(local_livekit_url)
|
||||||
multimodal_main(local_livekit_url)
|
|
||||||
else:
|
|
||||||
worker_main(local_livekit_url)
|
|
||||||
except KeyboardInterrupt:
|
except KeyboardInterrupt:
|
||||||
print("Exiting.")
|
print("Exiting.")
|
||||||
raise
|
raise
|
||||||
|
|
|
||||||
|
|
@ -12,12 +12,12 @@ readme = "../README.md"
|
||||||
|
|
||||||
[tool.poetry.dependencies]
|
[tool.poetry.dependencies]
|
||||||
python = ">=3.10,<3.12"
|
python = ">=3.10,<3.12"
|
||||||
livekit = "^0.17.2"
|
livekit = "^0.12.1"
|
||||||
livekit-agents = "^0.10.0"
|
livekit-agents = "^0.8.6"
|
||||||
livekit-plugins-deepgram = "^0.6.7"
|
livekit-plugins-deepgram = "^0.6.5"
|
||||||
livekit-plugins-openai = "^0.10.1"
|
livekit-plugins-openai = "^0.8.1"
|
||||||
livekit-plugins-silero = "^0.7.1"
|
livekit-plugins-silero = "^0.6.4"
|
||||||
livekit-plugins-elevenlabs = "^0.7.5"
|
livekit-plugins-elevenlabs = "^0.7.3"
|
||||||
segno = "^1.6.1"
|
segno = "^1.6.1"
|
||||||
open-interpreter = {extras = ["os", "server"], version = "^0.3.12"} # You should add a "browser" extra, so selenium isn't in the main package
|
open-interpreter = {extras = ["os", "server"], version = "^0.3.12"} # You should add a "browser" extra, so selenium isn't in the main package
|
||||||
ngrok = "^1.4.0"
|
ngrok = "^1.4.0"
|
||||||
|
|
@ -26,7 +26,6 @@ realtimestt = "^0.2.41"
|
||||||
pynput = "^1.7.7"
|
pynput = "^1.7.7"
|
||||||
yaspin = "^3.0.2"
|
yaspin = "^3.0.2"
|
||||||
pywebview = "^5.2"
|
pywebview = "^5.2"
|
||||||
livekit-plugins-cartesia = "^0.4.2"
|
|
||||||
|
|
||||||
[build-system]
|
[build-system]
|
||||||
requires = ["poetry-core"]
|
requires = ["poetry-core"]
|
||||||
|
|
|
||||||
|
|
@ -1 +0,0 @@
|
||||||
Subproject commit 39869d3252a5d4620a22d57b34cdd65ab9e72ed5
|
|
||||||
|
|
@ -0,0 +1,32 @@
|
||||||
|
# iOS/Android Client
|
||||||
|
|
||||||
|
**_WORK IN PROGRESS_**
|
||||||
|
|
||||||
|
This repository contains the source code for the 01 iOS/Android app. Work in progress, we will continue to improve this application to get it working properly.
|
||||||
|
|
||||||
|
Feel free to improve this and make a pull request!
|
||||||
|
|
||||||
|
If you want to run it on your own, you will need to install Expo Go on your mobile device.
|
||||||
|
|
||||||
|
## Setup Instructions
|
||||||
|
|
||||||
|
Follow the **[software setup steps](https://github.com/OpenInterpreter/01?tab=readme-ov-file#software)** in the main repo's README first before you read this
|
||||||
|
|
||||||
|
```shell
|
||||||
|
cd software/source/clients/mobile/react-native # cd into `react-native`
|
||||||
|
npm install # install dependencies
|
||||||
|
npx expo start # start local development server
|
||||||
|
```
|
||||||
|
|
||||||
|
In **Expo Go** select _Scan QR code_ to scan the QR code produced by the `npx expo start` command
|
||||||
|
|
||||||
|
## Using the App
|
||||||
|
|
||||||
|
```shell
|
||||||
|
cd software # cd into `software`
|
||||||
|
poetry run 01 --mobile # exposes QR code for 01 Light server
|
||||||
|
```
|
||||||
|
|
||||||
|
In the app, select _Scan Code_ to scan the QR code produced by the `poetry run 01 --mobile` command
|
||||||
|
|
||||||
|
Press and hold the button to speak, release to make the request. To rescan the QR code, swipe left on the screen to go back.
|
||||||
|
|
@ -0,0 +1,31 @@
|
||||||
|
import * as React from "react";
|
||||||
|
import { NavigationContainer } from "@react-navigation/native";
|
||||||
|
import { createNativeStackNavigator } from "@react-navigation/native-stack";
|
||||||
|
import HomeScreen from "./src/screens/HomeScreen";
|
||||||
|
import CameraScreen from "./src/screens/Camera";
|
||||||
|
import Main from "./src/screens/Main";
|
||||||
|
import { StatusBar } from "expo-status-bar";
|
||||||
|
|
||||||
|
const Stack = createNativeStackNavigator();
|
||||||
|
|
||||||
|
function App() {
|
||||||
|
return (
|
||||||
|
<>
|
||||||
|
<StatusBar style="light" />
|
||||||
|
<NavigationContainer>
|
||||||
|
<Stack.Navigator
|
||||||
|
initialRouteName="Home"
|
||||||
|
screenOptions={{
|
||||||
|
headerShown: false, // This hides the navigation bar globally
|
||||||
|
}}
|
||||||
|
>
|
||||||
|
<Stack.Screen name="Home" component={HomeScreen} />
|
||||||
|
<Stack.Screen name="Camera" component={CameraScreen} />
|
||||||
|
<Stack.Screen name="Main" component={Main} />
|
||||||
|
</Stack.Navigator>
|
||||||
|
</NavigationContainer>
|
||||||
|
</>
|
||||||
|
);
|
||||||
|
}
|
||||||
|
|
||||||
|
export default App;
|
||||||
|
|
@ -0,0 +1,38 @@
|
||||||
|
{
|
||||||
|
"expo": {
|
||||||
|
"name": "01iOS",
|
||||||
|
"slug": "01iOS",
|
||||||
|
"version": "1.0.0",
|
||||||
|
"orientation": "portrait",
|
||||||
|
"icon": "./assets/icon.png",
|
||||||
|
"userInterfaceStyle": "light",
|
||||||
|
"splash": {
|
||||||
|
"image": "./assets/splash.png",
|
||||||
|
"resizeMode": "contain",
|
||||||
|
"backgroundColor": "#ffffff"
|
||||||
|
},
|
||||||
|
"assetBundlePatterns": ["**/*"],
|
||||||
|
"plugins": [
|
||||||
|
[
|
||||||
|
"expo-camera",
|
||||||
|
{
|
||||||
|
"cameraPermission": "Allow $(PRODUCT_NAME) to access your camera",
|
||||||
|
"microphonePermission": "Allow $(PRODUCT_NAME) to access your microphone",
|
||||||
|
"recordAudioAndroid": true
|
||||||
|
}
|
||||||
|
]
|
||||||
|
],
|
||||||
|
"ios": {
|
||||||
|
"supportsTablet": true
|
||||||
|
},
|
||||||
|
"android": {
|
||||||
|
"adaptiveIcon": {
|
||||||
|
"foregroundImage": "./assets/adaptive-icon.png",
|
||||||
|
"backgroundColor": "#ffffff"
|
||||||
|
}
|
||||||
|
},
|
||||||
|
"web": {
|
||||||
|
"favicon": "./assets/favicon.png"
|
||||||
|
}
|
||||||
|
}
|
||||||
|
}
|
||||||
|
After Width: | Height: | Size: 17 KiB |
|
After Width: | Height: | Size: 1.4 KiB |
|
After Width: | Height: | Size: 22 KiB |
|
After Width: | Height: | Size: 46 KiB |
|
|
@ -0,0 +1,6 @@
|
||||||
|
module.exports = function(api) {
|
||||||
|
api.cache(true);
|
||||||
|
return {
|
||||||
|
presets: ['babel-preset-expo'],
|
||||||
|
};
|
||||||
|
};
|
||||||
|
|
@ -0,0 +1,45 @@
|
||||||
|
{
|
||||||
|
"name": "01ios",
|
||||||
|
"version": "1.0.0",
|
||||||
|
"main": "node_modules/expo/AppEntry.js",
|
||||||
|
"scripts": {
|
||||||
|
"start": "expo start",
|
||||||
|
"android": "expo start --android",
|
||||||
|
"ios": "expo start --ios",
|
||||||
|
"web": "expo start --web",
|
||||||
|
"ts:check": "tsc"
|
||||||
|
},
|
||||||
|
"dependencies": {
|
||||||
|
"@react-navigation/native": "^6.1.14",
|
||||||
|
"@react-navigation/native-stack": "^6.9.22",
|
||||||
|
"expo": "~50.0.8",
|
||||||
|
"expo-av": "~13.10.5",
|
||||||
|
"expo-barcode-scanner": "~12.9.3",
|
||||||
|
"expo-camera": "~14.0.5",
|
||||||
|
"expo-haptics": "~12.8.1",
|
||||||
|
"expo-permissions": "^14.4.0",
|
||||||
|
"expo-status-bar": "~1.11.1",
|
||||||
|
"react": "18.2.0",
|
||||||
|
"react-native": "0.73.4",
|
||||||
|
"react-native-base64": "^0.2.1",
|
||||||
|
"react-native-polyfill-globals": "^3.1.0",
|
||||||
|
"react-native-safe-area-context": "4.8.2",
|
||||||
|
"react-native-screens": "~3.29.0",
|
||||||
|
"text-encoding": "^0.7.0",
|
||||||
|
"zustand": "^4.5.2"
|
||||||
|
},
|
||||||
|
"devDependencies": {
|
||||||
|
"@babel/core": "^7.20.0",
|
||||||
|
"@types/react": "~18.2.45",
|
||||||
|
"@types/react-native-base64": "^0.2.2",
|
||||||
|
"typescript": "^5.1.3"
|
||||||
|
},
|
||||||
|
"ios": {
|
||||||
|
"infoPlist": {
|
||||||
|
"NSAppTransportSecurity": {
|
||||||
|
"NSAllowsArbitraryLoads": true
|
||||||
|
}
|
||||||
|
}
|
||||||
|
},
|
||||||
|
"private": true
|
||||||
|
}
|
||||||
|
|
@ -0,0 +1,113 @@
|
||||||
|
import React, { useState } from "react";
|
||||||
|
import { StyleSheet, Text, TouchableOpacity, View } from "react-native";
|
||||||
|
import { Camera } from "expo-camera";
|
||||||
|
import { useNavigation } from "@react-navigation/native";
|
||||||
|
import { BarCodeScanner } from "expo-barcode-scanner";
|
||||||
|
// import useSoundEffect from "../lib/useSoundEffect";
|
||||||
|
|
||||||
|
export default function CameraScreen() {
|
||||||
|
const [permission, requestPermission] = Camera.useCameraPermissions();
|
||||||
|
// const playYay = useSoundEffect(require("../../assets/yay.wav"));
|
||||||
|
|
||||||
|
const [scanned, setScanned] = useState(false);
|
||||||
|
const navigation = useNavigation();
|
||||||
|
|
||||||
|
if (!permission) {
|
||||||
|
// Component is waiting for permission
|
||||||
|
return <View />;
|
||||||
|
}
|
||||||
|
|
||||||
|
if (!permission.granted) {
|
||||||
|
// No permission granted, request permission
|
||||||
|
return (
|
||||||
|
<View style={styles.container}>
|
||||||
|
<Text>No access to camera</Text>
|
||||||
|
<TouchableOpacity onPress={requestPermission} style={styles.button}>
|
||||||
|
<Text style={styles.text}>Grant Camera Access</Text>
|
||||||
|
</TouchableOpacity>
|
||||||
|
</View>
|
||||||
|
);
|
||||||
|
}
|
||||||
|
|
||||||
|
// function toggleCameraFacing() {
|
||||||
|
// setFacing((current) => (current === "back" ? "front" : "back"));
|
||||||
|
// }
|
||||||
|
|
||||||
|
const handleBarCodeScanned = async ({
|
||||||
|
type,
|
||||||
|
data,
|
||||||
|
}: {
|
||||||
|
type: string;
|
||||||
|
data: string;
|
||||||
|
}) => {
|
||||||
|
// await playYay();
|
||||||
|
setScanned(true);
|
||||||
|
console.log(
|
||||||
|
`Bar code with type ${type} and data ${data} has been scanned!`
|
||||||
|
);
|
||||||
|
// alert(`Scanned URL: ${data}`);
|
||||||
|
|
||||||
|
navigation.navigate("Main", { scannedData: data });
|
||||||
|
};
|
||||||
|
return (
|
||||||
|
<View style={styles.container}>
|
||||||
|
<Camera
|
||||||
|
style={styles.camera}
|
||||||
|
facing={"back"}
|
||||||
|
onBarCodeScanned={scanned ? undefined : handleBarCodeScanned}
|
||||||
|
barCodeScannerSettings={{
|
||||||
|
barCodeTypes: [BarCodeScanner.Constants.BarCodeType.qr],
|
||||||
|
}}
|
||||||
|
>
|
||||||
|
<View style={styles.buttonContainer}>
|
||||||
|
{/* <TouchableOpacity style={styles.button} onPress={toggleCameraFacing}>
|
||||||
|
<Text style={styles.text}>Flip Camera</Text>
|
||||||
|
</TouchableOpacity> */}
|
||||||
|
{scanned && (
|
||||||
|
<TouchableOpacity
|
||||||
|
onPress={() => setScanned(false)}
|
||||||
|
style={styles.button}
|
||||||
|
>
|
||||||
|
<Text numberOfLines={1} style={styles.text}>
|
||||||
|
Scan Again
|
||||||
|
</Text>
|
||||||
|
</TouchableOpacity>
|
||||||
|
)}
|
||||||
|
</View>
|
||||||
|
</Camera>
|
||||||
|
</View>
|
||||||
|
);
|
||||||
|
}
|
||||||
|
|
||||||
|
const styles = StyleSheet.create({
|
||||||
|
container: {
|
||||||
|
flex: 1,
|
||||||
|
flexDirection: "column",
|
||||||
|
justifyContent: "flex-end",
|
||||||
|
position: "relative",
|
||||||
|
},
|
||||||
|
camera: {
|
||||||
|
flex: 1,
|
||||||
|
},
|
||||||
|
buttonContainer: {
|
||||||
|
backgroundColor: "transparent",
|
||||||
|
flexDirection: "row",
|
||||||
|
margin: 2,
|
||||||
|
},
|
||||||
|
button: {
|
||||||
|
position: "absolute",
|
||||||
|
top: 44,
|
||||||
|
left: 4,
|
||||||
|
flex: 0.1,
|
||||||
|
alignSelf: "flex-end",
|
||||||
|
alignItems: "center",
|
||||||
|
backgroundColor: "#000",
|
||||||
|
borderRadius: 10,
|
||||||
|
paddingHorizontal: 8,
|
||||||
|
paddingVertical: 6,
|
||||||
|
},
|
||||||
|
text: {
|
||||||
|
fontSize: 14,
|
||||||
|
color: "white",
|
||||||
|
},
|
||||||
|
});
|
||||||
|
|
@ -0,0 +1,47 @@
|
||||||
|
import React from "react";
|
||||||
|
import { View, Text, TouchableOpacity, StyleSheet } from "react-native";
|
||||||
|
import { useNavigation } from "@react-navigation/native";
|
||||||
|
|
||||||
|
const HomeScreen = () => {
|
||||||
|
const navigation = useNavigation();
|
||||||
|
|
||||||
|
return (
|
||||||
|
<View style={styles.container}>
|
||||||
|
{/* <View style={styles.circle} /> */}
|
||||||
|
<TouchableOpacity
|
||||||
|
style={styles.button}
|
||||||
|
onPress={() => navigation.navigate("Camera")}
|
||||||
|
>
|
||||||
|
<Text style={styles.buttonText}>Scan Code</Text>
|
||||||
|
</TouchableOpacity>
|
||||||
|
</View>
|
||||||
|
);
|
||||||
|
};
|
||||||
|
|
||||||
|
const styles = StyleSheet.create({
|
||||||
|
container: {
|
||||||
|
flex: 1,
|
||||||
|
justifyContent: "center",
|
||||||
|
alignItems: "center",
|
||||||
|
backgroundColor: "#000",
|
||||||
|
},
|
||||||
|
circle: {
|
||||||
|
width: 100,
|
||||||
|
height: 100,
|
||||||
|
borderRadius: 50,
|
||||||
|
backgroundColor: "#fff",
|
||||||
|
marginBottom: 20,
|
||||||
|
},
|
||||||
|
button: {
|
||||||
|
backgroundColor: "#fff",
|
||||||
|
paddingHorizontal: 20,
|
||||||
|
paddingVertical: 10,
|
||||||
|
borderRadius: 5,
|
||||||
|
},
|
||||||
|
buttonText: {
|
||||||
|
color: "#000",
|
||||||
|
fontSize: 16,
|
||||||
|
},
|
||||||
|
});
|
||||||
|
|
||||||
|
export default HomeScreen;
|
||||||
|
|
@ -0,0 +1,310 @@
|
||||||
|
import React, { useState, useEffect, useCallback, useRef } from "react";
|
||||||
|
import {
|
||||||
|
View,
|
||||||
|
Text,
|
||||||
|
TouchableOpacity,
|
||||||
|
StyleSheet,
|
||||||
|
BackHandler,
|
||||||
|
ScrollView,
|
||||||
|
} from "react-native";
|
||||||
|
import * as FileSystem from "expo-file-system";
|
||||||
|
import { Audio } from "expo-av";
|
||||||
|
import { polyfill as polyfillEncoding } from "react-native-polyfill-globals/src/encoding";
|
||||||
|
import { Animated } from "react-native";
|
||||||
|
import useSoundEffect from "../utils/useSoundEffect";
|
||||||
|
import RecordButton from "../utils/RecordButton";
|
||||||
|
import { useNavigation } from "@react-navigation/core";
|
||||||
|
|
||||||
|
interface MainProps {
|
||||||
|
route: {
|
||||||
|
params: {
|
||||||
|
scannedData: string;
|
||||||
|
};
|
||||||
|
};
|
||||||
|
}
|
||||||
|
|
||||||
|
const Main: React.FC<MainProps> = ({ route }) => {
|
||||||
|
const { scannedData } = route.params;
|
||||||
|
const [connectionStatus, setConnectionStatus] =
|
||||||
|
useState<string>("Connecting...");
|
||||||
|
const [ws, setWs] = useState<WebSocket | null>(null);
|
||||||
|
const [wsUrl, setWsUrl] = useState("");
|
||||||
|
const [rescan, setRescan] = useState(false);
|
||||||
|
const [isPressed, setIsPressed] = useState(false);
|
||||||
|
const [recording, setRecording] = useState<Audio.Recording | null>(null);
|
||||||
|
const audioQueueRef = useRef<String[]>([]);
|
||||||
|
const soundRef = useRef<Audio.Sound | null>(null);
|
||||||
|
const [soundUriMap, setSoundUriMap] = useState<Map<Audio.Sound, string>>(
|
||||||
|
new Map()
|
||||||
|
);
|
||||||
|
const audioDir = FileSystem.documentDirectory + "01/audio/";
|
||||||
|
const [permissionResponse, requestPermission] = Audio.usePermissions();
|
||||||
|
polyfillEncoding();
|
||||||
|
const backgroundColorAnim = useRef(new Animated.Value(0)).current;
|
||||||
|
const buttonBackgroundColorAnim = useRef(new Animated.Value(0)).current;
|
||||||
|
const playPip = useSoundEffect(require("../../assets/pip.mp3"));
|
||||||
|
const playPop = useSoundEffect(require("../../assets/pop.mp3"));
|
||||||
|
const navigation = useNavigation();
|
||||||
|
const backgroundColor = backgroundColorAnim.interpolate({
|
||||||
|
inputRange: [0, 1],
|
||||||
|
outputRange: ["black", "white"],
|
||||||
|
});
|
||||||
|
const buttonBackgroundColor = backgroundColorAnim.interpolate({
|
||||||
|
inputRange: [0, 1],
|
||||||
|
outputRange: ["white", "black"],
|
||||||
|
});
|
||||||
|
const [accumulatedMessage, setAccumulatedMessage] = useState<string>("");
|
||||||
|
const scrollViewRef = useRef<ScrollView>(null);
|
||||||
|
|
||||||
|
/**
|
||||||
|
* Checks if audioDir exists in device storage, if not creates it.
|
||||||
|
*/
|
||||||
|
async function dirExists() {
|
||||||
|
try {
|
||||||
|
const dirInfo = await FileSystem.getInfoAsync(audioDir);
|
||||||
|
if (!dirInfo.exists) {
|
||||||
|
console.error("audio directory doesn't exist, creating...");
|
||||||
|
await FileSystem.makeDirectoryAsync(audioDir, { intermediates: true });
|
||||||
|
}
|
||||||
|
} catch (error) {
|
||||||
|
console.error("Error checking or creating directory:", error);
|
||||||
|
}
|
||||||
|
}
|
||||||
|
|
||||||
|
/**
|
||||||
|
* Writes the buffer to a temp file in audioDir in base64 encoding.
|
||||||
|
*
|
||||||
|
* @param {string} buffer
|
||||||
|
* @returns tempFilePath or null
|
||||||
|
*/
|
||||||
|
const constructTempFilePath = async (buffer: string) => {
|
||||||
|
try {
|
||||||
|
await dirExists();
|
||||||
|
if (!buffer) {
|
||||||
|
console.log("Buffer is undefined or empty.");
|
||||||
|
return null;
|
||||||
|
}
|
||||||
|
const tempFilePath = `${audioDir}${Date.now()}.wav`;
|
||||||
|
|
||||||
|
await FileSystem.writeAsStringAsync(tempFilePath, buffer, {
|
||||||
|
encoding: FileSystem.EncodingType.Base64,
|
||||||
|
});
|
||||||
|
|
||||||
|
return tempFilePath;
|
||||||
|
} catch (error) {
|
||||||
|
console.log("Failed to construct temp file path:", error);
|
||||||
|
return null; // Return null to prevent crashing, error is logged
|
||||||
|
}
|
||||||
|
};
|
||||||
|
|
||||||
|
/**
|
||||||
|
* Plays the next audio in audioQueue if the queue is not empty
|
||||||
|
* and there is no currently playing audio.
|
||||||
|
*/
|
||||||
|
const playNextAudio = useCallback(async () => {
|
||||||
|
if (audioQueueRef.current.length > 0 && soundRef.current == null) {
|
||||||
|
const uri = audioQueueRef.current.at(0) as string;
|
||||||
|
|
||||||
|
try {
|
||||||
|
const { sound: newSound } = await Audio.Sound.createAsync({ uri });
|
||||||
|
soundRef.current = newSound;
|
||||||
|
setSoundUriMap(new Map(soundUriMap.set(newSound, uri)));
|
||||||
|
await newSound.playAsync();
|
||||||
|
newSound.setOnPlaybackStatusUpdate(_onPlayBackStatusUpdate);
|
||||||
|
} catch (error) {
|
||||||
|
console.log("Error playing audio", error);
|
||||||
|
}
|
||||||
|
} else {
|
||||||
|
// audioQueue is empty or sound is not null
|
||||||
|
return;
|
||||||
|
}
|
||||||
|
},[]);
|
||||||
|
|
||||||
|
/**
|
||||||
|
* Queries the currently playing Expo Audio.Sound object soundRef
|
||||||
|
* for playback status. When the status denotes soundRef has finished
|
||||||
|
* playback, we unload the sound and call playNextAudio().
|
||||||
|
*/
|
||||||
|
const _onPlayBackStatusUpdate = useCallback(
|
||||||
|
async (status: any) => {
|
||||||
|
if (status.didJustFinish) {
|
||||||
|
audioQueueRef.current.shift();
|
||||||
|
await soundRef.current?.unloadAsync();
|
||||||
|
if (soundRef.current) {
|
||||||
|
soundUriMap.delete(soundRef.current);
|
||||||
|
setSoundUriMap(new Map(soundUriMap));
|
||||||
|
}
|
||||||
|
soundRef.current = null;
|
||||||
|
playNextAudio();
|
||||||
|
}
|
||||||
|
},[]);
|
||||||
|
|
||||||
|
/**
|
||||||
|
* Single swipe to return to the Home screen from the Main page.
|
||||||
|
*/
|
||||||
|
useEffect(() => {
|
||||||
|
const backAction = () => {
|
||||||
|
navigation.navigate("Home"); // Always navigate back to Home
|
||||||
|
return true; // Prevent default action
|
||||||
|
};
|
||||||
|
|
||||||
|
// Add event listener for hardware back button on Android
|
||||||
|
const backHandler = BackHandler.addEventListener(
|
||||||
|
"hardwareBackPress",
|
||||||
|
backAction
|
||||||
|
);
|
||||||
|
|
||||||
|
return () => backHandler.remove();
|
||||||
|
}, [navigation]);
|
||||||
|
|
||||||
|
/**
|
||||||
|
* Handles all WebSocket events
|
||||||
|
*/
|
||||||
|
useEffect(() => {
|
||||||
|
let websocket: WebSocket;
|
||||||
|
try {
|
||||||
|
// console.log("Connecting to WebSocket at " + scannedData);
|
||||||
|
setWsUrl(scannedData);
|
||||||
|
websocket = new WebSocket(scannedData);
|
||||||
|
websocket.binaryType = "blob";
|
||||||
|
|
||||||
|
websocket.onopen = () => {
|
||||||
|
setConnectionStatus(`Connected`);
|
||||||
|
};
|
||||||
|
|
||||||
|
websocket.onmessage = async (e) => {
|
||||||
|
try {
|
||||||
|
const message = JSON.parse(e.data);
|
||||||
|
if (message.content && message.type == "message" && message.role == "assistant"){
|
||||||
|
setAccumulatedMessage((prevMessage) => prevMessage + message.content);
|
||||||
|
scrollViewRef.current?.scrollToEnd({ animated: true });
|
||||||
|
}
|
||||||
|
|
||||||
|
if (message.content && message.type == "audio") {
|
||||||
|
const buffer = message.content;
|
||||||
|
if (buffer && buffer.length > 0) {
|
||||||
|
const filePath = await constructTempFilePath(buffer);
|
||||||
|
if (filePath !== null) {
|
||||||
|
audioQueueRef.current.push(filePath);
|
||||||
|
|
||||||
|
if (audioQueueRef.current.length == 1) {
|
||||||
|
playNextAudio();
|
||||||
|
}
|
||||||
|
} else {
|
||||||
|
console.error("Failed to create file path");
|
||||||
|
}
|
||||||
|
} else {
|
||||||
|
console.error("Received message is empty or undefined");
|
||||||
|
}
|
||||||
|
}
|
||||||
|
} catch (error) {
|
||||||
|
console.error("Error handling WebSocket message:", error);
|
||||||
|
}
|
||||||
|
};
|
||||||
|
|
||||||
|
websocket.onerror = (error) => {
|
||||||
|
setConnectionStatus("Error connecting to WebSocket.");
|
||||||
|
console.error("WebSocket error: ", error);
|
||||||
|
};
|
||||||
|
|
||||||
|
websocket.onclose = () => {
|
||||||
|
setConnectionStatus("Disconnected.");
|
||||||
|
};
|
||||||
|
|
||||||
|
setWs(websocket);
|
||||||
|
} catch (error) {
|
||||||
|
console.log(error);
|
||||||
|
setConnectionStatus("Error creating WebSocket.");
|
||||||
|
}
|
||||||
|
|
||||||
|
return () => {
|
||||||
|
if (websocket) {
|
||||||
|
websocket.close();
|
||||||
|
}
|
||||||
|
};
|
||||||
|
}, [scannedData, rescan]);
|
||||||
|
|
||||||
|
return (
|
||||||
|
<Animated.View style={[styles.container, { backgroundColor }]}>
|
||||||
|
<View style={{flex: 6, alignItems: "center", justifyContent: "center",}}>
|
||||||
|
<ScrollView
|
||||||
|
ref={scrollViewRef}
|
||||||
|
style={styles.scrollViewContent}
|
||||||
|
showsVerticalScrollIndicator={false}
|
||||||
|
>
|
||||||
|
<Text style={styles.accumulatedMessage}>
|
||||||
|
{accumulatedMessage}
|
||||||
|
</Text>
|
||||||
|
</ScrollView>
|
||||||
|
</View>
|
||||||
|
<View style={{flex: 2, justifyContent: "center", alignItems: "center",}}>
|
||||||
|
<RecordButton
|
||||||
|
playPip={playPip}
|
||||||
|
playPop={playPop}
|
||||||
|
recording={recording}
|
||||||
|
setRecording={setRecording}
|
||||||
|
ws={ws}
|
||||||
|
backgroundColorAnim={backgroundColorAnim}
|
||||||
|
buttonBackgroundColorAnim={buttonBackgroundColorAnim}
|
||||||
|
backgroundColor={backgroundColor}
|
||||||
|
buttonBackgroundColor={buttonBackgroundColor}
|
||||||
|
setIsPressed={setIsPressed}
|
||||||
|
/>
|
||||||
|
</View>
|
||||||
|
<View style={{flex: 1}}>
|
||||||
|
<TouchableOpacity
|
||||||
|
style={styles.statusButton}
|
||||||
|
onPress={() => {
|
||||||
|
setRescan(!rescan);
|
||||||
|
}}
|
||||||
|
>
|
||||||
|
<Text
|
||||||
|
style={[
|
||||||
|
styles.statusText,
|
||||||
|
{
|
||||||
|
color: connectionStatus.startsWith("Connected")
|
||||||
|
? "green"
|
||||||
|
: "red",
|
||||||
|
},
|
||||||
|
]}
|
||||||
|
>
|
||||||
|
{connectionStatus}
|
||||||
|
</Text>
|
||||||
|
</TouchableOpacity>
|
||||||
|
</View>
|
||||||
|
</Animated.View>
|
||||||
|
);
|
||||||
|
};
|
||||||
|
|
||||||
|
const styles = StyleSheet.create({
|
||||||
|
container: {
|
||||||
|
flex: 1,
|
||||||
|
},
|
||||||
|
statusText: {
|
||||||
|
fontSize: 12,
|
||||||
|
fontWeight: "bold",
|
||||||
|
},
|
||||||
|
statusButton: {
|
||||||
|
position: "absolute",
|
||||||
|
bottom: 20,
|
||||||
|
alignSelf: "center",
|
||||||
|
},
|
||||||
|
accumulatedMessage: {
|
||||||
|
margin: 20,
|
||||||
|
fontSize: 15,
|
||||||
|
textAlign: "left",
|
||||||
|
color: "white",
|
||||||
|
paddingBottom: 30,
|
||||||
|
fontFamily: "monospace",
|
||||||
|
},
|
||||||
|
scrollViewContent: {
|
||||||
|
padding: 25,
|
||||||
|
width: "90%",
|
||||||
|
maxHeight: "80%",
|
||||||
|
borderWidth: 5,
|
||||||
|
borderColor: "white",
|
||||||
|
borderRadius: 10,
|
||||||
|
},
|
||||||
|
});
|
||||||
|
|
||||||
|
export default Main;
|
||||||
|
|
@ -0,0 +1,151 @@
|
||||||
|
import React, { useEffect, useCallback } from "react";
|
||||||
|
import { TouchableOpacity, StyleSheet } from "react-native";
|
||||||
|
import { Audio } from "expo-av";
|
||||||
|
import { Animated } from "react-native";
|
||||||
|
import * as Haptics from "expo-haptics";
|
||||||
|
|
||||||
|
interface RecordButtonProps {
|
||||||
|
playPip: () => void;
|
||||||
|
playPop: () => void;
|
||||||
|
recording: Audio.Recording | null;
|
||||||
|
setRecording: (recording: Audio.Recording | null) => void;
|
||||||
|
ws: WebSocket | null;
|
||||||
|
buttonBackgroundColorAnim: Animated.Value;
|
||||||
|
backgroundColorAnim: Animated.Value;
|
||||||
|
backgroundColor: Animated.AnimatedInterpolation<string | number>;
|
||||||
|
buttonBackgroundColor: Animated.AnimatedInterpolation<string | number>;
|
||||||
|
setIsPressed: (isPressed: boolean) => void;
|
||||||
|
}
|
||||||
|
|
||||||
|
const styles = StyleSheet.create({
|
||||||
|
circle: {
|
||||||
|
width: 100,
|
||||||
|
height: 100,
|
||||||
|
borderRadius: 50,
|
||||||
|
justifyContent: "center",
|
||||||
|
alignItems: "center",
|
||||||
|
},
|
||||||
|
button: {
|
||||||
|
width: 100,
|
||||||
|
height: 100,
|
||||||
|
borderRadius: 50,
|
||||||
|
justifyContent: "center",
|
||||||
|
alignItems: "center",
|
||||||
|
},
|
||||||
|
});
|
||||||
|
|
||||||
|
const RecordButton: React.FC<RecordButtonProps> = ({
|
||||||
|
playPip,
|
||||||
|
playPop,
|
||||||
|
recording,
|
||||||
|
setRecording,
|
||||||
|
ws,
|
||||||
|
backgroundColorAnim,
|
||||||
|
buttonBackgroundColorAnim,
|
||||||
|
backgroundColor,
|
||||||
|
buttonBackgroundColor,
|
||||||
|
setIsPressed,
|
||||||
|
}: RecordButtonProps) => {
|
||||||
|
const [permissionResponse, requestPermission] = Audio.usePermissions();
|
||||||
|
|
||||||
|
useEffect(() => {
|
||||||
|
if (permissionResponse?.status !== "granted") {
|
||||||
|
requestPermission();
|
||||||
|
}
|
||||||
|
}, []);
|
||||||
|
|
||||||
|
const startRecording = useCallback(async () => {
|
||||||
|
if (recording) {
|
||||||
|
console.log("A recording is already in progress.");
|
||||||
|
return;
|
||||||
|
}
|
||||||
|
|
||||||
|
try {
|
||||||
|
if (
|
||||||
|
permissionResponse !== null &&
|
||||||
|
permissionResponse.status !== `granted`
|
||||||
|
) {
|
||||||
|
await requestPermission();
|
||||||
|
}
|
||||||
|
|
||||||
|
await Audio.setAudioModeAsync({
|
||||||
|
allowsRecordingIOS: true,
|
||||||
|
playsInSilentModeIOS: true,
|
||||||
|
});
|
||||||
|
|
||||||
|
const newRecording = new Audio.Recording();
|
||||||
|
await newRecording.prepareToRecordAsync(
|
||||||
|
Audio.RecordingOptionsPresets.HIGH_QUALITY
|
||||||
|
);
|
||||||
|
await newRecording.startAsync();
|
||||||
|
|
||||||
|
setRecording(newRecording);
|
||||||
|
} catch (err) {
|
||||||
|
console.error("Failed to start recording", err);
|
||||||
|
}
|
||||||
|
}, []);
|
||||||
|
|
||||||
|
const stopRecording = useCallback(async () => {
|
||||||
|
if (recording) {
|
||||||
|
await recording.stopAndUnloadAsync();
|
||||||
|
await Audio.setAudioModeAsync({
|
||||||
|
allowsRecordingIOS: false,
|
||||||
|
});
|
||||||
|
const uri = recording.getURI();
|
||||||
|
setRecording(null);
|
||||||
|
|
||||||
|
if (ws && uri) {
|
||||||
|
const response = await fetch(uri);
|
||||||
|
const blob = await response.blob();
|
||||||
|
|
||||||
|
const reader = new FileReader();
|
||||||
|
reader.readAsArrayBuffer(blob);
|
||||||
|
reader.onloadend = () => {
|
||||||
|
const audioBytes = reader.result;
|
||||||
|
if (audioBytes) {
|
||||||
|
ws.send(audioBytes);
|
||||||
|
}
|
||||||
|
};
|
||||||
|
}
|
||||||
|
}
|
||||||
|
}, [recording]);
|
||||||
|
|
||||||
|
const toggleRecording = (shouldPress: boolean) => {
|
||||||
|
Animated.timing(backgroundColorAnim, {
|
||||||
|
toValue: shouldPress ? 1 : 0,
|
||||||
|
duration: 400,
|
||||||
|
useNativeDriver: false,
|
||||||
|
}).start();
|
||||||
|
Animated.timing(buttonBackgroundColorAnim, {
|
||||||
|
toValue: shouldPress ? 1 : 0,
|
||||||
|
duration: 400,
|
||||||
|
useNativeDriver: false,
|
||||||
|
}).start();
|
||||||
|
};
|
||||||
|
|
||||||
|
return (
|
||||||
|
<TouchableOpacity
|
||||||
|
style={styles.button}
|
||||||
|
onPressIn={() => {
|
||||||
|
playPip();
|
||||||
|
setIsPressed(true);
|
||||||
|
toggleRecording(true);
|
||||||
|
startRecording();
|
||||||
|
Haptics.impactAsync(Haptics.ImpactFeedbackStyle.Heavy);
|
||||||
|
}}
|
||||||
|
onPressOut={() => {
|
||||||
|
playPop();
|
||||||
|
setIsPressed(false);
|
||||||
|
toggleRecording(false);
|
||||||
|
stopRecording();
|
||||||
|
Haptics.impactAsync(Haptics.ImpactFeedbackStyle.Heavy);
|
||||||
|
}}
|
||||||
|
>
|
||||||
|
<Animated.View
|
||||||
|
style={[styles.circle, { backgroundColor: buttonBackgroundColor }]}
|
||||||
|
/>
|
||||||
|
</TouchableOpacity>
|
||||||
|
);
|
||||||
|
};
|
||||||
|
|
||||||
|
export default RecordButton;
|
||||||
|
|
@ -0,0 +1,10 @@
|
||||||
|
// store.js
|
||||||
|
import { create } from "zustand";
|
||||||
|
|
||||||
|
const useStore = create((set: any) => ({
|
||||||
|
count: 0,
|
||||||
|
increase: () => set((state: any) => ({ count: state.count + 1 })),
|
||||||
|
decrease: () => set((state: any) => ({ count: state.count - 1 })),
|
||||||
|
}));
|
||||||
|
|
||||||
|
export default useStore;
|
||||||
|
|
@ -0,0 +1,29 @@
|
||||||
|
import { useEffect, useState } from "react";
|
||||||
|
import { Audio } from "expo-av";
|
||||||
|
|
||||||
|
const useSoundEffect = (soundFile: any) => {
|
||||||
|
const [sound, setSound] = useState<Audio.Sound | null>(null); // Explicitly set initial state to null
|
||||||
|
|
||||||
|
useEffect(() => {
|
||||||
|
const loadSound = async () => {
|
||||||
|
const { sound: newSound } = await Audio.Sound.createAsync(soundFile);
|
||||||
|
setSound(newSound);
|
||||||
|
};
|
||||||
|
|
||||||
|
loadSound();
|
||||||
|
|
||||||
|
return () => {
|
||||||
|
sound?.unloadAsync();
|
||||||
|
};
|
||||||
|
}, [soundFile, sound]); // Include sound in the dependency array
|
||||||
|
|
||||||
|
const playSound = async () => {
|
||||||
|
if (sound) {
|
||||||
|
await sound.playAsync();
|
||||||
|
}
|
||||||
|
};
|
||||||
|
|
||||||
|
return playSound;
|
||||||
|
};
|
||||||
|
|
||||||
|
export default useSoundEffect;
|
||||||
|
|
@ -0,0 +1,6 @@
|
||||||
|
{
|
||||||
|
"extends": "expo/tsconfig.base",
|
||||||
|
"compilerOptions": {
|
||||||
|
"strict": true
|
||||||
|
}
|
||||||
|
}
|
||||||
|
|
@ -1,126 +0,0 @@
|
||||||
from __future__ import annotations
|
|
||||||
import sys
|
|
||||||
from livekit.agents import (
|
|
||||||
AutoSubscribe,
|
|
||||||
JobContext,
|
|
||||||
WorkerOptions,
|
|
||||||
cli,
|
|
||||||
llm,
|
|
||||||
)
|
|
||||||
from livekit.agents.multimodal import MultimodalAgent
|
|
||||||
from livekit.plugins import openai
|
|
||||||
from dotenv import load_dotenv
|
|
||||||
import os
|
|
||||||
import time
|
|
||||||
from typing import Annotated
|
|
||||||
from livekit.agents import llm
|
|
||||||
|
|
||||||
# Set the environment variable
|
|
||||||
os.environ['INTERPRETER_TERMINAL_INPUT_PATIENCE'] = '200000'
|
|
||||||
|
|
||||||
instructions = """
|
|
||||||
You are Open Interpreter, a world-class programmer that can complete any goal by executing code.
|
|
||||||
For advanced requests, start by writing a plan.
|
|
||||||
When you execute code, it will be executed **on the user's machine** in a stateful Jupyter notebook. The user has given you **full permission** to execute any code necessary to complete the task. Execute the code. You CAN run code on the users machine, using the tool you have access to.
|
|
||||||
You can access the internet. Run **any code** to achieve the goal, and if at first you don't succeed, try again and again.
|
|
||||||
You can install new packages.
|
|
||||||
If you modify or create a file, YOU MUST THEN OPEN IT to display it to the user.
|
|
||||||
Be concise. Do NOT send the user a markdown version of your code — just execute the code instantly. Execute the code!
|
|
||||||
|
|
||||||
You are capable of **any** task.
|
|
||||||
|
|
||||||
You MUST remember to pass into the execute_code function a correct JSON input like {"code": "print('hello world')"} and NOT a raw string or something else.
|
|
||||||
"""
|
|
||||||
|
|
||||||
load_dotenv()
|
|
||||||
|
|
||||||
async def entrypoint(ctx: JobContext):
|
|
||||||
|
|
||||||
from interpreter import interpreter
|
|
||||||
|
|
||||||
def execute_code(code):
|
|
||||||
print("--- code ---")
|
|
||||||
print(code)
|
|
||||||
print("---")
|
|
||||||
#time.sleep(2)
|
|
||||||
# Check if the code contains any file deletion commands
|
|
||||||
if any(keyword in code.lower() for keyword in ['os.remove', 'os.unlink', 'shutil.rmtree', 'delete file', 'rm -']):
|
|
||||||
print("Warning: File deletion commands detected. Execution aborted for safety.")
|
|
||||||
return "Execution aborted: File deletion commands are not allowed."
|
|
||||||
print("--- output ---")
|
|
||||||
output = ""
|
|
||||||
for chunk in interpreter.computer.run("python", code):
|
|
||||||
if "content" in chunk and type(chunk["content"]) == str:
|
|
||||||
output += "\n" + chunk["content"]
|
|
||||||
print(chunk["content"])
|
|
||||||
print("---")
|
|
||||||
|
|
||||||
output = output.strip()
|
|
||||||
|
|
||||||
if output == "":
|
|
||||||
output = "No output was produced by running this code."
|
|
||||||
return output
|
|
||||||
|
|
||||||
|
|
||||||
# first define a class that inherits from llm.FunctionContext
|
|
||||||
class AssistantFnc(llm.FunctionContext):
|
|
||||||
# the llm.ai_callable decorator marks this function as a tool available to the LLM
|
|
||||||
# by default, it'll use the docstring as the function's description
|
|
||||||
@llm.ai_callable()
|
|
||||||
async def execute(
|
|
||||||
self,
|
|
||||||
# by using the Annotated type, arg description and type are available to the LLM
|
|
||||||
code: Annotated[
|
|
||||||
str, llm.TypeInfo(description="The Python code to execute")
|
|
||||||
],
|
|
||||||
):
|
|
||||||
"""Executes Python and returns the output"""
|
|
||||||
return execute_code(code)
|
|
||||||
|
|
||||||
fnc_ctx = AssistantFnc()
|
|
||||||
|
|
||||||
await ctx.connect(auto_subscribe=AutoSubscribe.AUDIO_ONLY)
|
|
||||||
|
|
||||||
participant = await ctx.wait_for_participant()
|
|
||||||
|
|
||||||
openai_api_key = os.getenv("OPENAI_API_KEY")
|
|
||||||
model = openai.realtime.RealtimeModel(
|
|
||||||
instructions=instructions,
|
|
||||||
voice="shimmer",
|
|
||||||
temperature=0.6,
|
|
||||||
modalities=["audio", "text"],
|
|
||||||
api_key=openai_api_key,
|
|
||||||
base_url="wss://api.openai.com/v1",
|
|
||||||
)
|
|
||||||
model._fnc_ctx = fnc_ctx
|
|
||||||
assistant = MultimodalAgent(model=model, fnc_ctx=fnc_ctx)
|
|
||||||
|
|
||||||
assistant.start(ctx.room)
|
|
||||||
|
|
||||||
# Create a session with the function context
|
|
||||||
session = model.session(
|
|
||||||
chat_ctx=llm.ChatContext(),
|
|
||||||
fnc_ctx=fnc_ctx,
|
|
||||||
)
|
|
||||||
|
|
||||||
# Initial message to start the interaction
|
|
||||||
session.conversation.item.create(
|
|
||||||
llm.ChatMessage(
|
|
||||||
role="user",
|
|
||||||
content="Hello!",
|
|
||||||
)
|
|
||||||
)
|
|
||||||
session.response.create()
|
|
||||||
|
|
||||||
def main(livekit_url):
|
|
||||||
# Workers have to be run as CLIs right now.
|
|
||||||
# So we need to simulate running "[this file] dev"
|
|
||||||
|
|
||||||
# Modify sys.argv to set the path to this file as the first argument
|
|
||||||
# and 'dev' as the second argument
|
|
||||||
sys.argv = [str(__file__), 'dev']
|
|
||||||
|
|
||||||
# Initialize the worker with the entrypoint
|
|
||||||
cli.run_app(
|
|
||||||
WorkerOptions(entrypoint_fnc=entrypoint, api_key="devkey", api_secret="secret", ws_url=livekit_url, port=8082)
|
|
||||||
)
|
|
||||||
|
|
@ -5,7 +5,7 @@ from livekit.agents import AutoSubscribe, JobContext, WorkerOptions, cli
|
||||||
from livekit.agents.llm import ChatContext, ChatMessage
|
from livekit.agents.llm import ChatContext, ChatMessage
|
||||||
from livekit import rtc
|
from livekit import rtc
|
||||||
from livekit.agents.voice_assistant import VoiceAssistant
|
from livekit.agents.voice_assistant import VoiceAssistant
|
||||||
from livekit.plugins import deepgram, openai, silero, elevenlabs, cartesia
|
from livekit.plugins import deepgram, openai, silero, elevenlabs
|
||||||
from dotenv import load_dotenv
|
from dotenv import load_dotenv
|
||||||
import sys
|
import sys
|
||||||
import numpy as np
|
import numpy as np
|
||||||
|
|
@ -72,29 +72,12 @@ async def entrypoint(ctx: JobContext):
|
||||||
model="open-interpreter", base_url=base_url, api_key="x"
|
model="open-interpreter", base_url=base_url, api_key="x"
|
||||||
)
|
)
|
||||||
|
|
||||||
tts_provider = os.getenv('01_TTS', '').lower()
|
|
||||||
stt_provider = os.getenv('01_STT', '').lower()
|
|
||||||
|
|
||||||
# Add plugins here
|
|
||||||
if tts_provider == 'openai':
|
|
||||||
tts = openai.TTS()
|
|
||||||
elif tts_provider == 'elevenlabs':
|
|
||||||
tts = elevenlabs.TTS()
|
|
||||||
elif tts_provider == 'cartesia':
|
|
||||||
tts = cartesia.TTS()
|
|
||||||
else:
|
|
||||||
raise ValueError(f"Unsupported TTS provider: {tts_provider}. Please set 01_TTS environment variable to 'openai' or 'elevenlabs'.")
|
|
||||||
|
|
||||||
if stt_provider == 'deepgram':
|
|
||||||
stt = deepgram.STT()
|
|
||||||
else:
|
|
||||||
raise ValueError(f"Unsupported STT provider: {stt_provider}. Please set 01_STT environment variable to 'deepgram'.")
|
|
||||||
|
|
||||||
assistant = VoiceAssistant(
|
assistant = VoiceAssistant(
|
||||||
vad=silero.VAD.load(), # Voice Activity Detection
|
vad=silero.VAD.load(), # Voice Activity Detection
|
||||||
stt=stt, # Speech-to-Text
|
stt=deepgram.STT(), # Speech-to-Text
|
||||||
llm=open_interpreter, # Language Model
|
llm=open_interpreter, # Language Model
|
||||||
tts=tts, # Text-to-Speech
|
tts=elevenlabs.TTS(), # Text-to-Speech
|
||||||
|
#tts=openai.TTS(), # Text-to-Speech
|
||||||
chat_ctx=initial_ctx, # Chat history context
|
chat_ctx=initial_ctx, # Chat history context
|
||||||
)
|
)
|
||||||
|
|
||||||
|
|
|
||||||
|
|
@ -0,0 +1,175 @@
|
||||||
|
from interpreter import AsyncInterpreter
|
||||||
|
interpreter = AsyncInterpreter()
|
||||||
|
|
||||||
|
# This is an Open Interpreter compatible profile.
|
||||||
|
# Visit https://01.openinterpreter.com/profile for all options.
|
||||||
|
|
||||||
|
# 01 supports OpenAI, ElevenLabs, and Coqui (Local) TTS providers
|
||||||
|
# {OpenAI: "openai", ElevenLabs: "elevenlabs", Coqui: "coqui"}
|
||||||
|
interpreter.tts = "openai"
|
||||||
|
|
||||||
|
# Connect your 01 to a language model
|
||||||
|
interpreter.llm.model = "gpt-4o"
|
||||||
|
interpreter.llm.context_window = 100000
|
||||||
|
interpreter.llm.max_tokens = 4096
|
||||||
|
# interpreter.llm.api_key = "<your_openai_api_key_here>"
|
||||||
|
|
||||||
|
# Tell your 01 where to find and save skills
|
||||||
|
interpreter.computer.skills.path = "./skills"
|
||||||
|
|
||||||
|
# Extra settings
|
||||||
|
interpreter.computer.import_computer_api = True
|
||||||
|
interpreter.computer.import_skills = True
|
||||||
|
interpreter.computer.run("python", "computer") # This will trigger those imports
|
||||||
|
interpreter.auto_run = True
|
||||||
|
# interpreter.loop = True
|
||||||
|
# interpreter.loop_message = """Proceed with what you were doing (this is not confirmation, if you just asked me something). You CAN run code on my machine. If you want to run code, start your message with "```"! If the entire task is done, say exactly 'The task is done.' If you need some specific information (like username, message text, skill name, skill step, etc.) say EXACTLY 'Please provide more information.' If it's impossible, say 'The task is impossible.' (If I haven't provided a task, say exactly 'Let me know what you'd like to do next.') Otherwise keep going. CRITICAL: REMEMBER TO FOLLOW ALL PREVIOUS INSTRUCTIONS. If I'm teaching you something, remember to run the related `computer.skills.new_skill` function."""
|
||||||
|
# interpreter.loop_breakers = [
|
||||||
|
# "The task is done.",
|
||||||
|
# "The task is impossible.",
|
||||||
|
# "Let me know what you'd like to do next.",
|
||||||
|
# "Please provide more information.",
|
||||||
|
# ]
|
||||||
|
|
||||||
|
# Set the identity and personality of your 01
|
||||||
|
interpreter.system_message = """
|
||||||
|
|
||||||
|
You are the 01, a screenless executive assistant that can complete any task.
|
||||||
|
When you execute code, it will be executed on the user's machine. The user has given you full and complete permission to execute any code necessary to complete the task.
|
||||||
|
Run any code to achieve the goal, and if at first you don't succeed, try again and again.
|
||||||
|
You can install new packages.
|
||||||
|
Be concise. Your messages are being read aloud to the user. DO NOT MAKE PLANS. RUN CODE QUICKLY.
|
||||||
|
Try to spread complex tasks over multiple code blocks. Don't try to complex tasks in one go.
|
||||||
|
Manually summarize text.
|
||||||
|
Prefer using Python.
|
||||||
|
|
||||||
|
DON'T TELL THE USER THE METHOD YOU'LL USE, OR MAKE PLANS. QUICKLY respond with something like "On it." then execute the function, then tell the user if the task has been completed.
|
||||||
|
|
||||||
|
Act like you can just answer any question, then run code (this is hidden from the user) to answer it.
|
||||||
|
THE USER CANNOT SEE CODE BLOCKS.
|
||||||
|
Your responses should be very short, no more than 1-2 sentences long.
|
||||||
|
DO NOT USE MARKDOWN. ONLY WRITE PLAIN TEXT.
|
||||||
|
|
||||||
|
# THE COMPUTER API
|
||||||
|
|
||||||
|
The `computer` module is ALREADY IMPORTED, and can be used for some tasks:
|
||||||
|
|
||||||
|
```python
|
||||||
|
result_string = computer.browser.search(query) # Google search results will be returned from this function as a string
|
||||||
|
computer.files.edit(path_to_file, original_text, replacement_text) # Edit a file
|
||||||
|
computer.calendar.create_event(title="Meeting", start_date=datetime.datetime.now(), end_date=datetime.datetime.now() + datetime.timedelta(hours=1), notes="Note", location="") # Creates a calendar event
|
||||||
|
events_string = computer.calendar.get_events(start_date=datetime.date.today(), end_date=None) # Get events between dates. If end_date is None, only gets events for start_date
|
||||||
|
computer.calendar.delete_event(event_title="Meeting", start_date=datetime.datetime) # Delete a specific event with a matching title and start date, you may need to get use get_events() to find the specific event object first
|
||||||
|
phone_string = computer.contacts.get_phone_number("John Doe")
|
||||||
|
contact_string = computer.contacts.get_email_address("John Doe")
|
||||||
|
computer.mail.send("john@email.com", "Meeting Reminder", "Reminder that our meeting is at 3pm today.", ["path/to/attachment.pdf", "path/to/attachment2.pdf"]) # Send an email with a optional attachments
|
||||||
|
emails_string = computer.mail.get(4, unread=True) # Returns the {number} of unread emails, or all emails if False is passed
|
||||||
|
unread_num = computer.mail.unread_count() # Returns the number of unread emails
|
||||||
|
computer.sms.send("555-123-4567", "Hello from the computer!") # Send a text message. MUST be a phone number, so use computer.contacts.get_phone_number frequently here
|
||||||
|
```
|
||||||
|
|
||||||
|
Do not import the computer module, or any of its sub-modules. They are already imported.
|
||||||
|
|
||||||
|
DO NOT use the computer module for ALL tasks. Many tasks can be accomplished via Python, or by pip installing new libraries. Be creative!
|
||||||
|
|
||||||
|
# GUI CONTROL (RARE)
|
||||||
|
|
||||||
|
You are a computer controlling language model. You can control the user's GUI.
|
||||||
|
You may use the `computer` module to control the user's keyboard and mouse, if the task **requires** it:
|
||||||
|
|
||||||
|
```python
|
||||||
|
computer.display.view() # Shows you what's on the screen. **You almost always want to do this first!**
|
||||||
|
computer.keyboard.hotkey(" ", "command") # Opens spotlight
|
||||||
|
computer.keyboard.write("hello")
|
||||||
|
computer.mouse.click("text onscreen") # This clicks on the UI element with that text. Use this **frequently** and get creative! To click a video, you could pass the *timestamp* (which is usually written on the thumbnail) into this.
|
||||||
|
computer.mouse.move("open recent >") # This moves the mouse over the UI element with that text. Many dropdowns will disappear if you click them. You have to hover over items to reveal more.
|
||||||
|
computer.mouse.click(x=500, y=500) # Use this very, very rarely. It's highly inaccurate
|
||||||
|
computer.mouse.click(icon="gear icon") # Moves mouse to the icon with that description. Use this very often
|
||||||
|
computer.mouse.scroll(-10) # Scrolls down. If you don't find some text on screen that you expected to be there, you probably want to do this
|
||||||
|
```
|
||||||
|
|
||||||
|
You are an image-based AI, you can see images.
|
||||||
|
Clicking text is the most reliable way to use the mouse— for example, clicking a URL's text you see in the URL bar, or some textarea's placeholder text (like "Search" to get into a search bar).
|
||||||
|
If you use `plt.show()`, the resulting image will be sent to you. However, if you use `PIL.Image.show()`, the resulting image will NOT be sent to you.
|
||||||
|
It is very important to make sure you are focused on the right application and window. Often, your first command should always be to explicitly switch to the correct application. On Macs, ALWAYS use Spotlight to switch applications.
|
||||||
|
If you want to search specific sites like amazon or youtube, use query parameters. For example, https://www.amazon.com/s?k=monitor or https://www.youtube.com/results?search_query=tatsuro+yamashita.
|
||||||
|
|
||||||
|
# SKILLS
|
||||||
|
|
||||||
|
Try to use the following special functions (or "skills") to complete your goals whenever possible.
|
||||||
|
THESE ARE ALREADY IMPORTED. YOU CAN CALL THEM INSTANTLY.
|
||||||
|
|
||||||
|
---
|
||||||
|
{{
|
||||||
|
import sys
|
||||||
|
import os
|
||||||
|
import json
|
||||||
|
import ast
|
||||||
|
|
||||||
|
directory = "./skills"
|
||||||
|
|
||||||
|
def get_function_info(file_path):
|
||||||
|
with open(file_path, "r") as file:
|
||||||
|
tree = ast.parse(file.read())
|
||||||
|
functions = [node for node in tree.body if isinstance(node, ast.FunctionDef)]
|
||||||
|
for function in functions:
|
||||||
|
docstring = ast.get_docstring(function)
|
||||||
|
args = [arg.arg for arg in function.args.args]
|
||||||
|
print(f"Function Name: {function.name}")
|
||||||
|
print(f"Arguments: {args}")
|
||||||
|
print(f"Docstring: {docstring}")
|
||||||
|
print("---")
|
||||||
|
|
||||||
|
files = os.listdir(directory)
|
||||||
|
for file in files:
|
||||||
|
if file.endswith(".py"):
|
||||||
|
file_path = os.path.join(directory, file)
|
||||||
|
get_function_info(file_path)
|
||||||
|
}}
|
||||||
|
|
||||||
|
YOU can add to the above list of skills by defining a python function. The function will be saved as a skill.
|
||||||
|
Search all existing skills by running `computer.skills.search(query)`.
|
||||||
|
|
||||||
|
**Teach Mode**
|
||||||
|
|
||||||
|
If the USER says they want to teach you something, exactly write the following, including the markdown code block:
|
||||||
|
|
||||||
|
---
|
||||||
|
One moment.
|
||||||
|
```python
|
||||||
|
computer.skills.new_skill.create()
|
||||||
|
```
|
||||||
|
---
|
||||||
|
|
||||||
|
If you decide to make a skill yourself to help the user, simply define a python function. `computer.skills.new_skill.create()` is for user-described skills.
|
||||||
|
|
||||||
|
# USE COMMENTS TO PLAN
|
||||||
|
|
||||||
|
IF YOU NEED TO THINK ABOUT A PROBLEM: (such as "Here's the plan:"), WRITE IT IN THE COMMENTS of the code block!
|
||||||
|
|
||||||
|
---
|
||||||
|
User: What is 432/7?
|
||||||
|
Assistant: Let me think about that.
|
||||||
|
```python
|
||||||
|
# Here's the plan:
|
||||||
|
# 1. Divide the numbers
|
||||||
|
# 2. Round to 3 digits
|
||||||
|
print(round(432/7, 3))
|
||||||
|
```
|
||||||
|
```output
|
||||||
|
61.714
|
||||||
|
```
|
||||||
|
The answer is 61.714.
|
||||||
|
---
|
||||||
|
|
||||||
|
# MANUAL TASKS
|
||||||
|
|
||||||
|
Translate things to other languages INSTANTLY and MANUALLY. Don't ever try to use a translation tool.
|
||||||
|
Summarize things manually. DO NOT use a summarizer tool.
|
||||||
|
|
||||||
|
# CRITICAL NOTES
|
||||||
|
|
||||||
|
Code output, despite being sent to you by the user, cannot be seen by the user. You NEED to tell the user about the output of some code, even if it's exact. >>The user does not have a screen.<<
|
||||||
|
ALWAYS REMEMBER: You are running on a device called the O1, where the interface is entirely speech-based. Make your responses to the user VERY short. DO NOT PLAN. BE CONCISE. WRITE CODE TO RUN IT.
|
||||||
|
Try multiple methods before saying the task is impossible. **You can do it!**
|
||||||
|
""".strip()
|
||||||
|
|
@ -1,14 +1,19 @@
|
||||||
from interpreter import AsyncInterpreter
|
from interpreter import AsyncInterpreter
|
||||||
interpreter = AsyncInterpreter()
|
interpreter = AsyncInterpreter()
|
||||||
|
|
||||||
interpreter.tts = "cartesia"
|
# This is an Open Interpreter compatible profile.
|
||||||
interpreter.stt = "deepgram" # This is only used for the livekit server. The light server runs faster-whisper locally
|
# Visit https://01.openinterpreter.com/profile for all options.
|
||||||
|
|
||||||
|
# 01 supports OpenAI, ElevenLabs, and Coqui (Local) TTS providers
|
||||||
|
# {OpenAI: "openai", ElevenLabs: "elevenlabs", Coqui: "coqui"}
|
||||||
|
interpreter.tts = "openai"
|
||||||
|
|
||||||
# Connect your 01 to a language model
|
# Connect your 01 to a language model
|
||||||
interpreter.llm.model = "claude-3.5"
|
interpreter.llm.model = "claude-3.5"
|
||||||
# interpreter.llm.model = "gpt-4o-mini"
|
# interpreter.llm.model = "gpt-4o-mini"
|
||||||
interpreter.llm.context_window = 100000
|
interpreter.llm.context_window = 100000
|
||||||
interpreter.llm.max_tokens = 4096
|
interpreter.llm.max_tokens = 4096
|
||||||
|
# interpreter.llm.api_key = "<your_openai_api_key_here>"
|
||||||
|
|
||||||
# Tell your 01 where to find and save skills
|
# Tell your 01 where to find and save skills
|
||||||
skill_path = "./skills"
|
skill_path = "./skills"
|
||||||
|
|
|
||||||
|
|
@ -1,8 +1,12 @@
|
||||||
from interpreter import AsyncInterpreter
|
from interpreter import AsyncInterpreter
|
||||||
interpreter = AsyncInterpreter()
|
interpreter = AsyncInterpreter()
|
||||||
|
|
||||||
interpreter.tts = "cartesia" # This should be cartesia once we support it
|
# This is an Open Interpreter compatible profile.
|
||||||
interpreter.stt = "deepgram" # This is only used for the livekit server. The light server runs faster-whisper locally
|
# Visit https://01.openinterpreter.com/profile for all options.
|
||||||
|
|
||||||
|
# 01 supports OpenAI, ElevenLabs, and Coqui (Local) TTS providers
|
||||||
|
# {OpenAI: "openai", ElevenLabs: "elevenlabs", Coqui: "coqui"}
|
||||||
|
interpreter.tts = "elevenlabs"
|
||||||
|
|
||||||
interpreter.llm.model = "gpt-4o-mini"
|
interpreter.llm.model = "gpt-4o-mini"
|
||||||
interpreter.llm.supports_vision = True
|
interpreter.llm.supports_vision = True
|
||||||
|
|
|
||||||
|
|
@ -1,10 +1,9 @@
|
||||||
from interpreter import AsyncInterpreter
|
from interpreter import AsyncInterpreter
|
||||||
interpreter = AsyncInterpreter()
|
interpreter = AsyncInterpreter()
|
||||||
|
|
||||||
print("Warning: Local doesn't work with --server livekit. It only works with --server light. We will support local livekit usage soon!")
|
# 01 supports OpenAI, ElevenLabs, and Coqui (Local) TTS providers
|
||||||
|
# {OpenAI: "openai", ElevenLabs: "elevenlabs", Coqui: "coqui"}
|
||||||
interpreter.tts = "coqui"
|
interpreter.tts = "coqui"
|
||||||
interpreter.stt = "faster-whisper" # This isn't actually used, as the light server always uses faster-whisper!
|
|
||||||
|
|
||||||
interpreter.system_message = """You are an AI assistant that writes markdown code snippets to answer the user's request. You speak very concisely and quickly, you say nothing irrelevant to the user's request. For example:
|
interpreter.system_message = """You are an AI assistant that writes markdown code snippets to answer the user's request. You speak very concisely and quickly, you say nothing irrelevant to the user's request. For example:
|
||||||
|
|
||||||
|
|
|
||||||
|
|
@ -12,14 +12,20 @@ import os
|
||||||
os.environ["INTERPRETER_REQUIRE_ACKNOWLEDGE"] = "False"
|
os.environ["INTERPRETER_REQUIRE_ACKNOWLEDGE"] = "False"
|
||||||
os.environ["INTERPRETER_REQUIRE_AUTH"] = "False"
|
os.environ["INTERPRETER_REQUIRE_AUTH"] = "False"
|
||||||
|
|
||||||
def start_server(server_host, server_port, interpreter, voice, debug):
|
def start_server(server_host, server_port, profile, voice, debug):
|
||||||
|
|
||||||
|
# Load the profile module from the provided path
|
||||||
|
spec = importlib.util.spec_from_file_location("profile", profile)
|
||||||
|
profile_module = importlib.util.module_from_spec(spec)
|
||||||
|
spec.loader.exec_module(profile_module)
|
||||||
|
|
||||||
|
# Get the interpreter from the profile
|
||||||
|
interpreter = profile_module.interpreter
|
||||||
|
|
||||||
# Apply our settings to it
|
# Apply our settings to it
|
||||||
interpreter.verbose = debug
|
interpreter.verbose = debug
|
||||||
interpreter.server.host = server_host
|
interpreter.server.host = server_host
|
||||||
interpreter.server.port = server_port
|
interpreter.server.port = server_port
|
||||||
interpreter.context_mode = False # Require a {START} message to respond
|
|
||||||
interpreter.context_mode = True # Require a {START} message to respond
|
|
||||||
|
|
||||||
if voice == False:
|
if voice == False:
|
||||||
# If voice is False, just start the standard OI server
|
# If voice is False, just start the standard OI server
|
||||||
|
|
|
||||||